Transfer application data from phone to phone. How to transfer data from an old phone to a new one. Creating a local backup on MIUI firmware
Choosing yourself new phone, everyone first of all thinks about what kind of camera it will have, how much memory, system or user, what is the diagonal of the display and much more. But not everyone thinks about how to transfer data from Android to Android correctly, although it's too lazy to repeat everything manually. Regardless of the brand and model, there are 4 ways not to lose information when transferring.
Through a personal computer
This method is the most familiar and accurate in terms of data security. This is because by dumping information on a PC, the user, as it were, creates a backup copy, which can later be transferred to any other media.
For all its advantages, this method is also the most laborious, due to the need to perform the following actions:
- Install on computer software for a specific brand of device. Usually, the software is supplied with a gadget on a disk, but it can also be found on the net, preferably on the official website. If the brands are different, you will need the corresponding utilities (for HTC phones this is HTCSync, for Samsung - Kies, etc.).
- To avoid any problems during the data reset process, you may need to enable USB debugging on each device. But this option is available in developer mode, which is enabled by multiple taps on the build number in the settings.
- After that, the first Android needs to be connected to the PC using a cable and select the type of connection for synchronization.
- Then start the software and, following the prompts, make a backup copy of the necessary data on HDD computer.
- Then the information needs to be dropped onto the second Android in the same way.
Another disadvantage of this method of data transfer is that it does not allow you to resume application and system settings on a new gadget. But the following method will help with this.
Using your Google account
Due to the fact that Android and Google have common developers, they are directly related. Without a Google account, it will be difficult to use most of the services, and some are impossible at all, for example, to download software from the Play Store.
When you first start a phone or tablet on the Android platform, the system will prompt you to enter the data of an existing account or create a new one. Then in the settings it will be possible to mark what information needs to be synchronized with the cloud.
So, the algorithm of actions in this case is as follows:
- go to the settings, the General tab, the Accounts and sync section;
- find Google and open it;
- long press on the name to open the list of data that can be synchronized;
- check the date of the last synchronization of each desired item;
- if necessary, check the box next to those items that are also needed, but not included;
- on the new device, log in with the same username and password;
- wait until the automatic pumping of all applications, settings, contacts and other things is over.
The advantage of this method is its autonomy, i.e. the whole process takes place practically without the intervention of the owner. In addition, using a Google account, you can transfer data even to a device that is at a great distance from another.
Each game or application will be reloaded, and hence the minus - the presence of a network connection is required.
Special software
This option assumes the installation of the same program on both devices. Let's consider this process using the example of CLONEit, which can be downloaded for free from the Play Store. You need to do the following:
- run the utility on both devices;
- choose type this device(on the first Android this is the sender, on the second - the recipient);
- after the connection is established, a window for selecting the data to be transferred will appear on the screen of the sending phone;
- mark the necessary items and start the process.
Thanks to this program, you can quickly and losslessly transfer over the local Wi-Fi networks such information:
- phone book data;
- SMS and MMS messages;
- call log;
- all software with settings and data;
- system configurations and more.
Via memory card
In this case, everything is clear and familiar:
- we insert a flash drive into one phone;
- copy to it necessary information(even contacts can be exported);
- we take it out and insert it into the second phone;
- leave it or copy the data.
But what if you need to transfer not only photos and music to the second gadget? In this case, you will also need to use special utilities that will help you make a backup of the old system on a new smartphone or tablet.
Most programs for creating or uploading backups require superuser rights, and therefore you should think carefully before the procedure. After all, obtaining Root rights is a hacking of the system, which means that it violates the rules of warranty service. An example of such software is Titanium Backup. With its help it will be possible to make a copy of such information:
- open source software and configurations;
- protected software and configurations;
- system applications and settings;
- all files in the device's memory.
It is preferable to store the backup file on a memory card. This method is also convenient in that it helps a lot in cases when the first phone was lost or broken. That is why each Android user is advised to independently make periodic backups to prevent such situations.
Video "Creating a backup"
How to properly back up using Titanium Backup can be seen in this video.
Was this helpful?
Thank you for your opinion!
V this post will be described detailed instructions with screenshots, pictures on transferring an application from an Android phone to an Android phone.
What are the difficulties?
Initially, the problem is that Android has banned the transfer of applications from phone to phone via Bluesut, along with this in system folders this file could not be found.
That is, it is possible to transfer not the application itself, but its boot file... I will note right away, even if this post is out of date, then start by looking for conductors for your phone's system that transmit applications over bluetooth(again, if you have one).
How to transfer from phone to phone to Android bootable file?
An application called APK Extractor.
I will describe in detail how it works.
1. First, download the application itself to view all boot files. To do this, go to Play Market , looking for APK Extractor... Install.
Photo: screenshot APK applications Extractor
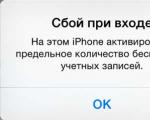
2. Turn on Bluetooth on the other phone (where we will transfer the application) (remember that it usually works for a minute, if the file is not transferred, see if the bluetooth is disconnected).
3. IMPORTANT! The phone where you want to transfer the file can be enabled protection, in which the phone does NOT install applications from outside, but only trusts those downloaded from the Play Market.
Therefore, if you are brave and are not afraid of anything, then protection must be turned off for a while.
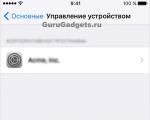
How to do it:
Find "Tinctures"
- Category "Options"
- After - section "Security"
- We put a tick in the "Device Administration" section in the "Unknown Sources" section, which reads: "Allow the installation of applications from sources other than the Play Market".

3. We return to our phone. Launch APK Extractor. We find the application we need (aka the application boot file) that needs to be transferred in the general list. For example, the download file of the VKontakte application, which allows you to download music (VKontakte Music Manager).

Photo: Screenshot of all your phone's apps found in APK Extractor
5. Click on it and hold it a little (or click the arrow on the right next to the name of the application boot file and click Submit).
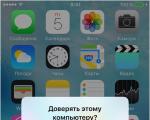
6. A share icon will appear at the top and next to Bluetooth. Click, choose who to transfer the file to.

Photo: transfer via bluetooth application via APK Extractor
7. The application must be transferred.
If you are surprised that the application takes 9.37 MB on your phone, but during transfer it weighs 3.20 MB, then just clear the cache of this application in Settings -> Applications -> Clear cache.

Photo: screenshot of the VKontakte Music Manager application in the Application Manager section of the Phone Settings
Screenshot of a working VKontakte music download application:

Photo: screenshot of the VKontakte Music Manager application
P.S. If the article was useful to you, then please write a comment or share the article with your friends in social network... If you have any questions, ask.
Thank you for your attention and pleasant communication!
On modern smartphones contains a lot of information. These are contacts, photos, music, and various documents. In theory, we can start using a new device from scratch. But why, if now you can transfer data from one smartphone to another? This process does not take long, only a little preparation is required.
The most important type of information is the contacts contained in the phone book. We bet that you haven't been writing down phone numbers somewhere in a regular notebook or notebook for a long time. Therefore, the loss of all contacts can seriously fray your nerves. Fortunately, now it's easy to transfer your contact list from your old device to your new one.
Transfer passwords and photos
Using a Google account allows you to transfer data without any difficulty. However, not all information is copied. By default, neither photos nor passwords from sites are transferred. Only third-party programs can solve this problem.
If you use the old browser on the new smartphone, then there will be no problems. In particular, Google chrome stores on its servers all your bookmarks, passwords and even open tabs. After installing the application, you will need to log in, after which you can comfortably browse your favorite sites again.
The service will help to transfer photos Google photos... However, the content sent to the server is compressed, which not all users will like. If this does not suit you, then you can use Google drive or the like. But then you won't have much free space in the "cloud", which should also be remembered. If this option does not suit you, then transfer your photos and videos to your computer. And from it you can already transfer images to new smartphone- it will not be difficult.
By the way, if all the photos are on the memory card, then all that remains is to rearrange it - they should not be copied anywhere.
Transferring Music
Now you know how to transfer data from Android to Android. But the above methods did not apply to music. It can also be synchronized with your Google account, but only through a special service. It is called Google Music... The service is capable of storing up to 50 thousand audio tracks. If they are in sync, then you can play your music on any device that has access to the service.
The sadness is that it's free to use Google Music it is possible only from one to three months. Also this service does not work with formats FLAC and ALAC... Therefore, it is easier to transfer all the music to your computer or memory card.
Universal software
There are many third party applications that help in transferring information from one device to another. Let's take the utility as an example. CLONEit - Batch Copy All Data... The developers claim that their creation is capable of transferring 12 types of information - from contacts to settings. operating system... How to work with this application?
Step 1. You need to install the program on both devices.

Step 2. Run the app, also on both devices.

Step 3. Now click on " Sender", And on the new one -" Recipient».

Step 4. Wait until the smartphones find each other and establish a connection. Then you just have to choose which data you want to transfer. When you decide on this, press the button " CLONEit».
In September, I talked about transferring data from one phone to Android to another (). The described method allows you to transfer contacts with photos and ringtones, call history, SMS and MMS, all applications, GoLauncher EX desktop settings, photos, music.
Only one thing could not be transferred - the data and settings of the programs. For some programs, this is not at all important, in some (for example, twitter, facebook, instagram) it is enough to re-enter the username and password, but with games it is more difficult: the data on the passage of the game is not so easy to recover.
In order to copy the program data, the Android device must have root access. As it turns out, getting root on many devices is very easy. So, on my Samsung Galaxy S II, it is enough to copy two files to the memory card and run them from the recovery console by simultaneously pressing the "power on", "home" and "volume plus" buttons when turning on (http://w3bsit3-dns.com/forum/index.php?showtopic= 259348 & st = 9980 # entry13059622, for Android 4.1: http://w3bsit3-dns.com/forum/index.php?showtopic=296324&st=180#entry14633175). You don't even need to be connected to a computer to get root rights.
After obtaining root access, the program data can be copied and restored using one of the special programs. Titanium Backup is often used for this, but it is paid and has a completely non-intuitive interface.
The GO Backup Pro program (https://play.google.com/store/apps/details?id=com.jiubang.go.backup.ex), which I suggested using in the September article, is good because it can work with both root-rights, and without. When there is no root, Go Backup Pro simply saves the applications, and then prompts you to install them manually one by one. As soon as root appears, GO Backup Pro starts installing applications automatically, as well as saving and restoring all settings and application data.
The program interface is very simple. There are only two buttons on the first screen.
On the second screen, you can choose what to save or restore.
The free version of Go Backup Pro has a limit on the amount of stored applications of 200 megabytes, but it can be very easily bypassed by saving all applications in 2-3 times (first all data and applications, except for large ones, and then other applications separately).
Thus, using the programs "Go Backup Pro" and "
When buying a new Android smartphone or tablet, many users are looking for how to easily and quickly transfer contacts from Android to Android. In fact, this is done very simply. Using one of the methods below, you can transfer the numbers that you enter your phone or tablet.
We use a Google account
The easiest way to copy recordings to a new phone is to sync with Google. The fact is that it is connected to any Android device. Google account... It is through Google that the Play Market operates, thanks to which you can download games and applications to your smartphone.
Moreover, mostly Android users work in Gmail. Therefore, you need to use your Google account to copy contacts from your old phone. This is done as follows:
1 Log in from your old mobile phone in the settings and find the "Accounts" item there.
2 If a Google account on the device already has, that is Account connected, under the above inscription there will be an item "Google".
If not, follow the account connection process. google records to the device. To do this, click "Add account", enter your username and password.

Rice. 1. "Accounts" in the settings
3 Click on your account, that is, on e-mail.

Rice. 2. E-mail in the section "Accounts"
4 This brings you to the sync settings. To save contacts from Android in the system Google services, click on "Contacts". The synchronization process will take place.

Rice. 3. Synchronization menu
5 Now you need to connect the new device with Google, and with the same account to which the old device was connected. To do this, repeat all the steps described in this list up to the Gmail item.
The entire contact list will be transferred.
Using the vcf file
This is also a very simple method to transfer contacts from Android to Android. It allows you to transfer data to the device's memory, to a flash drive and to Windows computer and then transfer them via Bluetooth, USB cable, email and other ways.
Now let's figure out how to transfer contacts from Android, with a vcf file, first of all, you need to export data to a file:
1 Go to the phone book application and click on the additional menu (most often represented by three dots in the upper right corner). To send information from phone to phone, select the item "Import Export".

Rice. 4. "Import / Export" in the phone application
Note: In some Android versions in the menu, there can be buttons "Export" and "Import" (separately). In this case, select "Export". It also happens that after clicking on the item shown in Figure 4, you need to press the "Export" button again. This is quite normal, you shouldn't be afraid - it's just that the mobile phone has such an OS.
2 To move the phone contacts, you need to select where exactly the file with contacts will be written. Choose the option with memory or SD card.

Rice. 5. Copy path options
3 Check the boxes next to the records that you want to transfer from one Android to another by export. You can also select Select All.

Rice. 6. Record selection process
4 You will be prompted to export and, accordingly, whether to transfer contacts from one device to another. Click OK or Yes.
That's all. Now you have a vcf file (aka vCard, in some cases csv is also created, but it is practically useless), which can be dropped through Bluetooth.
You can also transfer data to a memory card, then insert it into a second smartphone or tablet. You can also use any cloud. If it is most convenient for you to transfer contacts to a new device via a computer (first to a PC, then from it), then this is done via a USB cable.
To do this, first we connect the first gadget using a computer and a cable, copy the file with the vcf extension, then change the phones and transfer it to a new one.
Prompt: If the computer does not see the phone, the data cable may be defective. Please use a different or use a different USB port.
Thus, you will transfer data from Android to Personal Computer, and then to the second device. Of course, transferring information from your phone to your computer is not the best option.
It is much more convenient to use Bluetooth or a memory card. In any case, this method is working and you can just as quickly transfer Android contacts to your computer, and then from it to the desired device.

Rice. 7. The .vcf file with data
After the file, transferred via USB or in another way, is on the new device, just open it and watch how the Android system imports the necessary contacts.
There is another "tricky" option - to use Outlook. Its only advantage is that you can edit the data while the program is running. True, there can be problems with the encoding, so if you decide to throw from Outlook on Android, it is fraught with a headache.
We figured out how to copy contacts as a file from Android to a computer. Then you can simply open them in the same Outlook or the Windows Contacts program.

Rice. 8. Opening a file on a computer
To do this, just press right click mouse over the file, select "To open with" and choose the one you want. But the use of these programs will only allow you to edit the saved records.
As for how to transfer Windows contacts and how to transfer contacts from Outlook to Android, then in these programs this task it is impossible to execute. You have to save the file and use the transfer described above.
We copy numbers to a SIM card
Now let's look at how to transfer contacts from android to SIM card. To transfer data from the phone to the SIM, go to the book application with phone numbers, click the menu of additional functions, select "Import Export" and select the item "Export to SIM-card".

Rice. 9. We export numbers to a SIM card
Then you need to select all the numbers, or which ones to keep, the only drawback this method, this is a limitation on the number of contacts - 200-220 pieces. If you have fewer numbers, then you can safely use this method.
Import contacts from SIM card to Android

Rice. 10. Menu in the phone book
Now let's look at how to transfer contacts from a SIM card to an android. This is done just as easily, go to the phone book, click on the menu (three dots on the right), then select "Import Export"
The next step is to choose where to download contacts from, in our case, choose "Spoil from SIM-card"

Rice. 11. Importing numbers from SIM
This will copy the information of each contact to the phone.
For information: The phone may ask where to save the numbers, to the device or to the Google account (if a Google account is connected).
A slightly different way, we described in the article on transferring contacts. To do this, you also need to select "Contacts" on Android and using the same menu "Import Export" transfer information from the SIM card to the phone.
Via computer and MOBILedit
The exact same principle is used in special programs, each of which throws information. For example, there is MOBILedit, one of the best running programs that does this task.
The process of using this software, which helps to understand how to transfer contacts to Android, is as follows:
1 Download MOBILedit software for your computer from the official website and install it. On its own mobile device install Android Connector(ibid.).
It is presented in the form apk file... If it is not possible to download it directly from your smartphone, download it to your computer and copy it to your device.
2 Open the program and follow the instructions to connect the gadget. Press "Phone" when starting, then "Cable connection" if you connected a tablet / smartphone using a USB cable or "Bluetooth connection", "Wi-Fi connection".
3 The computer display will show all the entries from the phonebook of the connected device in the MOBILedit window if you click “Phonebook”. Do this and click "Export".

As you can see, it's easy to transfer contacts from android to android, and possible ways to do this, just as much. In terms of complexity, they do not require special knowledge of a PC or smartphone. You just need to follow the instructions that we have described.
The task at hand is almost always accomplished by transferring the vcf file in one way or another. Well, or synchronization with any cloud.
Thematic video: