Change color in photoshop of individual elements. How to repaint black and white color in photoshop. Dialog box "Replace Color"
Replacing the color in Photoshop - the process is simple, but fascinating. In this lesson, learn how to change the color of various objects in the pictures.
Change the colors of objects we will three different ways. In the first two, we use special functions of the program, and in the third painting the desired areas manually.
Method 1: Simple replacement
The first way to replace color is the use of the finished function in Photoshop "Replace color" or "REPLACE COLOR" in English. It shows the best result on monophonic objects. For example, take the icon and open it in Photoshop. Next, we will replace the color on any other of interest to us.


So we changed one color to another.
Method 2: Color Range
The second way according to the work scheme can be said, identical to the first. But we will look at it on a more difficult image. For example, we chose a photo with a car.

As in the first case, we need to specify which color we will replace. To do this, you can create a selection by using the color range function. In other words, highlight the image in color.

The result is achieved. If the source sections remain in the image, the procedure can be repeated.
In this lesson, we learn how to choose the color of the object on the same photo with the help of the "Color Selection" command on the subject on another picture. This feature Appeared in Photoshop, starting from Photoshop CS ( this means that you need at least Photoshop CS for execution.).
Here is an image of the model taken by me from the catalog. The girl obviously looks very contented, and besides the color of her blouses quite suitable for the colors of the green area in which it is:
Source image
Like most clothing models, this blouse can be performed in other colors. For example, suppose it is also available in the shade shown in this photo:
Model dressed in purple blouse
The client would like you to change the color blouse girls on the first photo so that it corresponds to the bloom color on the second photo, like this:
The color of the blouse on the original photo is selected from the color of the blouse on the second photo
Photoshop function "Color selection" was created specifically for such tasks, although it has many other applications that we consider in other articles. However, depending on the images you use, the "selection of the color" itself does not always work perfectly.
Sometimes this feature does everything as needed, sometimes not. Often she needs to help a little, and, as we will see in a minute, it is just one of those cases. Let's start!
Step 1: Duplicate background layer of the original image
The first thing we should always do, starting to work with the image in Photoshop, to duplicate the background layer. It contains source information of the image, and we do not want to lose it in the event that we have to start all over again. Currently, my palette of layers shows that my background is all that I have:
In the layer palette, the background layer is shown, which contains the image source information.
All you need to do to duplicate the background layer is to use a combination of hot keys Ctrl + J (Win) / Command + J (Mac). If we look at the palette again, we will see that now we have two layers - the original background from the bottom, and its copy that Photoshop automatically called " Layer 1.«:
In the palette of the layers, the background layer is now displayed, as well as a copy of the background layer above it.
Now we can safely work without worrying about damage to the original.
Step 2: Select an object whose colors need to be changed
Use the selection tool to your choice ("Lasso", "Feather", etc.), draw the selection around the object whose colors need to be changed. I covered the girl blouse in the contour:
Use the selection tool to your choice to highlight the object whose colors need to be changed
Step 3: Choose a large area inside the object in the second image
Now switch to the second image and again using your favorite allocation tool ( "Lasso" is perfect for this suitable), Choose a large area inside the object that contains the desired color. In my case, I will choose a purple blouse, dressed on the girl.
We do not need to accurately assemble the outcast circuit around the object, but the source area we need to make a large enough so that it includes as many shades as possible ( light and Dark Station).
Photoshop must be obtained as many shades of color so that it can accurately apply the color of the original image to the object ( buttons on the blouse can in certain cases create some problems, so I dragged them using the Lasso tool, while holding down the Shift key to subtract them from the selection, just just in case):
Choose a large blouse area to turn on as many shades of color as possible.
Step 4: Switch back to the original image
Now that we have allocated an object on the first photo and a large area inside the subject in the second photo, we can apply the Color Selection command. Before doing something, we must make sure that our original photo is active.
Therefore, click anywhere inside the original image to select it. The Color Selection team will refer to this source image as a target.
Step 5: Enter the "Color Will" function
With the selected source image, go to the "Image" menu, select "Correction" and click "Pick Color":
Go to Image\u003e Correction\u003e Pick Color
The Pick Color dialog box opens. Now I want to note that I love Photoshop. But, I put your hand on the heart, something in the "pick up color" dialog box. It confuses, and so should not be. So we just have to figure out this confusion to get to the truth.
The Color Selection dialog box is divided into two main parts - " Target image»Top and" Image statistics»Bottom. You have assumed that the lower partition will be called " Source image", is not it? But no, he is called " Image statistics" Let's just leave the bottom and focus on the top, " Target image».
Target image - This is an image containing the colors that we need to change. And there is no way in the dialog box to actually set the target image. Photoshop simply assigns it, based on what image you had chosen when you opened the Color Selection command.
That is why I first asked you to choose the original image before the command is called. My original image is called "Green.jpg", and we see it in the list next to the word "goal" at the top of the dialog box:
In the "Pick Color" dialog box, the photo "Green.jpg" is displayed as a target image.
Called the section " Target image"Locked the section" Image Parameters"It contains such options as:" Brightness "," Color intensity"," Weakening "and" neutralize ". It would be logical to assume that since these options are grouped in the section " Target image"So they do something with the target image.
But they control the original image at the bottom, which is called " Image statistics" Now you understand what I'm talking about? This dialog box needs some refinement.
Despite the fact that the dialog box itself is a bit confusing, what we can do with it is quite understandable. We already have " Target image"That we have chosen before starting the team. So now we need to choose the original image.
Step 6: Select the second image as source
Below, in the section " Image statistics»You will see a parameter called" Source "with a drop-down list. Select a second image from the list to install it as a source of the image:
Select the second image from the "Source" drop-down list.
If your " Source image"Contains several layers, you need to select the corresponding layer using the" Layer "parameter below the" Source "parameter. In my case, the second image contains only one layer, the original background, so that it is automatically selected.
Step 7: Specify Photoshop to use the selection that you did on the images
Directly above the "Source" parameter are two options with checkboxes next to them - "and" ". The first option informs the program that we want to use when selecting only the colors of the selected area of \u200b\u200bthe original image.
In other words, in my case I want to use only the purple colors that I highlighted the girl on the blouse. If I didn't do this, then it is clear that Photoshop would ignore my selection and used color from the entire image. What, of course, we are not needed, so make sure you have installed the checkbox for this option.
The second option reports Photoshop that we want to choose the colors only for a specific object that we chose in the source image. In my case, this means that I want Photoshop only the colors of the girl blouse.
If I did not point it, Photoshop would take into account all the colors of the photo, and the end result would not be so accurate. Therefore, make sure that this option is also noted:
Highlight options " Use selection in the source to calculate the color value"And" Use selection in the target image to calculate correction"To specify the program to use the selected areas of images when selecting colors.
Click the "OK" button to exit the dialog box and allow photoshop to try to pick up the color for the target image, pushing out from the colors of the original image. In many cases, it works fine, and nothing else needs to be done.
But sometimes Photoshop fails to pick up the color correctly. This is just one of these cases. That's how my original image looks like now ( selection remains visible and active):
Initial image after applying the "Pick color" function
Photoshop managed to choose the main colors, however, in general, something is wrong with the effects. The problem lies in the fact that the blouse area completely lost contrast. Dark areas look too light, highlighted areas completely disappeared. In general, everything looks unnatural. This is one of those cases when the "Selection of Color" features need to help a little.
I could try to adjust the brightness by moving the brightness slider in the section " Image Parameters»Pick color dialog box, but all I can achieve with it, it's all lighter or darker. I also need to be able to customize the bright and dark areas separately.
Step 8: Add the adjusting layer "Levels"
I'm going to use a simple level-adjusting layer "Levels" to darken dark areas and brighten the light areas on the blouse. To do this, click the icon " New adjusting layer"At the bottom of the palette of the layers:
Click on the "New Corrective Lay" icon at the bottom of the palette of the layers
Then select from the "Levels" list:
Select from the "Levels" list
Step 9: Drag the black and white dots sliders to the center
In the dialog that appears, you will see a large black histogram ( looks like a mountain). It will place three small sliders - a black slider on the left, white - right and gray - in the middle. To darken dark areas, simply click on the black slider and drag it to the right until it turns out to be at the point where the left side of the histogram begins.
Watch out the image in the document window while moving the slider so that you can see what is happening with shadows. Move the slider before getting the desired effect. Then, when you adjust the dark areas, click on the white slider drag it to the left, to the point where the right side of the histogram begins.
And hello again, my dear readers. Today I would like to tell you how to replace the color in photoshop to another in a separate area and even throughout the picture. After all, you probably often have a desire to repaint something to see how it will look. But in order not to make mistakes, first it is better to do it on some mockup or photo. Then you will know how and what looks like. Let's see how to change the color of the subject to the car repainting specified on the example.
The first way. Replacement color

Let's look at the simplest case when our background is absolutely different from the object itself, i.e. cars.
- So, upload a photo, a picture or picture to our editor and now go to the familiar menu "Image". Next, select the item "Correction", and then "replace the color".

- The color replacement window has opened before us. What do we do here? First, let's make sure that in this window the active tool is the usual pipette (no signs). Now just click on the left mouse button anywhere on the car's hood.

- As you can see, in the window we have a small drawing. What is painted light shows us what area will replace color. Now start pulling the "Color Tone" slider. See? Part of the color begins to change when you move this tone. Do not be upset that not the whole car has painted. We will fix it.

- To begin with, press the left mouse button on the slider "scatter" and pull it into the biggest way. Just try to make the machine so that the car is painted as much as possible, while the background would be untouched. In this case, there are no yellow shades against the background, which allows me to put the maximum scatter 200.

- The desired object changed almost all the color, but not completely? Again, it does not matter. Activate the internal tool "Pipette +" and press the left mouse button on those parts of the car, where the non-crushed areas remain in the figure.

- Voila!) As you can see, everything turned out and even our background did not suffer. And by the way, you can still move the "Color Tone" slider, "saturation", "brightness" to achieve the desired shade.

See. It looks like it is necessary. And this feature can be used in different areas, for example, to replace the color of clothing, or to give an unusual, but a certain shade of vegetables or fruits. In! Try to make a blue watermelon. Trust me. It is easy, very interesting and useful for consolidation.

Correction of misunderstandings
Let's look at the case a little harder. Suppose I want to change the color of the car, but already another. As you can see, the color of the car is the same as in the background. Well? Let's do everything as at the top and see what we succeed.

And we do not care, the background is so similar to the color of the machine that neither the "pipette" nor the reduction in the scatter does not help. If we want us to be purple, then we will also have similar mountains. What to do?

In such difficult situations will have to work a little handles. In fact, nothing terrible is not here. You just have to take advantage of your acquaintances. Yes Yes. Handles erase failed painted objects or background, thereby leaving with a certain color only the subject itself, i.e. In our case, the car.

Even better before changing the color, duplicate the layer and make all actions on the created copy. And unnecessary details can be erased by usual. So it will be better if you suddenly want to change the color later.
The second way. Overlay mode
Well, since we spoke here about the repainting of the car in Photoshop, I can't not mention another good way to implement this action. True, here you will also have to work with handles, as you have to change and paint all the places. But we can easily be able to replace the color in Photoshop to any other.
Let me load the same car as above.
- We take and how we would like to paint this machine. Well, let's say I want to see her green, then this particular color I will choose.
- Now create a new layer by pressing the key combination SHIFT + Ctrl + N. And then take a look at the panel of the layers. See there there are overlay modes? By default, it is normal, but you will open the drop-down list and select the "Color" item (by the way the "Color Tone" mode is also suitable, so you can choose it). Fine. Well done.

- But now choose the size, shape and rigidity of the brush, and forward! Machine machine. Just carefully, so that you do not hurt too much. Well, if they crushed, then the eraser will straighten, nothing terrible.

- And now, if you want to change the color you nipped, you need to go to our new image "Image" menu and there choose "Correction" - "Color tone / saturation". But I advise you to immediately use the simple key combination Ctrl + U.

- Well, in the newly opened window you can also move the color tone slide, saturation and brightness, in order to change the shade. Everything is simple.

How are you a lesson? Everything was clear and interesting? I hope that yes. Personally, I, when I learned about the replacement of the color of the subject in Adobe Photoshop.was just delighted. If, of course, something will be incomprehensible, then you can always clarify or ask. I will be glad to help as far as possible.
I would also advise you to see you cool video course on photoshop. The video tutorials are simply awesome, the course comes from the easy to complex, everything is told by the human language, nothing is missed and at the same time no extra "water". All over the shelves. So be sure to look.
Well, I'm saying goodbye to you today. I will be glad to see you in my other articles. Well, so as not to get lost, be sure to subscribe to updating my blog. I will not spam - everything is only in the case, honestly. Well, you practice. See you in other lessons. Bye Bye!
Sincerely, Dmitry Kostin.
In Photoshop, it is very easy to repaint any object, for this it is enough to use the correction of color tone and saturation, but for coloring neutral colors - black and white such manipulations will not be enough and there are some nuances. Let's consider in more detail this "problem".
Pray black color
Let's start with the coloring of the black color, everything will be very simple here! To color the black object in the image, it is necessary to highlight the layer this image In the layers panel by clicking on it 1 time with the left mouse button and in the Photoshop top menu select "Image" - "Correction" - "Color Tone / Saturation", or simply press the Ctrl + U key combination. After this action A window opens with tone and saturation settings and in this window you must put a tick to the "Toning" item, after which it is easy to select the desired color using the slider. If you do not put this tick, then change the tone in the black color will not work.
It is important to "play" the slider "saturation", selecting the most realistic appearance, and not just a color tone. This is the whole secret, many just do not know, many forget about this tick.
For high-quality coloring of the object, in this case of the car, it is necessary to paint each element individually, having pre-highlight it. To do this, take the pen tool, supply the car detail, for example the bumper, then click right-click Mice and choose "highlight the area". Next, in the splitting window, press "OK", while the radius of the decisive must be zero.

After that, we act in the specified manner: in the upper menu, select "Image" - "Correction" - "Color Tone / Saturation", put a tick and configure the necessary color tone and saturation.

And such actions must be fulfilled with all the necessary parts of the car: bumper, wings, etc.
Pray white color
With a white color, the situation is a bit more complicated than with black, more complicated in the sense that it is not enough to put a tick for coloring, but it is necessary to produce a number of manipulations.
For a start, as in the case of a car, we need to highlight the part of the object we will repaint, namely the girl's coat. To highlight it is better to use the pen tool, as in the first case. I am not all the coat for example and clarity, but only half. After that, you need to copy the selected area to the new layer, to do this, select the "Select" tool in the left menu and by clicking the right mouse button along the dedicated object. Next, in the tab that opens, select "Copy to a new layer" and will appear in the layer panel of a new layer with a carved coat fragment.

After that, we need to create another copy of the layer with a cut fragment, for this, click on the layer menu on the layer with a fragment of the right mouse button and select "Create a duplicate layer", after this action in the layer panel will appear a copy of the coat fragment.

Now we highlight the coat fragment itself in the upper layer, to do this, hold the Ctrl with the left mouse button on the upper layer and it will immediately be seen that workspace The fragment became highlighted. The next step should be painted this selection of the necessary color, you can simply make it a brush, you can the "Fill" tool, without any difference. I painted the "fill" tool in orange.

You only need to paint, buttons and hand do not need to be painted. After that, in the right menu of the layers of our layer with a painted fragment of a coat, you need to select the selection "chromaticity".

Now the top layer with a painted fragment we make the underlay layer, for this while holding the alt key to sum up the cursor between these layers until the icon appears (arrows down) and click the left mouse button and the upper layer becomes the imposition of the lower.
Then, select the bottom layer with an unpainted fragment by clicking on it in the layer panel with the left mouse button, and select the icons at the bottom, to create a layer-adjustment and select the "Curves" menu that appears.


1 vote
Hello, dear readers. Replacing colors in the picture is quite interesting and tightening. Personally, I can spend quite a long time for this entertainment. There are several tools that will help in this work and each of them is suitable for their occasion.
Today I will tell you how to change the color of the picture in Photoshop and how to use in each specific case. You will like it, I assure.

It should be noted that I have been using Photoshop CC, but we will not do anything specific, so you can safely start reading even if you have a simpler version of this program. Not online serviceOf course, it is weak and non-functions, but in cases with CS3, 5 or 6 discrepancies you will not notice.
Let's proceed?
Simple color correction
The equipment for high-quality shooting is quite expensive, and not trouble, if you do not possess. You can get good snapshots using editors' software such as photoshop. To be honest, I use this opportunity for almost every photo that I post on my blog. I like the colors of the bore, rather than typically lay out on the Internet.
By the way, if you are interested in - read the article already published in Start-Luck. I will take a pre-prepared picture in order to proceed with the story of a simple color correction and go to work.

I open the tab in the "Image" top menu, and then the category "Correction". Do not regret the time to own experience To understand what is "brightness / contrast", "juiciness", "Color Tone / Saturation" and other options that will find in this tab.
You will not spoil anything, you will not break and always be able to return to the original option, simply refusing to save changes when closing the picture. Just see how those or other instruments behave. As they say, what you reach, always remembered better than when you explain everything on your fingers.

For example, open the "color tone" and twitch for various sliders, you will immediately see how it changes the colors of the picture and you can build a logical chain between your actions and result. Do not forget to check the box opposite "View".

Color balance changes color stronger, setting is thinner and interesting.

If you want to work with defined element, enough, I'm already simple and simple and understandable He talked about how to do more than 8 tools and ways. I will not repeat, it is not difficult to find a publication, just go through the link just above.
I now use the most simple way - "Magic wand". Just clicking on the object and the desired fragment is highlighted. Using the setup tolerance, I'm on setting the scatter on color.
As you know, there are many shades of white, blue and any other color. The higher the tolerance number, the more shades from the spectrum will determine the program and allocate with the help of a stick.


Change the direction of the curve and the color becomes another.

By the way, if you want to work with the background, that is, by the site that is beyond the selection, you need to first allocate it, and then in the "Allocation" tab top menu Choose "Inversion" position.

Running ants are removed using the Ctrl + D key combination.
Replacement in contrast
Very detailed about this method I talked in the article « » . Now we quickly run the basic functions. I will give a small instruction that will be enough.
This tool is ideal for replacing the bright, highlighting colors in the picture. For example, a yellow apple on a white background, a red car in a green forest or like now, a bright girl in a dark room.

Returning to the "Correction" section and I choose a "replacement color" tool here. With the "Pipette" tool, which appear automatically, choose a shade that will have to change. In this case, click on the curtain. Then move the "Spots" slider so that the girl becomes almost black, and all other objects had the outline ( how to draw a black background I wrote a whole article).

Please note the curtain and wall should still have the outline, just put the scatter 200 will not be released. Otherwise, the program will not take into account shades and paint everything ugly, one color. Now I climb on the grochka with the color at the bottom of the window, the "result" is written below it.

Click on the spectrum and different shades until I get perfect result.

Ready. Not repainting the photo We got a great result. Just a few seconds. Now let's take a little about the shortcomings. As I said above, use this way convenient if the image is contrast. To repaint a concrete girl's dress in another shade, it will have to be allocated. I can offer another interesting, in which much attention is paid to complex objects, for example, hair.
I myself exercise the instrument "Magnetic Lasso".

Now I carry a dress to a new layer by pressing Ctrl + J simultaneously. ? Read the publication with a detailed story about them, which I recently prepared for beginners.
We return to the "replacement of the color" section "Correction". In this case, the shade will have to be changed using the slider "color tone", "saturation", "brightness". If I click on the piercing "result, it turns out extremely disgusting and implausible.

In my opinion, the shade of the lady's dresses is still far from the ideal, and therefore I want to blur him a little. I open the "Filter" tab and choose all the favorite "Blur in Gauss."

The robe has become less clear, but the shade was somewhat aligned.

As I said, it is best that this method works if there are contrasts, so I am satisfied with that, and I will tell you about the last tool today.
Quick tool for complex cases and cardinal changes
I like the brush "replacement of color" more than other tools for solving a similar problem. You can find about it in the article « » in which I turn the most ordinary girl in a red-haired smourf woman with blue skin.
It is not difficult to find a brush, for this you need to right-click on a conventional brush. An additional menu will open in which you can select the desired tool.
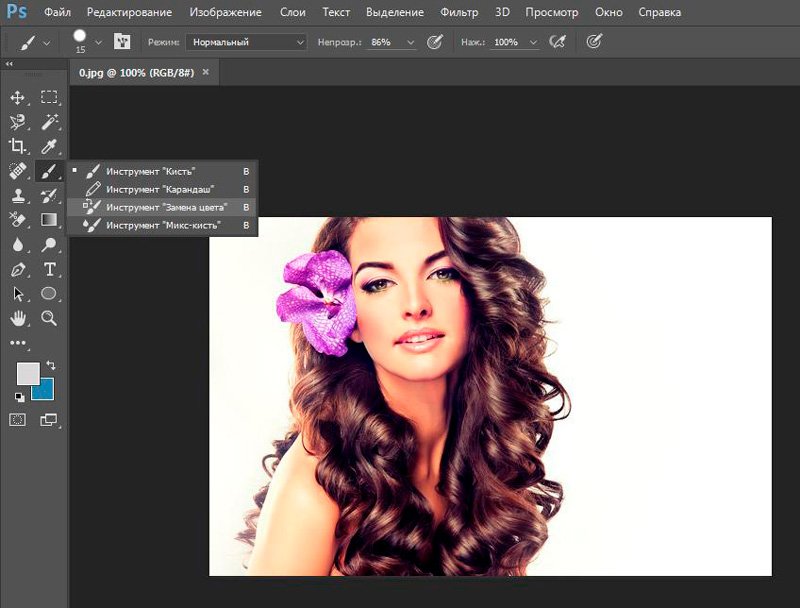
I choose color. Everything is as usual. The window on the right. In this case, black, and then paint the part of the girl's hair. Note, all shades are saved.

You can put green.

In order to change the size of the brush, use the keys.

I can also offer a learning video on this topic.
Well, if you want to more professionally understand the program and understand how it works, this or that function in the Photoshop program works, then I propose a very useful course " Photoshop for beginners in video format ».

Maximum useful information about tools. That's basically it. Do not forget to subscribe to the newsletter to be aware of the most recent, useful and simple information.
To new meetings and good luck.


