Windows services and driver management. Windows services from the inside out. Controlling Boot Drivers Using Selection Profiles
For those who are interested in the inner structure operating system, I suggest a little research. We will try to find out what is responsible for the order in which drivers and services are loaded into and whether this order can be changed.
First, let's take a look at the current system startup order using Sysinternals' LoadOrder program. The program will show us what is loaded and in what order when the operating system starts up.
As you can see from the figure, first the device drivers necessary to start the system are loaded, and then the various services. Since there are some differences between loading services and loading drivers, we will consider them separately.
Drivers
Let's take the driver as a test subject. Microsoft ACPI (Advanced Configuration and Power Interface), which is responsible for detecting hardware and power management. ACPI's job is to provide interoperability between the operating system and the hardware, so the ACPI driver is loaded first.

The Loadorder program provides rather limited information about the order of loading, so for more accurate data we go to the registry. Each driver and Windows service has its own subkey in the HKLM \ SYSTEM \ CurrentControlSet \ Services registry branch. The sections are named by the name of the driver \ service, respectively, we need the ACPI section.

Three registry parameters are responsible for the order in which the driver is loaded. Main parameter Start- defines the type of driver startup. Here are the rules by which drivers set the value of their Start parameter:
Drivers that must be loaded by the boot loader when the operating system starts up specify a Start value of 0 (start at system boot). Example - drivers system bus and driver file system used when booting the system;
A driver that is not directly required to boot the system specifies Start as 1 (system start). An example is a standard video card driver (VgaSave);
The driver, not required to boot the system, sets the Start value to 2 (autostart). Example - Multiple UNC Provider (MUP) driver supporting UNC names remote resources(like \\ Computer \ Share);
Drivers that are not required for the operating system (for example, network adapter drivers) specify a Start value of 3 (start on demand).
Also device drivers can use the parameters Group and Tag to control its boot order at system startup. The Group parameter is used by drivers \ services to indicate the group to which they belong, and the load order of the groups is determined by the parameter List, located in the HKLM \ SYSTEM \ CurrentControlSet \ Control \ ServiceGroupOrder \ section.

By the way, the Group parameter is optional. If the driver \ service is not included in any group, then it is loaded at the very end of the queue.
A driver can further fine-tune its boot order by using the parameter Tag which indicates the specific position of the driver in the group. The I / O manager sorts the drivers in the group by the value of this parameter, and drivers that do not have a Tag parameter are moved to the end of the list of drivers in the group.
Looking at the loading order, you might think that drivers with lower Tag values are loaded first, then with large ones, but this is not entirely true. The precedence of Tag parameter values within a group is defined under HKLM \ SYSTEM \ CurrentControlSet \ Control \ GroupOrderList.
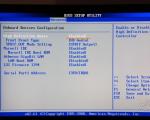
For example, let's open the Boot Bus Extender binary parameter, which corresponds to the group of the same name, to which the ACPI driver belongs. The parameter is a set of double words (4 bytes each). The first word (highlighted in red) sets the total length of the variable (the number of double words), in our example 06. The rest of the double words are just tags. The ACPI driver has a tag of 01 (highlighted in green).

The priority of the tag is determined not by the value of the tag, but by its position: the higher a tag is located, the higher its priority in the group, and the higher the priority of the driver to which this tag corresponds. And since 01 is higher than the rest of the tags, then the ACPI driver is loaded first in the group.
Services
The order in which Windows services are loaded is slightly different from the order in which drivers are loaded. Take the automatic update service (wuauserv) as an example. It is not particularly critical for system operation and therefore is loaded last.

Go to the registry again. Service startup parameters are located in the HKLM \ SYSTEM \ CurrentControlSet \ Services \ wuauserv section. I have identified two main parameters that are responsible for the loading order of this service.

Windows services are started by the Service Control Manager (SCM) according to the parameter value Start... This parameter for services can take the following values:
Auto start (2) - the service starts automatically, immediately after starting the main SCM process Services.exe;
Launch on demand (3) - the service is launched as needed, at the request of any service or program;
Disabled (4) - the service is disabled and does not start under any conditions.
The values 0 (start at system boot) and 1 (start by system) for services cannot be specified, only for device drivers.
In addition, starting with Windows Vista \ Server 2008, another startup mode has appeared for services - delayed autorun. The parameter is responsible for it DelayedAutoStart = 1, which tells the SCM to automatically start the given service with a delay. SCM starts the services for which the delayed start is selected, after loading the services marked for autostart.
The service launch mode can be controlled not only from the registry, but also in graphics mode, from the Services console.

Just like drivers, Windows services can use the Group parameter in their registry key to specify the group to which they belong. Now, for clarity, let's take our wuauserv service, located at the very end of the download list. Using the Group key, place it in the Event Log group, reboot and see the loading order in Loadorder. As you can see, the order has changed and wuauserv has risen from the last place, loading right after its classmate - the eventlog service. True, the order of placement within the group cannot be changed, since Tag is not used for services.

And one more parameter that indirectly affects the order of loading services - DependOnService... It indicates which services it depends on this service... Accordingly, the service is not loaded until the services listed in DependOnService are loaded.
Dependencies work as follows - if the services are in the same group, then the dependent service is moved to the end of the list and starts after the services it depends on. If the groups are different, then the service simply will not start, and the SCM will generate an error.
This is shown more clearly in the Services snap-in, where on the Dependency tab both the services on which this service depends and the services that depend on it are specified.

A warning: this process involves some degree of risk, and therefore it is desirable to have at least a general idea of what we are going to do. If you need to return all services to the default state, then you can download the ready-made reg files. Choose your system and download the archive. After downloading the archive, unpack and run the reg file.
The full description of the services, as well as the name and display name, can be viewed and changed state along this path: Start - Control Panel - Administrative Tools - Services.
However, not all services are required for the computer to function properly. Below is a list of services that are disabled or enabled in my configuration. User one(with administrator rights), to the network not connected... To access the Internet, I use cellular telephone as a modem connection.
AST Service(Nalpeiron Licensing Service) - Disabled.
BranchCache(This service caches network content received from caching hosts on the local subnet) - Manually.
DHCP client(Registers and updates IP addresses and DNS records for this computer) - Auto
DNS client(The DNS Client service (dnscache) caches DNS (Domain Name System) names and registers the fully qualified name this computer.) - Disabled... If there is a network - Auto
KtmRm for Distributed Transaction Coordinator(Coordinates transactions between MS DTC and the Kernel Transaction Manager (KTM).) - Manually.
Microsoft. NET Framework NGEN v2.0.50727_X86(Microsoft .NET Framework NGEN) - Manual.
Parental Controls(This service is a stub for functionality Windows Parental Control Service that existed in Vista.) - Manually.
Plug-and-play(Allows the computer to recognize and adapt to changes in installed hardware, either without requiring user intervention or minimizing it) - Auto
Quality Windows Audio Video Experience (Quality Windows Audio Video Experience (qWave)- network platform for streaming audio and video in home networks based on IP protocol) - Manually.
Remote Desktop Configuration(Remote Desktop Configuration) - Manually.
Superfetch(Maintains and improves system performance.) - Auto
Windows Audio(Managing audio tools for Windows programs.) - Auto.
Windows CardSpace(This provides a robust ability to create, manage, and disclose digital identities.) - Manually
Windows Driver Foundation - User-mode Driver Framework(Manage host processes of user mode drivers.) - Manually.
Windows Search(Indexing content, caching properties and search results for files, Email and other content.) - Auto... If you do not use search on your computer, then you can Disable.
WMI Performance Adapter(Provides performance library information from Windows Management Instrumentation (WMI) providers to clients on the network.) - Manually.
WWAN Auto Config(This service manages mobile broadband (GSM and CDMA) data cards and built-in modular adapters, as well as connections and auto-configuring networks.) - Manually.
Offline files(The Offline Files service does the job of maintaining the Offline Files cache,) - Manually.
Protection agent network access (The NAP service agent collects and manages information about the health of client computers on the network) - Manually.
A IPsec Policy Gent(Internet Protocol Security (IPsec) supports network layer authentication of caching nodes) - Manually.
Adaptive brightness control(Designed to monitor the ambient light sensor and adjust the brightness of the monitor according to changes in illumination.) - Manually.
Windows backup(Supports backup and restore on Windows.) - Manually.
Windows biometric service(Windows Biometric Service is designed to collect, compare, process and store biometric data in client applications without gaining direct access to biometric samples or equipment) - Manually.
Windows firewall(Windows Firewall helps prevent unauthorized access to your computer over the Internet or network.) - Disabled... A third party Firewall is being used.
Web client(Allows Windows programs to create, access and modify files stored on the Internet) - Manually.
Virtual disk(Providing services for managing disks, volumes, file systems, and storage arrays.) - Manually.
IP Helper(Provides tunnel connectivity using IPv6 transition technologies) - Manually.
Secondary login(Allows to run processes as another user) - Manually.
Grouping network participants(Includes multi-way interactions using peer-to-peer grouping.) - Manually.
Disk Defragmenter(Provides the ability to defragment disks.) - Manually... You can leave and Auto by setting the schedule to run.
Dispatcher automatic connections remote access(Creates a connection to a remote network when the program accesses a remote DNS or NetBIOS name or address.) - Manually.
Print manager(Loading files into memory to print later) - Auto... If there is no printer, then Disabled.
Remote Access Connection Manager(Manages dial-up and virtual connections private network(VPN) from this computer to the Internet or other remote networks.) - Manually.
Desktop Window Manager Session Manager(Provides startup and maintenance of the desktop window manager) - Auto.
Network Participant Identity Manager(Provides identity services for Peer-to-Peer Name Resolution Protocol (PNRP) and Peer-to-Peer Grouping) - Manually.
Credential manager(Provides secure storage and retrieval of user credentials,) - Manually.
Security Accounts Manager(Starting this service signals to other services that the Security Accounts Manager (SAM) is ready to accept requests.) - Auto.
Access to HID devices(Provides universal access to HID devices) - Manually.
Windows event log(This service manages events and event logs) - Auto.
Performance Logs and Alerts(The Performance Logs and Alerts Service collects data from local and remote computers according to the specified schedule parameters, and then writes data to the log or issues an alert.) - Manually.
Protection software (Allows download, installation and enforcement of digital licenses for Windows and Windows applications) - Auto.
Windows defender(Protection against spyware and potentially dangerous programs) - Auto... However, it is recommended that you use third-party products to protect your computer from viruses.
CNG Key Isolation(The CNG Key Isolation Service is hosted in the LSA process) - Manually.
Windows Management Instrumentation(Provides a common interface and object model for accessing operating system, device, application, and service management information.) - Auto.
Application compatibility information(Handling compatibility check requests for apps as they run) - Manually.
Group Policy Client(This service is responsible for enforcing the settings defined by administrators for computers and users through the Group Policy component.) - Auto.
Changed links tracking client(Supports linking NTFS files moved within a computer or between computers on a network.) - Auto.
Distributed Transaction Coordinator(Coordination of transactions spanning multiple resource managers such as databases, message queues, and file systems.) - Manually.
Cache Windows fonts Presentation Foundation(Optimizes the performance of Windows Presentation Foundation (WPF) applications by caching commonly used font data.) - Manually.
SNMP Trap(Receives trap messages generated by local or remote SNMP agents and forwards them to SNMP management programs running on this computer.) - Manually.
Remote Procedure Call (RPC) Locator(On Windows 2003 and earlier Windows versions the Remote Procedure Call (RPC) Locator service managed the RPC naming service database.) - Manually.
Routing and remote access (Offers routing services to organizations on LAN and WAN) - Disabled.
IPsec Key Modules for Internet Key Exchange and Authenticated IP(The IKEEXT service contains modules for Internet Key Operations (IKE) and Authenticated IP (AuthIP).) - Auto.
DCOM Server Process Launcher(DCOMLAUNCH service starts COM and DCOM servers in response to object activation requests) - Auto.
NetBIOS over TCP / IP Helper(Provides NetBIOS support over TCP / IP Service (NetBT) and NetBIOS name resolution for clients on the network) - Manually.
Immediate Windows connections- configuration recorder(WCNCSVC service contains Windows Connect Now configuration (Microsoft's implementation of WPS protocol)) - Manually
SSDP detection(Detects network devices and services using SSDP discovery protocol such as UPnP devices) - Manually.
Discovery of online services(Includes notifying the user about the need for user input for interactive services, which provides access to dialog boxes created by online services as they become available.) - Manually
Computer Browser(Serves a list of computers on the network and gives it to programs upon request) - Manually.
Internet Connection Sharing (ICS)(Provides broadcast services network addresses, addressing, name resolution and intrusion prevention services for home network or small office network.) - Disabled.
Determination of enclosure hardware(Provides notifications for autostart events on different devices.) - Auto.
TPM Core Services(Allows access to the Trusted Platform Module (TPM), which provides hardware-based cryptography services to system components and applications.) - Manually
Several tools are available to manage devices and their associated drivers: Device Manager, Devices and Printers, Device Stage ™, and the Pnputil tool, which is run from an elevated command prompt.
Device Manager is available in all categories of Control Panel items and helps you install and update drivers for hardware devices, change hardware settings for those devices, and troubleshoot problems.
In Device Manager, you can perform the following tasks:
- View a list of installed devices
- Delete device
- Enable and disable the device
- Troubleshoot device
- Update device driver
- Roll back the driver.
The device status indicates whether it has drivers installed and whether Windows can communicate with the device. To view the status of a device:
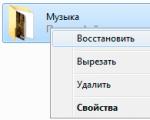
- Click right click mouse on the device and select the "Properties" command.
- Click the General tab and in the status area, view a description of the current state of the device.
Device Manager can only manage devices on the local computer.
Devices and printers.
The "Devices and Printers" category in the control panel also provides additional options for managing devices. To facilitate complex configuration tasks, a Configuration Wizard will guide you through the entire installation process. Windows 7 recognizes new devices and tries to automatically download and install any drivers required for that device.
The devices that appear in Devices and Printers are usually external devices that you connect or disconnect from your computer through a port or network connection.
In the "Devices and Printers" section, a multifunction printer is displayed, which, instead of an individual printer, can be controlled as a single device, scanner or fax device. Each individual component of a multifunction printer is displayed and controlled separately in Device Manager.
Device Stage
Device Stage provides users with new way for accessing devices and additional options for managing them. Devices are displayed on the taskbar as a photo icon. This system tray icon can provide fast access to the general tasks of the device; Status indicators that allow users to quickly understand battery status, device sync status, remaining capacity, links to user manual, additional applications, information community and help, or additional products and services.
The PnP specification defines how a computer detects and configures connected hardware and automatically installs drivers. PnP is supported in Windows 7, so when a device is connected, it automatically searches for a suitable driver package and configures the device. This greatly simplifies installation.
However, you should not allow users to connect any devices to work computers. The driver program runs as part of the OS, with unrestricted access to the entire computer, so only verified hardware should be allowed to be installed. When windows user 7 connects the device, it is detected. Service Plug and play identifies the device and searches the store for the required driver. If it is found, the device is considered authorized, and the driver files using the service Plug and play copied from the driver store to the system location, usually in the C: \ Windows \ System32 \ Drivers folder. Through the service Plug and play the registry is configured and the installed driver is launched.
Installing device drivers from Windows Update
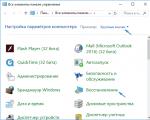
By default, updated device drivers uploaded to Center windows updates (Windows Update) are downloaded and installed on client computers automatically. You can change this behavior in the Device Installation Options dialog box ( Device Installation Settings). The easiest way to open it is to type in the Start Menu search box ( Start) the phrase device installation ( device installation) and click Change device installation settings ( Change Device Installation Settings).
The default is Yes, do it automatically (recommended) ( Yes, Do This Automatically (Recommended)). To prevent unverified drivers from being installed on Windows 7 computers, select the Never install drivers from Windows Update radio button ( Never Install Driver Software From Windows Update).
If you selected Always install the best drivers from Windows Update ( Always Install The Best Driver Software From Windows Update), the expediency of replacing an already installed driver is determined automatically. However, you will not have the opportunity to test new driver before installing. By choosing the option Install drivers from Windows Update if they are not found on the computer ( Only Install Driver Software From Windows Update If It Is Not found On My Computer), you will also not be able to test the new driver before installing. In an enterprise environment, especially when software is distributed through Windows Update Services ( WSUS), the ability to update drivers from the Windows Update site should be disabled, and the site should be excluded from the search path.
Device driver placement
If the required driver is not in the repository, the administrator must approve the device. This process is called staging.
In Group Policy, you can allow standard computer users to approve the installation of a device that belongs to a specific class of device installation. You can also host a device driver so that regular users can install it. But doing this with all devices is undesirable. In this lesson, you will learn how to configure Group Policy so that users without administrative privileges can install individual devices and device installation classes.
In Windows 7, the hosting process begins by looking for the correct driver package in the folders specified in the DevicePath registry entry. You will learn how to configure additional search folders for device drivers in Windows 7 in this lesson. If no suitable driver is found, it searches Windows Update. The user is then prompted to insert installation disc... If a driver is found, the system checks to see if the user has permission to place the driver package in the repository. To do this, the user must have administrator credentials or the computer policy must allow standard users to install known device drivers. Then the digital signature of the package is verified. If the driver package is not signed or signed with a certificate not found in the trusted publishers store, the user will be prompted to confirm the action. If the driver is approved by an authorized user, a copy of the driver package is placed in the driver store and installation continues.
During posting Windows tools all necessary security checks are performed, including verification of administrative privileges and digital signatures. Once the package has been successfully placed, anyone logged into the computer can install drivers from the repository by simply plugging in the device. This action does not require special permissions and is performed without user intervention.
Installing a Non-Plug and Play Device
If your device does not support PnP (for example, an old device), to install it you will need Account with administrative powers. If you have an installation disc for your device, Microsoft recommends using the installer that comes with it. This is usually done before connecting the device. Otherwise, open Device Manager ( Device manager), right-click the computer name in the console tree and select Install Old Device ( Add Legacy Hardware). The Add New Hardware Wizard will open ( Add Hardware Wizard).
By following the instructions in the wizard, you can search for hardware or install hardware that you manually select from a list. In the first case, the device must be connected to the computer. The installation procedure is the same as for installing non-pre-authorized PnP equipment. If you decide to choose the hardware yourself, you will be presented with a list of device types. If you select Show all devices ( All Devices), select your device from the list of manufacturers. If you have a driver (not necessarily a driver installation package) on removable disk or in a folder on your hard drive, click the Have Disk button ( Have Disk). After selecting the driver, the wizard will install the hardware. If there are problems (for example, errors with code 10- device cannot be started) they will be listed on the last page of the wizard.
Device installation policy settings
In this lesson, you will allow non-administrator users to install devices of a specified installation class in the Local Group Policy Editor ( Local Group Policy Editor). It can also be used to configure device installation policies. Expand the nodes: Computer Configuration ( Computer Configuration), Administrative Templates ( Administrative Templates), System ( System), Installing the device ( Device Installation) and click Device Installation Restrictions ( ). Click the Standard tab ( Standard) with a list of policies.
To open the Local Group Policy Editor ( Local Group Policy Editor), type gpedit.msc in the Start Menu search box ( Start). Be sure to review the details for each policy under Device Installation Restrictions ( Device Installation Restrictions) and in the Device Installation section ( Device Installation) by double-clicking the policy.
Working with device drivers
It is known that to install hardware, you need to find the driver installation files and install the driver. After installation, the driver can be updated (by installing a different driver), uninstalled, disabled, and enabled. If you have updated your driver and the new driver is performing worse than the previous one, roll back to the previous driver.
If an updated driver is distributed through Windows Update ( Windows Update), it is usually installed automatically after download. In Device Manager ( Device manager) it is also possible to update the driver. It is typically used to install a new or updated driver from a hardware vendor before publishing the driver to Windows Update. To obtain latest version driver and test it on a reference computer running Windows 7, download the driver files from the vendor's website, and manually update the driver.
The process of updating a driver is similar to installing it when adding new hardware to a computer. If the driver is already approved and is in the repository, or if the administrator has already placed it, after starting the update process continues automatically without user intervention. Otherwise, you can resolve automatic search drivers for the device or manually set the search folder. If a driver is found that is newer than the one already installed driver, the administrator will be prompted to approve the driver.
There are two ways to start the driver update process in Device Manager ( Device manager):
- right-click the device and select Update Drivers ( Update Driver Software);
- double-click the device and click Update ( Update Driver) on the Driver tab ( Driver).
Sometimes the problem can be solved not by uninstalling and reinstalling the driver, but by disabling it.
If there is a driver conflict other than a PnP device, try disabling or stopping one of the drivers. To roll back a driver, click the Driver tab ( Driver) device properties window. If only one driver is installed, the Roll Back button ( Roll back driver) is not available. A driver rollback is performed if an updated device driver performs worse than the previous one or conflicts with other drivers. In this case, the previous driver remains in the storage, and the process occurs without user intervention (except for confirming the action in the UAC window).
To collect information about driver problems or simply obtain additional information driver information, click the Details button ( Driver Details) on the Driver tab ( Driver). The screen will display information about the location of the driver files. Note that this is not a driver store (it is a protected area). Running driver files usually have the SYS extension and act as part of the OS. Driver installation files have the .INF extension. The driver information contains information about the vendor (usually third-party), file version, digital signature (usually Microsoft), and copyright information. The version of the file is useful for finding information about the problematic driver on the Internet, for example, on Microsoft blogs.
Resolving Driver Conflicts
Driver conflicts are less common these days than they used to be. But even 15 years ago, when a printer was connected, the mouse could stop working! Almost all modern equipment supports PnP technology. Installation takes place under the control of the OS, and conflicts, as a rule, can be avoided. However, the system is imperfect, and there is a possibility of conflicts. Typically, a conflict occurs when two devices require the same resources, especially when crossing interrupts or I / O ranges. You can set resource usage in the Properties dialog box ( Properties) on the Resources tab ( Resources). For most drivers, the checkbox is checked Automatic tuning (Use Automatic Settings), and the Edit button ( Change settings) is not available.
Conflicts between PnP devices are rare. To resolve them, it is enough to turn off one of the devices for a while. Sometimes the conflict can be resolved by updating the driver (if an update is available) or by uninstalling and reinstalling the hardware. If a non-PnP device is involved in the conflict, it may need to be stopped to resolve the issue. To stop a non-PnP device, follow these steps:
- Open Device Manager ( Device manager).
- On the View menu ( View) select Show hidden devices (Show Hidden Devices).
- Double-click Non-Self-Configuring Device Drivers ( Non-Plug and Play Drivers), right-click the device you want to stop and select Properties ( Properties).
- On the Driver tab ( Driver) click the Stop button ( Stop), then Ok.
Restarting the device is done in much the same way. Only instead of the Stop button ( Stop) you need to click the Run button ( Start). In addition, on this tab you can change the startup type. Please note: if the Run button ( Start) on the Driver tab ( Driver) is not available, the driver is already loaded.
Find Conflicts in System Information
If you suspect a device driver is not working correctly due to a resource conflict, open the System Information ( System Information) and review the I / O and IRQ requirements of all devices. This is more convenient than opening the Resources tab ( Resources) for each device separately. To run the utility, type msinfo32 in the Start menu search bar ( Start), in the Run window ( Run) or on the command line. It is not required to run Msinfo32 command line with increased powers. The program provides general information about the system.
In the node Hardware resources ( Hardware Resources) you will find information about memory, I / O and interrupt resources IRQ for each of the computer devices. The most useful information for resolving conflicts is in the Conflicts and Sharing node ( Conflicts / Sharing). If you have problems with a specific device, enter its name in the Look for ( Find what).
Information about specific devices(CD-ROM, audio device, display, etc.) are located in the Components node ( Components). When diagnosing, the most useful section is Devices with problems ( Problem Devices). It lists non-working devices, devices for which drivers are not installed, etc. In the Software Environment node ( Software Environment) there is a section System drivers ( System Drivers) that lists the kernel drivers. Here you can find out if the driver is working or not. You can search for a driver by name or description using the Search field ( Find what).
Driver Verifier Manager
Driver problems are not always caused by conflicts. It happens that devices do not work correctly or STOP errors occur, but there is no information about conflicts, and disabling other drivers does nothing. Windows 7 comes with the Driver Verifier Manager tool ( Driver Verifier Monitor) to monitor device drivers for invalid procedure calls or actions that could harm the system. It allows you to put drivers under load and test them for incorrect behavior.
Driver Verifier Manager ( Driver Verifier Monitor) called by the verifier command. The / volatile flag allows you to start checking any driver without rebooting, even if the Driver Verifier Manager ( Driver Verifier Monitor) does not work anymore, and also run a check of the already loaded driver. This innovation, first introduced in Windows Vista, significantly reduces the number of restarts. This saves time and allows you to monitor the driver while connecting or removing a device.
Using the dispatcher, you can query parameters, add and remove devices, but the most powerful option is / faults, which allows you to enter load tests of a given level of complexity to determine the driver's ability to work correctly in all situations. For example, you can simulate a lack of resources or a sleep mode that returns an unexpected result. You can monitor resource usage (pool allocation) and track the number of errors sent to the system. Driver Verifier Manager ( Driver Verifier Monitor) is mainly a load generating tool that will inform you about, for example, the possibility of a driver crash if disk or memory usage exceeds a certain threshold. You can monitor resource usage and diagnose resource shortages using more general tools such as System Monitor ( Performance Monitor) or Task Manager ( Task Manager).
Driver signatures and digital certificates
Digital signatures enable administrators and users who install Windows software to obtain information about the identity of the publisher who provided the software package. Installing unsigned kernel-mode components requires administrative authority. Drivers must be signed with certificates that are trusted by Windows 7. Certificates signed by trusted publishers are stored in the Trusted Publishers ( Trusted Publishers).
The administrator is free to approve the installation of an unsigned driver or driver with a signature that is not in the certificate store from trusted publishers. This is acceptable, provided that the driver is installed on the test computer for informational purposes, and not for mass distribution to client computers. Many drivers come from trusted sources (such as hardware manufacturers) but have not yet gone through the verification process that results in a digital signature. Even some Microsoft drivers are not signed. When you or other administrators install drivers, authorization is not a problem. It's another matter when you need regular users to install the driver. Even after the driver is posted, users will not be able to install it because only an administrator can approve the driver installation without a valid signature.
You can only get a self-signed certificate that is valid within an organization from a CA server under management. Windows Server with running certification services ( Certificate Services). Such a certificate is not valid in another organization if there is no trust relationship between the organizations. Even internally, Microsoft recommends using this procedure only on a test network, and in a production environment only installing drivers with a valid signature.
For a signed device driver to be used by other organizations, the certificate must be issued by a trusted external CA, such as VeriSign. Obtaining such a certificate is much more difficult. For users to install the driver without a trusted signature, you must sign the device driver package with a digital certificate, and then deliver the certificate to client computers. This saves users from having to check the reliability of the publisher or device driver.
The device driver package must be placed in the Secure Driver Store on the client computer so that a standard user can install the package without having administrative rights. Typically, it is preferable to deploy the certificate to client computers using Group Policy. It allows you to automatically install a certificate on all managed computers in a domain, organizational unit, or site.
The presence of a digital signature is a guarantee that the package came from the declared source (authenticity) without damage or alteration (integrity). The digital certificate serves as the identity of the organization. It is trustworthy because it is electronically verified by a certification authority.
The general procedure for signing a device driver is as follows:
- Create a digital certificate in the Certificates ( Certificates) on the certificate server. Alternatively, you can use the MakeCert utility.
- Add the certificate to the Trusted Root Certification Authorities store ( Trusted Root Certification Authorities). This operation is performed in the Console Certificates ( Certificates) by copying and pasting.
- Add the certificate to the Trusted Publishers store ( Trusted Publishers). This is also done in the Certificates snap-in ( Certificates).
- Sign the device driver package with a certificate. To do this, prepare INF file driver package, create a catalog file for the driver package, and sign the catalog file using the Signtool utility.
How to load drivers and services in Windows
For those who are interested in the internal structure of the operating room Windows systems, I suggest a little research. We will try to find out what is responsible for the order of loading drivers and services in Windows and whether this order can be changed.
First, let's take a look at the current system startup order using Sysinternals' LoadOrder program. The program will show us what is loaded and in what order when the operating system starts up.
As you can see from the figure, first the device drivers required to start the system are loaded, and then various Windows services. Since there are some differences between loading services and loading drivers, we will consider them separately.
Drivers
As a test case, let's take the Microsoft ACPI (Advanced Configuration and Power Interface) driver, which is responsible for hardware detection and power management. ACPI's job is to provide interoperability between the operating system and the hardware, so the ACPI driver is loaded first.
The Loadorder program provides rather limited information about the order of loading, so for more accurate data we go to the registry. Each driver and Windows service has its own subkey in the HKLM \ SYSTEM \ CurrentControlSet \ Services registry branch. The sections are named by the name of the driver \ service, respectively, we need the ACPI section.
Three registry parameters are responsible for the order in which the driver is loaded. Main parameter Start- defines the type of driver startup. Here are the rules by which drivers set the value of their Start parameter:
Drivers that should loaded by the bootloader when the operating system starts, indicate the value Start equal 0
(startup at system boot
). An example is the system bus drivers and the file system driver used at system boot;
A driver that not required directly to boot the system, points to Start value equal to 1
(system launch
). An example is a standard video card driver (VgaSave);
Driver, optional to boot the system, sets the value Start equal 2
(autostart). An example is a Multiple UNC Provider (MUP) driver that supports UNC names of remote resources (type);
Drivers, not required for the operating system to work(for example, network adapter drivers) indicate the value Start equal 3
(launch on demand
).
Also device drivers can use the parameters Group and Tag to control its boot order at system startup. The Group parameter is used by drivers \ services to indicate the group to which they belong, and the load order of the groups is determined by the parameter List located in HKLM \ SYSTEM \ CurrentControlSet \ Control \ ServiceGroupOrder \.
By the way, the Group parameter is optional. If the driver \ service is not included in any group, then it is loaded at the very end of the queue.
A driver can further refine the order of its loading by using the Tag parameter, which specifies the specific position of the driver in the group. The I / O manager sorts the drivers in the group by the value of this parameter, and drivers that do not have a Tag parameter are moved to the end of the list of drivers in the group.
Looking at the loading order, you might think that drivers with lower Tag values are loaded first, then with large ones, but this is not entirely true. The precedence of Tag parameter values within a group is defined under HKLM \ SYSTEM \ CurrentControlSet \ Control \ GroupOrderList.
For example, let's open the Boot Bus Extender binary parameter, which corresponds to the group of the same name, to which the ACPI driver belongs. The parameter is a set of double words (4 bytes each). The first word (highlighted in red) sets the total length of the variable (the number of double words), in our example 06. The rest of the double words are just tags. The ACPI driver has a tag of 01 (highlighted in green).
The priority of a tag is determined not by the value of the tag, but by its position: the higher the tag is located, the higher its priority in the group, and the higher the priority of the driver to which this tag corresponds. And since 01 is higher than the rest of the tags, then the ACPI driver is loaded first in the group.
Services
The order in which Windows services are loaded is slightly different from the order in which drivers are loaded. Take the automatic update service (wuauserv) as an example. It is not particularly critical for system operation and therefore is loaded last.
Go to the registry again. Service startup parameters are located in the HKLM \ SYSTEM \ CurrentControlSet \ Services \ wuauserv section. I have identified two main parameters that are responsible for the loading order of this service.
Windows services are started by the Service Control Manager (SCM) according to the parameter value Start... This parameter for services can take the following values:
Auto start (2) - the service starts automatically, immediately after starting the main SCM process Services.exe;
Launch on demand (3) - the service is launched as needed, at the request of any service or program;
Disabled (4) - the service is disabled and does not start under any conditions.
The values 0 (start at system boot) and 1 (start by system) for services cannot be specified, only for device drivers.
In addition, starting with Windows Vista \ Server 2008, another startup mode has appeared for services - delayed autorun. The parameter is responsible for it DelayedAutoStart = 1 which tells the SCM to automatically start this service with a delay. The SCM starts the services for which Delayed Start is selected after loading the services marked for autorun.
The start mode of services can be controlled not only from the registry, but also graphically, from the Services console.
Just like drivers, Windows services can use the Group parameter in their registry key to specify the group to which they belong. Now, for clarity, let's take our wuauserv service, located at the very end of the download list. Using the Group key, place it in the Event Log group, reboot and see the loading order in Loadorder. As you can see, the order has changed and wuauserv has risen from the last place, loading right after its classmate - the eventlog service. True, the order of placement within the group cannot be changed, since Tag is not used for services.
And one more parameter that indirectly affects the order of loading services - DependOnService... It indicates which services this service depends on. Accordingly, the service is not loaded until the services listed in DependOnService are loaded.
Dependencies work as follows - if the services are in the same group, then the dependent service is moved to the end of the list and starts after the services it depends on. If the groups are different, then the service simply will not start, and the SCM will generate an error.
This is shown more clearly in the Services snap-in, where on the Dependency tab both the services on which this service depends and the services that depend on it are specified.
So we found out in what order drivers and services are loaded in Windows and how this order can be changed. But before you rush to edit the registry, remember that the order of loading drivers and services is determined automatically, and you should not make changes to it without a good reason. Just one incorrectly set parameter can lead to a complete inoperability of the system, and not the fact that it can be restored. Therefore, before you start editing the registry, be sure to do it backup and it is also advisable to have bootable media on hand.