How to make a narrow train out of a wide train. Manufacturing a flexible cable for an LCD screen. How to glue a cable to the display - description of the method
To connect moving elements with the electronic filling of the device, flat cables are used. During operation, such cables can break, and the contact comes off or disappears. To find the cause of the malfunction and lack of contact, ring the cables with an ohmmeter, carefully bending the connecting tracks in different directions (to identify the lack of contact in each track of the cable).
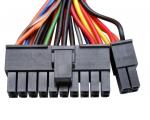
But... the train is different. For example, in computer technology, this is a slang name for a ribbon (flat) cable; such cables are usually used to connect hard drives, optical drives and other nodes to motherboard PC. Another thing is the loop in the security and fire alarm system - an electrical circuit connecting the output circuits of detectors, auxiliary elements and designed to transmit signals to the receiving and control device, and in some cases to supply power to the detectors. A cellular or (cordless) radiotelephone cable is a component that connects several moving parts of the phone and is designed to transmit an electronic signal from one part of the phone to another, such as from electronic board to the LCD display (indicator).
It was this section that failed in my radiotelephone (made in China) Texet TX-D5300; After falling to the floor from a height of 1.5 m, the display of the portable “tube” stopped displaying individual segments of symbols. I had to disassemble this radiotelephone and localize the fault, which consists of a partial loss of contact between the plastic cable track and the tinned contacts on the board with the display indicator.
The cost of such a cable varies in the range of 100-600 rubles, and therefore, in my opinion, taking into account the rapid obsolescence of a certain phone model, it is not reasonable to spend money on purchasing a new cable, and then also reserve time for its installation in the device; It’s easier to repair the old cable using additional jumpers, which I’ll talk about below. In Fig. 2 you can see that the contacts of the cable are glued to the display and in this part a quick and “economical” repair is not effective.
Rice. 2 Connection between cable and LCD
On the other side of the cable, the contacts are soldered to the board in a checkerboard pattern (Fig. 3).

Fig 3 View of the place where the cable is soldered to the main board
Loop repair technology
Filming back cover radiotelephone housing, 2 AA batteries. Unscrew the 2 screws accessible after removing the batteries and the cover. Use a flat-head screwdriver (placed in the joint in the area of the sound capsule above the display) to separate the two housing covers; after which 2 more screws become available. Having unscrewed them, remove the main printed circuit board. Then the plastic cover under the display is removed (it is held on with double-sided tape). After which it is already possible to test the loop, with the help of which a break is found in a specific track (tracks).
Using a medical needle, using a portable magnifying glass, clean the insulation of the cable conductors, periodically restoring the sharpening of the needle on a fine emery block; this problem can be solved quite easily. Then, with a soldering iron with a power of 25 W, with a piece of copper wire wound around a V-shaped oblique tip - as a thin and sharp tip, they solder the stripped sections of the cable, removing the remainder of the plastic insulation.
Using a scalpel blade (or a knife), clean a 1-2 mm section of the cable track and tin it. Then, using the same device placed on the soldering iron tip, the conductor is soldered to the printed circuit board. These operations are repeated as many times as the number of loop conductors need to be restored. An almost repaired cable is checked for gaps between all adjacent conductor tracks.
The next step is to wrap thermal film (suitable from a printer) or thick polyethylene in one layer near the newly soldered cable tracks. Then heat it with an iron until it melts slightly (the film of the cable begins to melt and sticks well to the board). At this stage, the main thing is to move the sting with gentle pressure, smoothly. They also solder the cable on the other side to the phone display board (in the case when the indicator is attached using rubberized tracks).
If one or more tracks of the cable are broken not at the edge, but in the middle (in the center of the length, usually this is noticeable visually even with the naked eye), to restore it, it is better to duplicate the tracks with pieces of thin flexible mounting wire, for example, MGTF-0.6.
Reassembling the radiotelephone housing is carried out in the reverse order.
Attention, important!
If the train is small in the number of tracks (for example, up to 10), it can be made literally “on the knee” by securing the wires into a homemade train from a wide adhesive plaster on a fabric basis. In this case, the wires are laid on a piece of plaster (corresponding to the length of the standard cable), one to the other and with the same insulating interval. The length of the conductors varies in a checkerboard pattern (except for the corresponding “pattern” on the printed circuit board, this is also necessary so that when soldering the next conductor, protect the soldering site of the previous one from touching the soldering iron tip, and, therefore, instantly desoldering it).
In the same way, you can quickly repair radiotelephones of other models, and even cell phones whose connecting cable has “broken” (a common malfunction of sliders and clamshells) or has partially lost contact.
Stuck on a shelf at homeseat seat from Walkman (D-NE920). Good player, BUT..... He doesn't plow.After analysis, it turned out that the reason lies in a broken head cable, so today I will show you how to fix the cable with your own hands.
Disassembly
There's nothing really special inside. The standard components for a CD player are a mechanically driven head and electronics.
Even before disassembly, it was established that half of the cable leading to the head was broken. Unfortunately, I lost the very first photo of what the train originally looked like ((
I was lucky because... the train was one-sided, although there are also double-sided ones. If the conductors pass from both sides, then the possibility of repairing such a loop becomes much more difficult. Although it all depends on manual dexterity and the width of the conductors. I haven't encountered anything like this. Typically, double-sided cables are used in cell phones and laptops to save space.
I received the player itself in a deplorable state and lay quietly on the shelf for a long time. To be honest, I don’t even understand how it was possible to manage to break the train like that.

Here is the player head with a torn cable. All tatters and damaged areas were cut off. Now I will show you how to fix the cable.
How to fix a cable, let's go...
In the photo above you can see that the side of the head is not cut straight, but like a ladder. The ladder goes along the cable conductors.

But there is a ladder on both sides of the cable break.
To restore and fully operate the cable, it is necessary to connect all the broken tracks, and for this it is necessary to solder wires instead of the missing parts of the cable. To reduce the likelihood of shorting the places where the wires are soldered to each other, it is better if they are not on the same line but separated by a ladder.
Tinning conductors
In order to everything went smoothly, it’s better to tin the wires right away (you can see how to do this in) and also tin the conductors on the cable. To do this, you need to clean off the top insulating layer.
I did this with the edge of a utility knife. It is enough to clean a small area, into which you then need to poke a soldering iron with tin dipped in rosin. The result should be a tin droplet.
Instead of the missing parts of the cable there will be wires from the headphones. They are convenient for three reasons:
- At home there will always be dead headphones.
- Such wires are a mixture of thin copper wires and nylon threads. Thanks to this they bend easily, more hardy and thinner.
- They varnished along the entire length. Accordingly, they do not need any outer insulating braid, which will only thicken them and impede their flexibility.
Soldering the wires

The first step was to restore the outer conductors. Actually, there is no difference where to start, it’s just that the outer contacts turned out to be thicker and the training was done on them)
There were still three thin (~0.1 mm) conductors left in the center. It seemed pointless to me to cut them together with the base of the cable, and in order to separate the soldering points, the excess parts of the conductors were simply torn off.

Now that all the wiring is soldered, you need to make sure there are no errors made during soldering. We take a multimeter in our hands, turn on the resistance measurement mode and check first of all whether we have shorted adjacent conductors to each other. If everything is fine, then now you need to ring each conductor from the beginning of the cable (connector) to the place where something is soldered to the cable:
Protective covering
If something is wrong, we look for it and fix it. When everything is okay, only the final touch remains. To protect against you never know I painted the soldering areas with nail polish and covered the problem area with tape.

To be honest, I had a little doubt about the tape; after all, the cable should bend easily when moving the head, but because of the tape, the cable became stiff, but it did bend)
We collect, try...

This is where the biggest disappointment awaited me... The problem was not only in the cable, but also in the electronics. When the player was connected to charging, it showed charging on the screen, but after lighting up for a couple of seconds it went out, and after that it no longer responded to any buttons. Disconnecting and reconnecting the charger only led to a repetition of the described...
It was 2 o’clock in the morning and the mood to fix things had noticeably diminished and the player went on collecting dust on the shelf... This is such a sad thing :-(
I hope that the information about cable repair was useful to you))
Cables are a type of wire that is used to connect various printed circuit boards and electronic elements inside a device. They have many varieties and soldering features. Depending on the internal cross-section of the installed contacts, the conductivity will be higher or lower. This also applies to the type of soldering material.
If the question arises of how to restore a cable if it is damaged yourself, then many different nuances should be taken into account. The article will describe the main elements and provide information on how to solder contacts on various devices.
Peculiarities
Before you start considering the question of how to restore a torn cable, you should study its features. Depending on the type of device or circuit board, this type wires can be either flat or circular in cross-section. In addition, various elements in the form of technical varnish, graphite coating or rubberized braiding can be applied over the contacts and the conductor itself.
If the cable on the moving modules of the device is damaged, for example, on the print head of the printer, then it is necessary to clean the contacts from the rubberized braid. Loops on screens and phones can be applied on top of a printed silicon board. They have a flat appearance and are protected by graphite coating.
Purpose
The main purpose of each loop is to transmit short or long electrical impulse between device modules. Depending on the type and thickness, as well as the material of the conductor, the signal is transmitted at a certain speed.
This is important to consider, since if it is necessary to replace the conductive element itself, a copper wire of the required alloy will be required. Otherwise, contact may not proceed. The cables are convenient to place in compact equipment models due to their small size. Often this type of connection is used in mobile phones, laptops or screens.
Conductors can vary in the number of wires and contacts inside. Stubs with a single conductor element are usually installed on top of silicon circuit boards. If you need to connect a screen or HDD, then the multi-threaded connection type will be used. It can have up to 40 grip points. It is these cables that are most often subject to damage, since soldering occurs on all contacts. If at least one of them is damaged, the device will cease to function normally.
Malfunctions related to damage
Determining that equipment is damaged due to a loop is quite simple. If you look at the screen of a laptop or TV, then due to damage to the conductor, the matrix will begin to flicker or the image will partially disappear. This is due to the fact that such a connection channel to the main board is responsible for projecting the signal. The damaged area will be broadcast with interruptions in the image precisely at the point where the contacts are soldered.

In any case, you can make sure that the problem is in the cable only by disassembling the device itself and checking the voltage at each of its contacts. Usually such interruptions are visible to the naked eye.
The main visual signs of damage include the following:
- Darkening in places where there's a vein coming plume.
- Kinks and tears in the tape.
- Damaged contacts at solder points.
In any case, such problems cannot be corrected with ordinary glue. Here you will need rosin, tin, alcohol and a soldering station.
Which devices often need repairs?
Every time the owner household appliances and the electronics engineer is faced with the question of how to restore the cable, he must understand that the operation of soldering or stripping the contacts itself carries a certain risk. Having corrected the problem on the cable without necessary tools or materials, there is a risk of damaging adjacent modules.
The owners of the workshops become frequent clients:
- TVs, monitors, laptop screens.
- Keyboards.
- Laptops and PCs.
- Phones.
The problem is not the quality of the conductors themselves, but the risk of damage to them. If we consider a mobile phone, the cable is mainly damaged due to contact with liquid. As a result, the contacts burn out at the soldering points.
Keyboard wires wear out from frequent use of keys and switches. This leads to the fact that the conductor itself wears off over time and conductivity decreases. If we consider laptops and personal computers, then the problem may arise due to a voltage surge or incorrect connection of the conductor itself.
Screens
The question of how to restore the display cable is quite complex. It all depends on the brand and model of the matrix and the boards to which such a screen is attached. It could be a laptop, monitor, tablet, all-in-one or TV. Each of the listed devices uses its own soldering method and technology for applying binding materials.
Damaged contacts at the coupling points must be completely cleaned. You can use a blade or scalpel for this. Then you will need to strip the wires to fix them in place where they are soldered to the board. It is better to use a soldering iron with a small tip to prevent tin from getting on other elements. If you need to build up a damaged area if it breaks or bends, then you will need similar model wires. You can find it on the radio market or on the Internet, on thematic resources.

When considering the question of how to restore a cable on a matrix, it is necessary to test each connected element or contact before starting the repair. This is done using a voltmeter. It shows the voltage at each section. This must be done in order to not only find the source of the damage, but also its cause, which may be a damaged part.
Keyboards
Fans of computer games and constant correspondence become frequent clients of workshops asking how to restore a cable on a keyboard. It is a common practice for a keyboard to become unusable after several years of active use.
A frayed cable will have to be replaced. For these purposes, you will need copper wire of a suitable cross-section. The contact itself is flat and located over the entire area of the printed circuit board, which is responsible for transmitting information after pressing a specific button on the keyboard. You will need to clean the varnish layer and remove the frayed wire. After this, a new one is placed in its place and fixed with conductive glue. Then technical varnish is applied.
It is not difficult to restore the keyboard cable. If performed correctly, the operation will take no more than 30-40 minutes. The main thing is that all contacts are well treated with varnish and glue.
Laptops
There are several ways to restore a laptop cable. The contacts and wires located on the motherboard are of a replaceable type. If damage is detected on them, it is better to replace the wire itself. It costs much less than the materials that would be required to restore it.
If you cannot find the components, you can replace it. To do this, you will need to select a suitable wire cross-section. This method not suitable for multi-core cables.
The damaged conductor is removed from the contact point on the board. After this, the braided wire is carefully threaded into the forks at the clutch points. They use latches so you can secure them with a flathead screwdriver.
If it is necessary to restore a multi-core cable, then the damaged area should be cleaned and the break should be extended using conductor compound. Conductive glue is often used for these purposes.
Phones
Another popular question is how to restore a cable on a phone after it gets into water. Upon contact with it, the screen of the mobile device begins to darken. This is a sign that the cable contacts on the matrix are damaged.

In order to fix this, you will need to replace the conductor. It must be carefully cut away from the place where it is fixed on the main board and disconnected from the phone screen. After purchasing a new wire, it should first be soldered to the main board exactly in the place where the old wire was. Next, the contacts are attached to the smartphone matrix.
What you need to know about recovery
If we talk about how to restore a track on a cable, then first of all you should understand the procedure for repairing such a conductor. A special feature of the tracks is that they are not contained in a protected casing or rubber braid, but on the printed circuit board itself.
The main difficulty is that the contacts are flat, and in order to remove them you will need to clean off the base layer of protective varnish. To correct the damage, they can be replaced with wires and round copper fishing line. The conductor is fixed using conductive glue. After this, varnish is applied on top.

When connecting a stranded conductor, it is important that each individual contact is well soldered. You can verify the conductivity of all flows using a voltmeter.
What materials and tools will be required
When considering the question of how to restore a track on a cable, you need to know what materials and tools will be needed to perform this action.
In most cases, when repairing or replacing a conductor, a soldering iron or soldering station will be needed. When using a nozzle, it is important to install the needle as a heater, since it is this that will allow you to accurately apply the tin to adhere all the elements.
Technical varnish and conductive glue will also be needed when repairing the cable. Depending on its type and shape, you will have to purchase consumables in the form of wires of the required size and cross-section. In order to increase the accuracy of the adhesion of each element, it is recommended to use a magnifying glass or microscope.
How the repair is carried out
There are several ways to restore the loop contacts. The main and simplest of them is the use of conductive glue. It can be found in specialized equipment repair stores.
All types of work differ depending on the device model and the nature of the damage. The general procedure for performing recovery is as follows:
- Clean the cable where it is damaged.
- Remove the damaged area.
- Apply glue or install a new conductor.
- Secure the wire at the junction.
- Using a soldering station, apply tin for joining.
- Apply a protective layer of varnish over the conductor or wrap the conductor with electrical tape.
Do not start the device right away, as the protective layer of varnish or tin may not fully harden. It is important to be careful when applying all liquid solutions to the board to avoid touching other conductive components.
Precautionary measures
When considering the question of whether the cable can be restored, it is important to know what problems may arise during this action. It is not recommended to solder the conductor on its own. modern smartphones. Unlike older phone models, special equipment will be required to repair matrices. It will be impossible to do this at home using a blowtorch.

When replacing a conductor, only use an identical one. If you replace it with a high- or low-conductivity one, as a result of a voltage surge, the connected element may completely fail. After replacement, all stripped elements must be covered with a protective layer. They should not be left open, as this may lead to overheating of the conductor itself.
What to do if the cable installation failed
Having figured out how to restore the cable, you can get to work. To achieve a successful result, you must carefully follow each step and apply the solder adhesive carefully. Only after the applied mass has hardened can the device be tested. To do this, check the voltage level on the connected element with a voltmeter.
If there is no voltage and the cable itself does not function, it is better to seek help from a specialized workshop. Not all parts and cables can be glued or soldered at home.
However, experienced specialists note that a set of tools and materials will not be enough to carry out soldering. To do this, expensive equipment and various devices are used, which would be problematic to purchase on your own. Therefore, to avoid the risk of damage, it is better to immediately seek help from professionals.
Articles and Lifehacks
Printed circuit boards and moving elements of modern mobile technology are connected to each other thanks to flat conductors, also called cables.
During active use of the device, one of these cables often breaks, and the owner of the device begins to wonder how to restore the cable on the phone.
Our article is for those who have certain technical skills; it will tell you how to make repairs yourself in this situation.
What is needed for recovery
Modern mobile devices are quickly going out of fashion and are constantly being replaced by others.However, not every user is ready to post cash not only for the purchase of an improved smartphone, but also for the purchase and installation of a new cable that has failed.
- If we figure it out mobile device, we will see that the contacts are glued directly to the display, and in this situation we are unlikely to be able to do anything. From the opposite end, the cables are connected to the board in a certain sequence.
- To find a faulty conductor, use a device called an ohmmeter. At the same time, the connecting elements are carefully bent in opposite directions to reveal the “flickering” contact.
- For repairs, we will need a set of materials and special tools, including a flat-head screwdriver, a magnifying glass, a needle, alcohol, sandpaper, a soldering iron, thermal film (thick polyethylene), adhesive tape and a multi-core MGTF cable.
Instructions for restoring the cable

- Remove the back cover of the device and remove the battery. After this, unscrew the fastening screws using a screwdriver.
- Remove the main board and the plastic cover under the screen. It is attached with 2-sided tape.
- Now you can look for a break on a specific path. We remove the insulation with a needle, making it easier to see with a magnifying glass. It is better to sharpen the needle sometimes.
- We wind a piece of copper wire around the tip of our soldering iron. It is best if we use a low power device (up to 25 watts). We solder the stripped sections of the conductor, eliminating the remnants of what was insulation.
- We prepare the cleaned edge of the torn cable (about 1.2 millimeters) for soldering to the main board. If several conductors are damaged, repeat the above action for each of them.
- Now we solder the edges to the board and check for gaps between the tracks.
- We take the thermal film and wrap it at the soldered edges of the cable in 1 layer. We warm it up until it starts to melt and sticks to the tape.
In this case, a regular iron can be used. The main thing is to use it carefully and smoothly, avoiding strong pressure. If necessary, warm up the cable and reverse side.
- If the track breaks off not at the edge, but in the center, it is best to duplicate it with pieces of mounting wire. Now you can start assembling your mobile device.
Are you familiar with the principle of connecting all moving elements with printed circuit board in all modern mobile technologies? The connection of these elements is achieved using cables. During continuous use, this component may fail. How to repair and restore the cable on your phone? Users without experience immediately panic and start searching for the nearest service center. But in a workshop, plumbing services cost quite a lot of money, and who likes unexpected expenses? This article will help those users who have basic knowledge of working with modern technology. Today we will try to repair, solder and connect the cable using our own efforts.
A little about the device and the work ahead
Modern models mobile phones very quickly lose their former relevance, because they are replaced by new versions of devices. Not every user is ready to pay a large amount of money in order to get a new one. powerful smartphone. Therefore, it is necessary to restore the loop. The components for such devices are not very expensive, but installing them is a rather expensive undertaking.
Is it possible to repair the cable yourself? If you disassemble your gadget, you will see that the contact pads are attached directly to the display. On the back of the case, these parts are attached to the printed circuit board in a certain sequence.
Important! In order to determine the malfunction, you need to get a brand new multimeter, which will have a built-in ohmmeter to measure resistance. In the same service centers, the connecting components are bent in opposite directions to identify the problematic contact.
If other problems are identified during the diagnosis, we advise you to eliminate them at the same time. Perhaps in this case you will find our other publications useful:
Tools
To carry out repairs at home, you need to be well prepared and find special materials and tools, such as:
- Flathead screwdriver.
- Magnifying glass.
- Needle.
- Alcohol solution.
- Sandpaper.
- Soldering Station.
- Thick layer of polyethylene.
- Adhesive tape and multi-core cable MGTF.
Important! Before you start restoration work, think several times. All manipulations are not particularly difficult if you have ever done anything similar. If you are not 100% sure of success, we still recommend finding service center, where skilled workers will take matters into their own hands.

Method one
In order to repair the phone cable, you need to perform the following steps:
- Remove the back cover of your device and remove the battery.
- Now you need to unscrew the fastening screws using a flat-head screwdriver.
- Remove the main circuit board and the plastic trim that is located under the screen. The last component is attached with double-sided tape.
- Next, you need to start looking for a gap in any of the tracks. To do this, you need to get rid of the insulation with a needle.
Important! To make the procedure easier, use a magnifying glass.
- We take a soldering iron in our hands and wrap a piece of copper wire around its tip. A component with low power parameters (about 20-25 watts) is best suited. Unsolder the remaining wire insulation.
- The edge that has just been cleaned needs to be prepared for connection to the board.
Important! If for some reason several conductors were damaged at once, then repeat the last manipulation for each of them.
- If you are done with the previous point, then move on to the soldering itself. We solder the edges onto the printed circuit board and carefully inspect the entire circuit for any gaps between the tracks.
- Take thermal film or a layer of polyethylene in your hands and wrap it around the edges of the soldered cable in at least one layer. Warm up the whole thing until the film melts, thereby gluing it to the tape. An iron is perfect for this action, but you need to take into account that the entire procedure must be carried out with extreme caution.
- It happens that the path breaks not at the edges, but in the very center. To fix this problem, it is best to duplicate this track using pieces of the mounting conductor.
- Now we assemble the mobile device in reverse order and check its functionality.
Important! You should also know that you can make the train yourself. To do this, you need to place the conductors on a layer of ordinary medical plaster.
How to repair a phone cable in another way? Everything is very simple.

Method two
Restoration work can also be carried out as follows:
- First, grind a small amount of rosin to a powder and dissolve it in an alcohol solution. To create a solution, use a proportional ratio of one to six.
- Now we take the good old “Moment” glue in our hands and glue the damaged area onto an insulated plate. Then you need to put this connection under the most ordinary technical microscope, which everyone used in biology lessons at school.
- Let's start removing the insulation. The tool you can use is a scalpel or a small knife. We remove about 1.5 mm of wire at the break point. Next you need to apply a little of the solution that was in the first step to a section of the tape. Use a brush to apply the mixture. After application, touch the soldering iron tip to this area of the cable.
- Remove the varnish using a scalpel and thoroughly lubricate this section with a solution of rosin and alcohol. Tin the conductor 25 mm from its edge and carefully solder it to the outermost trace in relation to the outermost cable.
Important! For convenience, it is better to lift the wire in the middle above those parts that are damaged.
- We bend a section of the wire, which we connect the two sides of the non-working track and use wire cutters to bite off the excess parts that were formed during the work. All that remains is to solder the cable to the board.
- If there is a need to “extend” the cable, then use another section of the cable with the appropriate geometric dimensions. Cut the component perpendicular to the damaged area.
- We clean, connect and solder both halves. We isolate the sections of the wire that are exposed and assemble the mobile phone in the reverse order.