How to close the dialog box in Word. How do I close the dialog? What to do if the dialog box does not close
Application dialog boxes are not standalone programs and are designed to request some parameters from the user. Most dialog boxes are modal, which prevents you from continuing to work with the application until you have finished working with the dialog box.
Instructions
You will need
- - Internet connection;
- - a program that changes the appearance of the windows of the operating system.
Instructions
Consider the sequence of user actions to open the required document and the purpose of the main elements of the dialog box Opening a document(Open) (Figure 2.12). (To display it, select the command Open(Open) on the menu File(File)).
Rice. 2.12... Open Document dialog box
Opening a Document Using a Dialog Box
To open a document, follow these steps:
- In the list Folder(Look in) or in the address bar on the left side of the window, select the drive, folder or Internet address where the document you want to open is located. Click the button on the right side of the field to open the list. Documents on the network can be opened without connecting to a server if the network supports UNC addresses.
- In the folder list, double-click the folders in sequence until you open the folder containing the document you are looking for. To move to a higher level folder, press the key Backspace... Enter in the text box File name(File name) the name of the file to open.
- Select the format of the opened document in the list File type(Files of type). To view all files in the current folder, select All files(All Files). Office lets you open a document created in another program, such as WordPerfect.
If you move the mouse pointer over the file icon, a hint will be displayed with brief information about the file: Type of(Type), The size(Size).
To open multiple files from the list at the same time, in random order, click the name of a file, then press CTRL and without releasing it, click the remaining files. To select files in a row in the list, click the name of the first file while holding down the SHIFT, click the name of the last file.
Possible options for opening a document
By clicking the arrow next to the button Open(Open) in a dialog box Opening a document(Open), you will see a dropdown. Below is the purpose of some of the list items:
- Open(Open) - opens the selected document.
- Open for reading(Open Read Only) - Opens the selected document read-only to avoid accidental changes. To save changes to a read-only document, choose Save as(Save As) and save the document with a different name.
- Open as copy(Open as Copy) - opens a copy of the selected document; to protect the file from accidental changes. A copy is created in the folder containing the original document.
- Open in browser(Open in Browser) - Opens the file in the browser (Internet Explorer). The command is available only after selecting an HTML document. (Web pages).
- Open and restore(Open and Repair) - allows you to recover a damaged file (see below the section "Document and Application Recovery").
Address bar in the Open Document dialog box
Shortcuts in the address bar along the left side of the dialog box Opening a document(Open) provide quick access to frequently used folders:
- My latest documents(My Recent Documents) - contains shortcuts of all files that you have worked with recently, sorted by date and time.
- Desktop(Desktop) - contains shortcuts to objects that are visible on the desktop.
- My documents(My Documents) - opens a folder My documents(My Documents). It is recommended to put files and folders with which the user often works in it.
- My computer(My Computer) - opens the My Computer folder. Provides quick access to folders and files stored on hard and floppy disks in the Shared Documents and User Documents folders.
- My Network Neighborhood(My Network Places) - Allows you to open a document stored on a server on a network or on the Internet, including My MSN Sites.
The user interface structure in Word includes features designed to make it easier to work with the applications you use most. The Word user interface (ribbon) is located at the top of the workspace, contains tabs, context commands, and other elements related to the current task (Figure 1). The Ribbon brings the most common commands to the front, so you don't have to search for commonly used commands in different parts of the application.
Fig. 1. View of the Word 2007 window after loading the application
The user interface is a collection of the following components.
Command tabs
Home, Insert, Page Layout, Links, Mailings, Review and View in Word, located in a horizontal row on the screen, just below the window's title bar. The content of each tab has been carefully thought out based on user experience. Command tabs in Word serve a variety of purposes.
Groups of teams
Each tab has several groups that display common-purpose teams. So for the tab home there are five groups: Buffer exchange, Font, Paragraph, Styles and Editing.
Command is a button, field for entering information or a menu.
Traditional dialog boxes
Several sets of commands in the user interface are also available in traditional dialog boxes. The dialog box can be opened by clicking on the dialog box switch in the lower right corner of the command group (Figure 2). This arrow is called dialog box button.


Fig. 2. The result of pressing the dialog box launch button
Clicking on it will display additional options associated with that group. These features are often displayed as a dialog box, similar to dialog boxes in the previous version of Word, or as a familiar task pane.
Show additional tabs
In Word, some tabs only appear as needed. For example, a picture was inserted into the document, and now you need to perform some actions with it, crop it or change the style of text wrapping around the picture.
When you select a picture, an additional tab appears on the ribbon Format, which contains groups of commands for working with pictures (Fig. 3).

Fig. 3. Additional tabFormat
If you click outside of the picture, the tab Format will disappear.
When working with other objects, such as tables, images, charts, and graphs, additional tabs also appear.
Mini Toolbar
Some formatting commands are used so frequently that it is convenient to have access to them in any mode of operation.
Suppose you want to quickly format some text, but you are working with a tab Page layout... You can click the tab to display the formatting tools. home, but there is also a faster way: select the text and then move the mouse pointer over it - a semi-transparent mini-toolbar will appear. When you hover over the mini toolbar, it is displayed clearly and you can click the formatting tools located on it (Figure 4).

Fig. 4. Mini Toolbar
Interactive preview
An interactive preview lets you try out an item before selecting it. Now, when considering the use of a particular option, for example, in the gallery Page color shown in Figure 5, you can hover over it. At the same time, this parameter will apply to the Word document, and you can figure out how the document will look in this case.

Fig. 5. Interactive preview
Quick Access Toolbar
The Quick Access Toolbar is a small area in the upper left corner of the Word window. It contains commands that are reused every day: Save, Cancel, Repeat... You can also put other commands in this panel, which will be available regardless of which tab is active.
To do this, click on the button Customization panels quick access(fig. 6) . In the list that appears, select the required commands. If there are no such commands in the specified list, then click on the line Other commands ... and select the required ones from the complete list of commands.
Fig. 6. Quick Access Toolbar
Hide the ribbon temporarily
With the ribbon, all Word commands are in one place and easy to find. However, sometimes you don't need to look for anything. If you just need to work with the document, it is desirable to have more space for it. Hiding the ribbon is as easy as working with it.
Double click the active tab. The groups disappear, making room for the document.
To display all commands again, double-click the active tab. The groups will return to their place.
Another way to enable / disable the ribbon is to right-click on any command on the ribbon and select the option Collapse the ribbon(fig. 7).

Fig. 7. Enabling / disabling the tape using the optionCollapse the ribbon
Main menu
To enter Main menu the button with the Microsoft Office 2007 logo is used. Main menu contains two panels. The main commands for working with files are displayed on the left; on the right, when you hover the mouse pointer over one of the commands, the options corresponding to those commands are displayed.
Initially, when you open the menu, the right pane displays a list of recent documents that the user has worked with (Fig. 8).

Fig. 8.The main thing menu displays additional options when hovering over basic commands
Table 1 shows the purpose of some of the commands. Main menu and quick access bars.
Instructions
Helpful advice
The Y and N accelerators can be used as an alternative to the Yes and No buttons.
Sources:
- Dialog boxes and standard controls
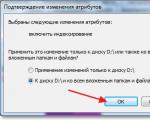
A dialog box can be called almost any auxiliary window that appears on the monitor screen, containing buttons and various controls with which the user can execute various commands. Through such windows, the user "communicates" with the system - specifies the desired settings, confirms or cancels his actions. There are several ways to remove the dialog box.
Instructions
Almost all dialog boxes can be closed using three buttons, depending on the type of the dialog box. In the notification window, when the system informs or warns you about something, as a rule, there is only one button - OK. Click on it to "reply" to the system and close the window.
When the system (or application) offers a choice, another Cancel button appears in the dialog box. If you want to interrupt any running process and close the dialog, click on it. In some windows, the labels on the buttons may have a different look, instead of OK and Cancel, you can see the labels “Yes” and “No”.
Another option is to click on the X in the upper right corner of the window. This button closes the dialog box, and in certain cases, the process that the system has notified of is interrupted. In other cases, closing the dialog in this way has no effect.
If you yourself called a dialog box, for example, "Properties: Display", it means that you were going to change the appearance of the "Desktop" or see the current settings. Depending on what goal was set, you will need to perform certain actions. To make the changes in the settings made by you, take effect, before closing the dialog box, click on the "Apply" button.
The windows are closed by single clicking the left mouse button on the corresponding button in the dialog box (if your mouse is configured for the left hand, then use the right mouse button). The keyboard keys can be used as an alternative to pressing the OK and Cancel (Yes and No) buttons. Enter key - confirmation, Esc key, respectively, refusal.
You can also interrupt the process and close the dialog with another button. Press the F4 key (or Alt-F4 combination) on the keyboard - the window will be closed. This key can also be used to urgently close most of the applications running on the computer.
www.kakprosto.ru
How to close a dialog box
Do you have a dialog on your screen that doesn't want to disappear and would you like to get rid of it? There are several ways you can take to remove it.
Actions
1. Understand that dialog boxes are displayed when there may be a problem with your computer

The creator of the program wants to make sure that the user is aware of the implications of being able to take an action and that you know that the process is undoing the change (if it ends inadvertently).
2. Respond to the dialog

Click OK or Cancel / Close in the dialog box. Traditionally, when closing them, you can click one of the boxes.
3. Close the dialog with the alternative buttons

Click the x button in the upper right corner of the dialog you want to close. Pressing this button should close the window and make it disappear. However, this can sometimes cause alternative other windows to open instead.
4. Use the context-Close task from the taskbar list for the dialog box that appears

Right-click the icon that refers to the dialog box on the Windows taskbar and click Close. Again, you can end up with others by doing this, but this dialog will disappear.
5. Use the Windows Task Manager

(if you are using them on a Windows PC). Open the Windows Task Manager (from the Applications tab), highlight the line in the dialog box and click End Task. If the dialog box is stubborn, you may need to do this several times (without clicking End Task for the dialog box to disappear completely).
6. Close the entire program and any other open programs

Do this if no other ideas succeed in closing the problematic dialog box.
7. Save your work

(if the program still allows you, as some programs are running in the background away from the dialog box) and restart the whole system from scratch. Hold the power button for 30 seconds. Release, let the computer cool down and restart the computer after 30-60 seconds.
- iOS (iPhone, iPod touch and iPads) dialog boxes rarely appear. When they do this, you will only have the opportunity to answer the question and click "OK". If the field does not apply, click Cancel.
Warnings
- If you ever get a dialog that says your computer is having malware problems from a program you don't recognize, you will have to close it.
- However, never press any of the buttons. Go straight to the task manager and complete the task of this button just before doing any other tasks on your computer.
kakdelayut.ru
How do I close the dialog?
Application dialog boxes are not standalone programs and are designed to request some parameters from the user. Most dialog boxes are modal, which prevents you from continuing to work with the application until you have finished working with the dialog box.
Instructions
You will need
- - Internet connection;
- - a program that changes the appearance of the windows of the operating system.
Instructions
imguru.ru
For dialog boxes
| Action | |
| Canceling the current job | |
| Button press Checking or unchecking a check box Parameter selection | |
| Team selection | Alt + underlined letter |
| Pressing the highlighted button | |
| Backward through parameters | |
| Move back through tabs | CTRL + SHIFT + TAB |
| Move forward in parameters | |
| Move forward through tabs | |
| Opens a folder one level up from the folder selected in the Save As or Open window. | |
| Opens a save or search window in the Save As or Open dialog box | |
| Action | |
| Bypass auto play when CD is inserted | Hold down the SHIFT key while inserting the CD |
| Copying a file | Hold down CTRL while dragging the file |
| Create shortcut | Hold CTRL + SHIFT while dragging the file |
| Removing an item without placing it in the trash | |
| Opens the Find: All Files window | |
| Calling the context menu of an element | CONTEXT key |
| Refreshing the contents of the window | |
| Renaming an item | |
| Selecting all elements | |
| Opening the Properties Window for an Element | ALT + ENTER or ALT + double click |
Text editors are programs designed for entering and editing text, but many of them are not limited to this. One of these programs is Microsoft Word.
With Word 97, you can create any document - be it a simple memo, a Web page, or a 500-page report. Word is surprisingly easy to use.
The program window, like the windows of many other programs, consists of a title bar that displays the name of the document and the program; the working area of the document, where you can enter and edit text; a menu bar, with menu items that open drop-down lists of commands; toolbars whose buttons allow you to select frequently encountered commands With a mouse click, the status bar displays information about the document and the status switches.
When working with Word, commands are used that tell Word exactly what to do. Word commands are on menus, and most of them can be invoked using toolbars. The method is selected at the request of the user. To select a menu command, do the following:
A menu opens by clicking on its name in the menu bar. You can also open a menu by pressing the key and then the underlined letter key in the menu name. For example, (hold down press) to open the file menu.
In the open menu, click on the required command name or press the key corresponding to the letter underlined in the command name.
Many Word commands use dialog boxes; Word uses these boxes to provide additional information needed to execute the command. Each dialog box is different, but each has the same basic elements.
In the dialog box, by pressing the key, you can move from field to field; by pressing, you can move through the fields of the window in the opposite direction. You can click in the selected field, or press together with the underlined letter key in the field name. When everything you want is selected in the dialog box, you must click or click on the OK button for Word to accept the selection and execute the command. By clicking the Cancel button or pressing a key, you can close the dialog box without executing the command.
Word displays a flickering vertical line in the work area of its window. This is the cursor, or insertion point, that indicates the place in the document where text will be entered and where editorial changes can be made. You use the keyboard to enter text. No need to press a key at the end of a line — Word will automatically jump to a new line when it reaches the right margin. Press only when you want to start a new paragraph
If a mistake is made, there is an opportunity to correct it.
Press the key to delete characters to the left of the cursor
Press the key to delete characters to the right of the cursor
You can move the cursor to add and edit text anywhere in the document
When you are finished working in Word, there are several ways to close this program. They all give the same result.
Select the command File Exit.
Click on the "Close" button in the title bar of the program window.
If the document is not saved, Word will offer to save it before exiting the program. If you do not want to save it, just select the Cancel button.
Word allows you to do more than just enter and edit text. Its capabilities are much wider:
Formatting text, with setting indents and highlighting the first line, aligning it in the center, in width or along one of the edges.
Automatic pagination and creation of headers and footers.
Automatic search and replacement of text.
Create, insert and edit drawings.
Creation of tables.
Creation of interactive fields and document management macros.
Embedding documents from other applications. For example, such as MS Excel workbooks.