Acer laptop keyboard repair. Rules for cleaning a laptop keyboard on your own How to clean a keyboard on a laptop
If the laptop keyboard is flooded or stained with crumbs, you can clean it at home. How exactly, find out in the article.
Even if someone has not yet encountered such a problem as a keyboard filled with some kind of liquid (and this happens very often!), Then clean it from dust, food crumbs or sebum that got there, which everyone has and with regular using a laptop remains on the keys, over time everyone will have to. Therefore, the question of whether and how to wash, clean and refresh the keyboard is very relevant.
Can you wash a laptop keyboard?
It is possible, even necessary, especially if any liquid has been spilled on it. Moreover, this must be done immediately, without waiting until it (tea, coffee, beer, cola, etc.) penetrates the laptop and does not spoil not only the keyboard, but also its other components.
IMPORTANT: It is clear that we are not talking about washing with strong water and full immersion. It is necessary to carefully remove and clean the keyboard itself
If cleaning is carried out in order to get rid of dust, because the buttons began to sink, or for some other reason, then for this you need to allocate two or three hours of your time, because the work is painstaking.
You can, however, take the device to a service center, where specialists will work on it. You can do everything yourself.
How and how to clean the buttons on a laptop?
It is best to clean the buttons on a laptop with isopropyl alcohol or special keyboard liquid, which is sold in computer departments.
IMPORTANT: Before you start cleaning the keyboard, you must turn off the laptop, unplug it and remove the battery from it
If the "rescue" of the keyboard takes place in emergency mode, then you can not turn off the laptop, just unplug it and remove the battery
- Before removing the buttons, you need to make sure how to properly return them to their own places. To do this, you need to either take a picture of the keyboard, or lay the buttons in the same order as they were removed (this method is only suitable when a person is cleaning the keyboard himself, so that no one moves these buttons while they are waiting for their return to their place, neither a child nor animal, nor an accidental movement of one's own hand).
- An ordinary knife, a small screwdriver or a nail file will help to remove the buttons. The tool used is brought under the angle of the key and carefully pry it up. It is better to learn how to remove keys from a laptop keyboard, starting with some little-used key, for example, from a hard sign or from the letter “ё”.
- You can wash the keyboard buttons with a brush (toothbrush, napkin, cotton pad), removing them from it and lowering them into a soapy solution and cleaning their inner and outer surfaces from dirt and dust.
Before attaching them to the keyboard again, they must be thoroughly dried. - If you managed to carefully remove all the keys, then putting them back is also not difficult. The key must be carefully adjusted to the desired position and then pressed lightly. If the key is placed correctly, an audible click should occur - the key is fixed.
For larger keys, spacebar, shift, enter, you may need to attach a metal mount first, but this is also not difficult at all.


VIDEO: How to remove and insert back the laptop key?
How and how to clean the keyboard from dust, debris, dirt?
You can clean the keyboard from dust and dirt by doing a superficial cleaning, or doing a “general” one.
- Surface cleaning includes wiping the keys with a damp (not wet!) napkin or cloth, cleaning the gaps between the keys with a brush, vacuum cleaner, hair dryer or compressed air canister.
- "General" cleaning means that you have to remove the keys, all or part of them and wash them with soapy water or wipe with isopropyl alcohol.
The algorithm of actions will look like this:
- finish work on laptop
- disconnect it from the power supply
- take out the battery
- take a picture of the keyboard if there is a “general” cleaning
- carry out clean-up work
- assemble the buttons on the keyboard
 You can remove the buttons from the keyboard with a screwdriver.
 On sale there are special rubber Velcro nozzles for cleaning the keyboard.
Such a nozzle is superimposed on the keys and slightly pressed down. Due to its properties, it fills the interior of the keyboard and absorbs dirt from it. After it is easily removed.


How and how to clean a flooded laptop keyboard?
A flooded laptop keyboard must be cleaned and dried, otherwise the liquid that was splashed or poured onto it will flood the parts, they will begin to rot and fail. Worse, all sorts of Coca-Cola and other drinks can enter into chemical reactions with the details of the laptop, which will also lead to big problems with it.
- The buttons on the keyboard will have to be removed, washed and dried thoroughly.
You may need to disassemble the keyboard further, removing and cleaning the layers under the keyboard buttons (three film layers with contacts and tracks on them). If the liquid has flowed on or under these layers, they will also have to be removed and washed. - The layers are connected and glued. They need to be carefully separated from each other, trying not to hurt the tracks and contacts. First, the rubber gasket that protects them is removed. She pulls out with no problem.
- Each layer is washed and dried.
- A hair dryer will help speed up the process, only its air stream should not be hot, otherwise the contacts may melt.

The question of how to wash the keys and the inner layers of the keyboard remains open.
- Water, especially tap water with impurities, is not the best remedy. If you really use it, then take distilled water for this purpose.
- The best option is alcohol, ethyl 96%. It will wash well and quickly disappear, and will also absorb water.
- You can flush with the same isopropyl alcohol.
- The keyboard rubber pad can also be washed under running tap water.
Wiping the layers, be sure to pay attention to the tracks - they should not be damaged. Unfortunately, if the keyboard is thoroughly flooded, or time has passed, the tracks may be damaged - oxidized, crumbled, cracked, and so on. But they can be restored using conductive varnish. It is sold in auto shops. With such a varnish, those parts of the tracks that are damaged are drawn.
Lacquer must be applied carefully so that there is no short circuit between the tracks.
VIDEO: L izun keyboard cleaning
How to properly remove keys from a laptop keyboard: disassembling the keyboard
The buttons are located on the so-called elevators. They are made of plastic, their role is to ensure the mobility of the button.
- You can remove the buttons first by removing the surfaces that cover them, then the elevators on which the surfaces are located.
- You can also get the hang of removing the buttons at the same time as the elevators.
By removing one face of the button (with or without a lift), you can see that each of them has three or four holes. For connecting elevators, each of which is fixed on one side with a hook, and on the other side with two latches. When disconnecting the lift, first you need to disconnect the latches, and then the hook. - Assemble the washed and cleaned keyboard in the reverse order, guided by the photograph of the keyboard, which was taken in advance in order to put all the buttons in their place: attach the button; hook the hook; press the button where the latches are to hear the click and feel the button lock.
How to clean a computer keyboard without disassembling?
Without disassembling the keyboard, the computer is cleaned of dust, crumbs and dirt:
- Vacuum cleaner (car vacuum cleaner). It must be set to blow, so that the resulting wave of air blows out crumbs and dust.
- Using a can of compressed air or a compressor. In the same way, crumbs and dust are blown out.
- With the help of a hair dryer, setting it to blow with a cold (not hot !!!) jet of air.
- Rubbing with alcohol or a special solution of the button and the gaps between them with cotton swabs.


Laptop Keyboard Cleaner
On sale there are special kits for cleaning laptops, which include a special liquid, a napkin and a brush.
Of the home-grown products, it is best suited:
- isopropyl alcohol, which can be slightly diluted
- distilled water, moisten a cloth or napkin with it and clean
- ordinary soapy water, which, however, must be used with care so that the cloth moistened with it is not too wet and moisture does not get on the laptop

VIDEO: K how to clean laptop keyboard?
No matter how carefully the owner of such a device handles a laptop, pollution of a different nature accumulates on the surface and in the inside of the keyboard of such a device over time. Pieces of horny hand skin, crumbs, hair, dust, animal hair - all this, accumulating on the surface and inside the laptop keyboard, can create obstacles for the correct operation of the device, and also cause it to fail.
The greatest danger to a laptop keyboard is drinks spilled on it, which can cause a short circuit inside the device, which will lead to the need to repair it or even replace it with a new one. You can clean the laptop keyboard in various ways, which are selected depending on the degree and nature of its contamination, the availability of various technical devices and consumables.
Cleaning the laptop keyboard, on which dust and various contaminants of a different nature necessarily accumulate, should be done regularly - once a month. Before starting, the laptop must be de-energized and the battery removed from it; this is done in order to clean both the surface of the keys and the space between them from dirt and dust.
Regular cleaning of the laptop keyboard from simple dirt is performed in the following ways:
- First, all dust is removed from the keyboard surface, which can be done with a special brush or a soft cloth made of lint-free cloth.
- The space between the keys is also cleaned with a brush or, if it is not available, with cotton swabs. When using cotton swabs, it is necessary to ensure that the villi from them do not remain in the gaps between the keys and in the device case.
- Dirt from the surface of the keys and the body of the device is removed with a lint-free cloth soaked in a solution specially designed for cleaning computer and office equipment. As an alternative to such a tool, if it is not available, you can use diluted isopropyl alcohol, which also cleans plastic surfaces well without harming either them or the inscriptions that are applied to them. If such a tool is not at hand, then you can clean the laptop keyboard at home with soapy water, lightly dampening a cloth with it.
When cleaning with any of the liquid products, care must be taken to ensure that drops of such a product do not fall into the inside of the device, which can lead to its failure. After the wet cleaning of the keyboard is finished, it should be wiped dry and wait about 20-30 minutes, and only then connect the laptop to the power supply.
Under no circumstances should substances that act as solvents be used to clean the keys and keyboard housing of a laptop, as they can cause irreparable damage to their plastic surfaces. It is also not recommended to expose the surface of keys and keyboard cases to liquids containing ethyl alcohol in their composition, which will not harm the plastic itself, but, together with dirt, can remove the inscriptions applied to it from its surface.
Cleaning the keyboard from liquid and sticky residues
After filling the laptop keyboard with liquids, especially if they are sweet, it needs to use emergency and most radical cleaning methods. To clean the keyboard in such cases, it will have to be disassembled, which is done to remove all moisture from its inside, which can cause short circuits in the device, as well as gradual decay and failure of its structural elements.

The actions to be taken in cases where the laptop is flooded with liquids are as follows:
- The buttons are removed, washed and dried thoroughly.
- If the spilled liquid has penetrated too deeply into the inside of the laptop, then you will have to dismantle not only the buttons, but also the three film layers located under them. Such layers, on the surface of which contact tracks are applied, will need to be separated from each other, thoroughly rinsed each of them and wiped dry, or dry their surfaces with cold air blown from a hair dryer. When drying the film layers of the laptop keyboard, you should be extremely careful not to damage the contact tracks on their surface with careless movement. If this happens, then the tracks will have to be restored, which can be done using a special conductive varnish.
To rinse the keyboard and all elements of its internal structure after pouring without harming them, it is best to use the following liquid substances:
- distilled water, which does not contain salts and other mineral inclusions;
- 96% ethyl alcohol, which not only has good cleaning properties, but is also able to absorb moisture and quickly erode with it;
- isopropyl alcohol.
It is possible to wash with ordinary running water only the rubber gasket of the laptop keyboard, on the surface of which there are no conductive elements.
Deep cleaning laptop keyboard
Deep cleaning of the laptop keyboard, as mentioned above, is performed with its disassembly, which makes it possible to make available all the elements of its internal design. It is quite possible to clean the keyboard on a computer at home in this way, the main thing is to disassemble such a device very carefully and follow all the recommendations for implementing such a procedure.
Despite the fact that different models of laptops can differ greatly from each other in their design, the method of fastening the buttons for the vast majority of them is similar and involves the use of special latches for this purpose.
You can disassemble the keyboard using thin tweezers and a dental probe, but if they are not available, then you can use a small screwdriver or even a nail file for these purposes. The process of dismantling the structural elements of the laptop keyboard itself is performed in the following sequence:
- First you need to determine from which side the keys are easier to remove from their attachment point. On the vast majority of laptop models, the keys have vertical and side fastening, which should be determined by trying to remove one of them by moving the tool used under one of its corners and prying it straight up.
- First of all, the keys with letters and numbers are removed, they differ in the same shape and size and are equipped with a similar fastening mechanism. After removing the keys, it is better to lay them out together with the microlifts in the same order in which they are installed on the keyboard. This should be done so that when performing the subsequent assembly of the device, nothing is confused.
- The next disassembly step is to remove the top row buttons (Ё, Esc, F, etc.), then the large keys and the space button, which is fixed with two microlifts. Last of all, the Fn, Win, Ctrl and Alt keys are removed from the laptop keyboard.
- After dismantling all the buttons, a film base is removed from the inside of the device, consisting of three layers that are easily separated from each other, and then a black stencil is removed from it.
After the laptop keyboard is completely disassembled, you can start deep cleaning it. Such a procedure is concluded, which allows you to thoroughly clean the keyboard both from the outside and from the inside, as follows:
- The key attachment points and the keyboard base are cleaned, which is best done using a jet of compressed air blown from a conventional medical syringe or hair dryer. When using a hair dryer, it should be set to the cold air blowing mode, since the temperature effect on the elements of the internal structure of the device can seriously harm them. The joints on the base of the keyboard are wiped with a cloth soaked in isopropyl alcohol or a special agent.
- The removed keys are placed in a solution prepared from warm water and ordinary detergent, kept in it, and then rinsed in a container with clean water. If there are old dirt on the surface of the keys and in their inside, they can be cleaned with a soft toothbrush dipped in a detergent solution.
- After cleaning the keys and rinsing them in clean water, they must be thoroughly dried, for which they can be laid out on a towel, or speed up this process by using a stream of cold air blown by a hair dryer.
The assembly of the laptop keyboard, after thorough cleaning of all elements of its design, is performed in the reverse order. The key, when it is installed, is carefully adjusted to the place of its fastening, after which it must be slightly pressed, as a result of which an audible click should be heard, which will mean that the button is fixed in the correct position. Before you install long keys, such as Shift, Enter and space, in their places, it will be necessary to fix the elements of their metal fastening on the base of the keyboard, which does not cause great difficulties.
Cleaning a computer keyboard is a procedure that cannot be avoided even with the most careful handling of such a device. In order to meet the need to perform such a procedure as rarely as possible, you should follow simple recommendations. They are as follows:

- Periodically, at least once every 1-2 weeks, it is necessary to carry out a surface cleaning of the keyboard, using a brush, a miniature vacuum cleaner and napkins soaked in a special cleaning agent for this purpose. It is necessary to perform a similar procedure somewhat more often if there are pets in the house, repairs are being carried out, or if you smoke while working at a computer.
- In the process of working at a laptop, it is advisable not to drink or eat food, or, if it is difficult to do without it, do it very carefully.
- Before sitting down to work at a laptop, it is advisable to wash your hands, this will protect its keyboard from active contamination with sebum residues and particles of keratinized skin.
The frequency with which it is necessary to perform a deep cleaning of the laptop keyboard depends on several factors, which include the model of the device, its operating conditions (dustiness of the room, air humidity in it, etc.), and the accuracy of its owner. On average, for most modern laptop models, this period is 1-2 years.
Most laptop owners are quite careless about cleaning the keyboard. Therefore, no one has long been surprised by sticky keys, the space between which is clogged with dust and crumbs.
The result of such carelessness is always the same - a breakdown of the keyboard or even the entire device. Laptops are at risk first of all, because the keyboard is their integral part.
Laptop crash due to dirty keyboard
Many mistakenly believe that getting rid of dirt is only necessary for an aesthetic reason.
But a clogged hull can cause a number of problems, among which the most common are the following:
- "sinking" of buttons;
- keyboard failure;
- breakdown of internal parts;
- laptop overheating.
At the same time, careless cleaning can also result in damage to the device. However, it can be easily prevented by following the tips below.
How to clean keys
Most often, specially designed tools are used to clean the keys. These include cleaning fluids, special wipes and brushes. Napkins are needed for the keys themselves, brushes will help remove dust and dirt between the buttons. Thanks to the listed devices, you can clean the keyboard on a laptop at home not only quickly, but also quite efficiently.
But with the right approach, the surface can be cleaned with improvised means. The most optimal cleaning agent is diluted isopropyl alcohol (regular can damage the paint of the keys). With its help, you can get rid of even stubborn dirt.
Advice! Do not overdo it with the cleaning liquid, in no case should it drip onto the contacts between the keys.

A special brush for cleaning a computer can be replaced with a soft paint brush with long bristles. Some also use a knife wrapped in a rag. As for napkins, it is recommended to use any rags made of non-woven material instead.
In addition, the keys should be cleaned regularly with soapy water. However, they must not be kept wet. They need to be wiped dry as soon as possible. It is also convenient to clean the surface with cotton swabs.
Video: clean laptop keyboard
Cleaning from dust and dirt
First you need to figure out what kind of cleaning the mechanism needs - superficial or deep. The first cleans the buttons and the space between them, while the second helps remove dust from contacts that can eventually settle on internal devices. The more often you carry out superficial cleansing, the less often deep cleansing will be required.

Anyone can do surface cleaning. First you need to turn the device over and shake out its contents. A car vacuum cleaner or a furniture cleaner will make the cleaning procedure more effective. They must be used carefully so as not to accidentally tear off the keys.

In this case, you can use a can of compressed air or, in extreme cases, a regular hair dryer. Note that the air from the can comes out under strong pressure, which allows you to blow out the dust that settles on the contacts. When using the first, try not to inhale its contents. After completing the procedure, ventilate the room.
Deep cleansing will require a lot of effort. The device will need to be unlocked. The keys can be detached from the housing using a table knife or a screwdriver. In this case, you need to act with the utmost care, otherwise you risk damaging the cable connecting the keyboard to the motherboard.
It is equally important to reassemble the keyboard correctly. The main thing here is to put all the keys in the correct position. It will be easier to do this if you prepare a photo before starting the procedure. Some buttons may have metal bases, so before installing them, make sure that all parts are installed in the specially designed grooves.
But remember, if you decide to completely disassemble the mechanism, it is quite possible that then you will not be able to exchange it under the guarantee. And in general, computer buttons are not so easy to replace, especially Enter and space.
How to clean a spilled laptop keyboard
Service center specialists assure that every 3rd laptop breakdown is somehow related to spilled liquid.

To avoid serious problems, you need to act correctly in the first seconds after the incident:

If a lot of liquid has spilled, it is worth disassembling the product completely or separating the keys. After removing the buttons, wipe the surface of the case first with isopropyl alcohol, and then with a dry sponge. In addition, you should be prepared to replace the protective membranes. If the case has been damaged by a drink, then you will need a special detergent.
The described procedure does not require special knowledge and skills. But in order to avoid more serious breakdowns, it is worth consulting with the specialists of the service center. They will diagnose the computer and check the health of the contact tracks. When the latter are oxidized, individual parts will need to be replaced.
You need to clean your laptop regularly. This simple procedure, in fact, is a mandatory preventive operation that allows you to extend the life of your computer. In addition, immediately after cleaning, you will see that the mechanism began to work better.
The laptop keyboard tends to get clogged with dust, crumbs, you can spill water on it or, even worse, sweet tea, cola, etc. In all these situations, the buttons start to stick, and the characters stop being printed. Moreover, if any sweet and sticky liquid gets on the input device, it must be quickly removed and cleaned. Otherwise, an aggressive environment may get on the tracks of the board and damage them. Next, we will tell you how to clean the laptop keyboard at home in the most convenient and safe way.
Cleaning from dust and crumbs
Dust and dirt under the keys of a laptop keyboard usually accumulates for many months or even a year or two, so simply wiping the device with a cleaning cloth, the user is unlikely to be able to remove all accumulated dirt.
To do this, before cleaning, you will have to remove all the buttons, but before that, do not forget to take a picture of their location so that you do not experience further difficulties with their installation back.
The keys from the input device of the laptop are "snapped" as follows:

The cleaning method described above is effective only when accidental drops of spilled liquid, crumbs and dust get on the input device. Cleaning a laptop keyboard after a sweet tea spill requires a few other steps that most users can do on their own at home.
Cleaning the keyboard from sticky liquid
To completely remove traces of tea or coffee, the laptop input device will have to be completely dismantled. But on most laptops, this device is attached to the front panel using ordinary plastic latches, so you don’t have to perform a complete or any complicated disassembly of a mobile computer.
In some cases (mostly for quite old and rare models), the keyboard can be attached to the back cover of the device with screws. Usually there are no more than two. After unscrewing the fasteners, it is enough to simply pick up the device to be dismantled with a knife or screwdriver, after which it can be disconnected from the case without any problems.
The main thing is that after getting wet, the fastest way is to turn off the device and remove the battery. Next, you can disassemble and clean the keyboard on the laptop:

You should also use a screwdriver to lift the edges of the input device when snapping off the fasteners. Doing this with your hands is not recommended, since the plastic of the device is quite thin - if careless efforts are applied to it, the material may crack.
Loop disconnect
The mobile computer's input device is connected to the system board via a special cable. It is easily damaged, so in no case do not pull the removed panel after snapping off the fasteners. The cable is attached using a special lock with latches, the type of which may vary in different laptop models.
When removing the cable, in order to open the retainer that holds it, in some cases it is necessary to perform actions such as lifting the mount or pinching the lugs. Some types of latches use spring latches to hold the cable.
Flushing a laptop keyboard
After a large amount of liquid has entered, in order to prevent oxidation of the conductive tracks of the board, the keyboard will need to be washed with high-quality water (you can use soap), which any user can do with their own hands. Do not use any aggressive detergents for this.
The main thing after this is to carry out high-quality drying of the device. This should be done under sunlight or on a battery for at least a day, maybe two. Otherwise, if moisture remains on the conductive tracks, they will oxidize over time and the input device of the mobile computer will stop working completely.
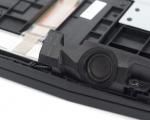
Dust in the air, food crumbs and other small debris inevitably clog the laptop keyboard, even if you use the equipment with all caution and try to protect it from the negative effects of the external environment. It is impossible to protect the buttons from dirt, but you can eliminate it in a timely and effective manner. If you are an active laptop user, it will be useful for you to learn how to clean the keyboard on your laptop yourself.

Removing buttons
First of all, you need to remove the buttons. To do this, you will need two items - a flathead screwdriver and a sewing needle.
Most modern laptops have the same principle of fastening the keyboard - on latches. In some models, the buttons are screwed to the case itself, but this is less common. To remove the keys on the latches, gently push the top edge latch with a screwdriver and at the same time lift the keyboard by prying it with a needle and pulling the Esc and “E ~” buttons. If during this manipulation the keys accidentally flew off, do not worry - later, during assembly, they can be returned to their rightful place.
Next, press the second top latch with a screwdriver, use the needle as before, and slowly lift the keyboard. Continue this manipulation with all the latches - traditionally there are 4 or 6 of them. When finished, lift the keyboard slightly with one hand - you will see a cable that connects the keyboard and the body of the computer. Turn over the button part and pull out the fastener.
If this method seems too unreliable to you or you want to carry out a deeper cleaning of the equipment, you can separately remove the closing surfaces first, and then the plastic lifts that provide the mobility of the keys.
The layout of the keyboard assembly is opposite, but at the same time similar to its disassembly. That is, do the same thing, but in reverse order. In other words, attach the keyboard to the body of the laptop, press alternately against the latches and push. You should hear a characteristic click - this means that the parts are fastened together.
We clean from dust and dirt
You can clean the keyboard on a laptop superficially and thoroughly. For easy cleaning, it will be enough to wipe the surface of the keys with special wet wipes for the care of equipment. This procedure will only take a few minutes. Deep keyboard cleaning requires more time and special tools. Stock up on the following items: a can of compressed air, isopropyl alcohol, and a soft, lint-free cloth. You will also need warm water and a deep mixing bowl.
With this method of cleaning, the computer can not be disassembled. This will save a lot of time. So, unplug your laptop from the power source and turn it off. It is advisable to remove the battery from the computer. Wipe the keyboard with a dry, clean cloth. Turn the laptop over so that the buttons are parallel to the floor and give it a little shake. Then arm yourself with a can of compressed air. Open the package, take the can at an angle and direct the air jet between the buttons from a distance of a few centimeters. Strong currents will push out small debris stuck in the keyboard that did not fall out during shaking.
After removing dry debris, soak a cloth in a pre-prepared solution of warm water and isopropyl alcohol (proportions for the solution - 50:50). Wring the cloth well - it should be damp, but not wet. Wipe the keyboard by applying light pressure to particularly dirty areas. If some stains (for example, from fat) are not washed off, try to rub them with an effort with a cotton swab dipped in the same water-alcohol solution.
After wet cleaning, do not wipe the keyboard dry. Wait for it to dry on its own, and only then turn on the laptop.
If you want to disassemble the keyboard and clean its inside, do the same according to the same algorithm of actions. Leave the keyboard unassembled to dry after cleaning. Only absolutely dry parts can be fastened together.
From spilled liquid
If you accidentally spill tea, coffee, juice or plain water on your computer, immediately stop working on your laptop, turn it off and start cleaning. The liquid must be urgently removed, and the equipment must be dried. Otherwise, moisture will get on important elements, and the computer will simply fail.
Disassemble the keyboard and remove the wet buttons. Each of them will have to be washed separately. Remove any layers under the buttons that have been exposed to liquid. Be careful not to damage the contacts. Wipe the parts with a dry cloth. Then clean the elements of the technique with a water-alcohol mixture and leave to dry at room temperature.
To safely clean your laptop keyboard, follow the recommendations below.
- Before disassembling the computer and removing the buttons, take a photograph of the assembled equipment. This simple trick will prevent you from accidentally putting the keys in the wrong places.
- Do not use physical force to dismantle the keyboard: in good laptops, the fasteners are quite strong and reliable, but at the same time they can be easily disassembled at home.
- To disinfect the buttons, dip each of them in pure alcohol for a couple of seconds. But be aware that it can damage the paint. So only decontaminate when absolutely necessary.
Cleaning a laptop keyboard with your own hands is quite simple. All you need is some free time and a couple of auxiliary tools. And remember that the cleanliness of equipment must be maintained regularly. So you will significantly extend its service life.