noscript extension. The NoScript extension has become available for Chrome. What browsers does it work with
cron- a daemon program designed to perform tasks in certain time or at certain intervals. The crontab utility is used to edit jobs.
Listing
You cannot modify the schedule file by simply opening it in text editor. To edit it, use the crontab -e command.
A simple example of a schedule file. Taking a screenshot every hour:
SHELL =/ bin/ bash MAILTO =username 0 * * * * scrotbasic settings
Choosing an environment for executable tasks:
SHELL=/bin/bashName of the user to whom the message about the completion of the task will be sent:
MAILTO=usernameInstead of a name, you can also use an email address:
MAILTO [email protected] example.orgOptional settings
Set the user directory:
HOME=Set the directories of executable files:
PATH=/ sbin:/ bin:/ usr/ sbin:/ usr/ binWe prescribe the display if the script launched by cron should use graphics:
DISPLAY=:0.0Choice of task execution time
The start time is presented as follows:
Minute hour day_of_month month day_of_week command
The symbol "*" means - any value.
The minimum time is 1 minute. This is due to the fact that cron looks through the list of tasks every minute, and looks for which ones need to be executed.
Additional cron variables
Managing with crontab
Adding a schedule file:
Crontab scheduling_filename
Display the contents of the current schedule file:
Crontab -l
Deleting the current schedule file:
Crontab -r
Editing the current schedule file (on the first run, a list of supported text editors will be displayed):
Crontab -e
This key allows you to perform the above actions for a specific user:
Crontab -u username
Note that -u can only be used when running crontab as root.
Examples
Every minute:
* * * * *Every hour, using cron variables:
@hourly~/script.shEvery day at 03:15 run the script:
15 3 * * * ~/script.shEvery Monday:
0 0 * * 1Every even hour:
* */ 2 * * *Same as above, but painted in full:
* 0 ,2 ,4 ,6 ,8 ,10 ,12 ,14 ,16 ,18 ,20 ,22 * * *Every 10 minutes:
*/ 10 * * * *New Year :
59 23 31 dec *Every weekday at 22:00:
0 22 * * 1 -5Launching a program with a graphical shell (GUI); every minute a message will be displayed with the text "It work!":
0 -59 * * * * DISPLAY =:0 gdialog --msgbox "It work\!" 25 20 > /dev/null* where DISPLAY=:0 - monitor number
GUI versions
GTK+
There is a very useful program: Scheduled tasks(gnome-schedule). She represents GUI for cron, and will be useful for beginners, as plain language describes the execution time of the task. For example:
15 * * * *
every hour in 15 minutes;
* 0 * * *
every minute, between 00:00 and 00:59.
In our materials dedicated to Ubuntu Server From time to time, the issue of performing any tasks on a schedule is raised. In order not to explain the same thing every time, we decided to create this material, which should help system administrators master and effectively use the task scheduler in Linux.
Ubuntu Server uses as task scheduler cron- scheduler with interface command line. It is an important part of the system and starts functioning immediately after installation, performing various system tasks. Our goal is to put it to our service, especially since it is not as difficult as it seems.
There are two types of schedules cron: user and system. They differ in that the first is created by users and executed with user rights, the second is used for administrative or system purposes and can be run on behalf of any user.
To create or modify a custom schedule, type the command:
Crontab -e
At the first start, the utility will prompt you to select an editor, we recommend choosing mcedit(requires mc installed), or another editor you know how to work with.
The format of the schedule lines is:
Minute hour day month day_week command
- Minute- time in minutes from 0 to 59
- Hour- from 0 to 23
- Day- day of the month from 1 to 31
- Month- from 1 to 12 or letters jan - dec
- Day of the week- from 0 to 6 (0 - Sunday) or sat - sun
- Team- a string in the shell format that will be executed, it can be written like command1 && command2 to run multiple commands in a row.
Minutes, hours, days can be specified as follows:
- Meaning- a number indicating the date or time, a wildcard is allowed * full-range
- Multiple values- it is allowed to specify several values separated by commas, for example 2,14,22
- Value range- indicated with a hyphen, for example 2-10
- Value step- indicated through a fraction, the denominator of which is a step, for example */3 - every third value 0, 3, 6, 9, etc. The numerator must be a range of values or an asterisk.
Consider the following example entry:
0 8-19/2 * * 1 /home/ivanov/test
It means that every second hour from 8 to 19 (8, 10,12,14,16) on Mondays run the test script in Ivanov's home directory.
We want to immediately warn you against a common mistake, when specifying a periodic execution, all dates must be specified explicitly, the asterisk indicates the full range of values, and not their absence. For example, if you need to execute a certain script every hour from 10 to 15, it would be incorrect:
* 10-15 * * * /home/ivanov/test
This line will run the script every minute in the range from 10 am to 3 pm. It will be right:
0 10-15 * * * /home/ivanov/test
This entry will allow the script to run at the beginning of every hour of the specified range.
In addition to the date, a number of special strings can be used:
- @reboot- run command on reboot
- @yearly or @annually- perform on January 1, similar to the entry: " 0 0 1 1 * "
- @monthly- perform on the 1st day of each month, similarly " 0 0 1 * * "
- @weekly- perform every Sunday, is equivalent to " 0 0 * * 0 "
- @daily or @midnight- every day at midnight 0 0 * * * "
- @hourly- once an hour, 0 * * * * "
So for the daily execution of our script every midnight, you can write:
@midnight /home/ivanov/test
After completing the scheduling, save the file and exit the editor. The custom schedule will be saved in /var/spool/cron/crontabs under the name of the current user.
A file is provided for system and administrative tasks. /etc/crontab the syntax of the entries in it is distinguished by the presence of an additional value - the user under whose name the task will be launched:
Minute hour day month day_week user command
An example of such an entry:
0 19 * * 1-5 root /etc/backup
According to which at 19:00 from Monday to Friday the script will be launched /etc/backup on behalf of the user root.
This file also contains system schedules, so it should be edited with care. All system and administrative tasks should be placed in it.
As we see cron quite easy to use, but at the same time provides rich opportunities for setting up schedules in Ubuntu Server. We hope this article will help administrators to master this tool.
Introduction
By hosting the site, we want to achieve uninterrupted operation without our participation.
This means that you need to automate processes, and here cron comes to the rescue.
Cron- program, daemon for auto start programs and scripts on the server at the right time.
Crontab in Timeweb Control Panel
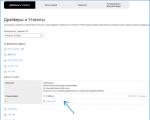
If your account is paid, and you have not been caught spamming, then the Crontab section is available and operational: 
The Crontab interface in the Timeweb control panel is friendly and intuitive: even novice users with no prior experience with cron will easily figure out how to create tasks. By creating a task, you can automatically make backups, mailings, clear the cache and perform other typical actions.
Crontab in the Timeweb control panel will help any user to automate their tasks and achieve the desired result.
After the basic information, I will talk about the nuances that are important to consider when working with cron.
New tasks are created in the Crontab section. To do this, you will need to fill in the fields:
- Name. This is the name of our task.
- File type and path to file. Depending on the language in which the script is written, select the file type and the path to it. If a task runs a script that requires web server variables, running it directly through the php interpreter results in errors. Therefore, in the case when you use a script that works when launched through the address bar of the browser, you must select the file type "HTTP request" and specify the URL for the request in the same way as it is indicated in the address bar "your_site / path / to / script / script .php?option1=value1&option2=value2".

If necessary, specify one administrator account in the Crontab section. Messages will be sent to this mailbox if a message appears in the console when the script is run.
Nuances
Small nuances to keep in mind when working with cron.
1. Cron works if the account is paid and there are no restrictions.
You can check the status by creating a file with php extension(for example twtest.php) with code:
And accessing the file in the browser.
In the browser you will see the information:
uid=12345(login) gid=600(customers) groups=600(customers) - indicates that cron and mail are available
uid=12345(login) gid=600(customers) groups=601(newcustomers),600(customers),660(spammers) - write to support
2. The file you run must have read and execute permissions (r+x).
By default, files on the hosting are created with permissions of 600. You can change the permissions to the ones you need via ssh with the command:
Chmod 744 twtest.php
or in File manager, Timeweb has an instruction about this:
3. In order not to litter e-mail with unnecessary letters,configure frequently executed scripts to log to a file, not to the console.
CRON over SSH
Setting up the scheduler via ssh has been described so many times that it will not be possible to tell a new one.
Connecting via ssh is described in detail in help center timeweb:
After reading, you need to find the file with the script, moving between directories with the cd command. Once you find the file type pwd and copy the path (example "/home/c/cc123456/public_html/test/")
If you do not know what permissions the file has, enter:
Chmod 744 filename
When connecting via ssh, you can edit tasks with the command
Crontab -e
The first time the server will ask you to select an editor:
Select an editor. To change later, run "select-editor". 1. /bin/ed 2. /bin/nano<---- easiest 3. /usr/bin/mcedit 4. /usr/bin/vim.basic 5. /usr/bin/vim.tiny Choose 1-5 :
The system points to a simple nano editor under the number 2. If you miscalculated the forces or accidentally selected vi, don't be alarmed, press Esc, then type a colon q and press enter.
To change the editor, enter the command:
select-editor
and select nano.
Tasks are written line by line. Example:
1 2 3 4 5 /opt/php56/bin/php /home/c/ss123456/public_html/twtest.php
The meanings of the first five values are:
- 1 minute is a number from 0 to 59
- 2 hours - a number from 0 to 23
- 3rd day of the month - a number from 1 to 31
- 4 is the number of the month in the year - a number from 1 to 12
- 5th day of the week - a number from 0 to 7 (0-Sun, 1-Mon, 2-Tue, 3-Wed, 4-Thurs, 5-Fri, 6-Sat, 7-Sun)
For each parameter, it is possible to set the required number of values separated by commas. For example, if you write 8.23 in the "hours" field, the task will run at 8:00 am and 23:00 pm. You can set the interval: 9-18 will mean that the program will start every hour in the period from 9 to 18 hours inclusive. The symbol "*" means "all possible values". For example, specifying "*" in the "hours" field will mean "run every hour". The symbol "/" is used to indicate additional frequency of the job. For example, "*/3" in the "minutes" field means "every three minutes".
"/opt/php*/bin/php" where php*/ = php53/ php5.3/ php54/ php5.4/ php56/ php5.6/ php70/ php7.0/ php71/ php7.1/
The last entry indicates the path to the file and the name of the file that we are launching.
Nuances
- When changed in the control panel in the "Crontab" section, changes to entries made via ssh will be deleted!
- If both fields "day of the month" and "day of the week" are defined, then such a task will be executed on each specified day of the week, regardless of the day of the month. For example, the following command will run at 9:19 every Wednesday and every 7th of the month, even if the 7th is not Wednesday.
19 9 7 * 3 /opt/php56/bin/phpn /home/c/ss123456/public_html/twtest.php
Special cases
To run a task more than once a minute, use sleep.
To do this, write in crontab:
* * * * * /opt/php56/bin/php /home/k/konoplev/tmp/twtest.php; /bin/sleep30; /opt/php56/bin/php /home/k/konoplev/tmp/twtest.php
to run a file every 30 seconds.
Sometimes, when using the cron program scheduler, it is not known how long the script execution takes. To avoid a double script launch, a check for the completion of the previous script launch is required.
The logical option would be to create a lock file and check for the existence of the file when running the script. But on Timeweb hosting, as well as on other hostings, there is a processor limit. The script depends on the conditions and execution time, which means that we cannot predict the execution time of the script. If the script is executed in violation of the rules and restrictions ( ), then the process will end on the hosting side. Then the lock file will not be deleted, which means that the script will not be run by cron until the file is deleted.
Maestro from the engineering department told how to solve the problem.
First, create a sh script in the /home/c/cc123456/tmp/twtest.sh file:
#!/bin/bash [email protected] no_spaces=`echo $command | sed -e "s/\s/_/g" -e "s|/|_|g"` pidfile=/var/tmp/$no_spaces.pid lockfile=/var/tmp/$no_spaces.lock if [[ -e $pidfile ]] then pid=`cat $pidfile 2>/dev/null` ps h $pid >/dev/null 2>/dev/null if[[$? -eq 0 ]] then exit 1 else rm $lockfile fi fi echo $$ > $pidfile /usr/bin/flock -w 0 $lockfile $command rm $pidfile
In the control panel in the crontab section, select the type "Executable binary file".
In the "Full Path" field, write:
/home/c/cc123456/tmp/twtest.sh /opt/php56/bin/php /home/c/cc123456/tmp/twtest.php
Where
- /home/c/cc123456/tmp/twtest.sh - our test script
- /opt/php56/bin/php - path to the desired interpreter
- /home/c/cc123456/tmp/twtest.php - path to our script
Specify the required launch time and come up with a name.
Conclusion
Now you know how to work with cron and run tasks automatically. More detailed information for cron look in "man cron". Good luck!