Windows 10 camera work
Most modern laptops have built-in video cameras in their design. With their help, you can take photos, record videos, hold online conferences in video format and much more. Thanks to these devices, the capabilities of netbooks and laptops are greatly expanded, which makes them indispensable assistants in travel and travel.
Not so long ago, Microsoft released a new operating system Windows 10. Many users have already managed to update the OS of their laptops and evaluate the proposed innovations. But along with this, some people have encountered problems with the camera on a laptop: for some, the video device does not turn on at all, for others, a black square or an upside-down image appears on the screen. We will talk about the causes of such malfunctions and how to turn on the video camera on a Windows 10 laptop in this article.
In the Windows 10 operating system, you can check whether the camcorder is working or not using the free Camera app from Microsoft installed by default.
To launch this program, you must first click on the "Start" menu in the lower left corner of the screen. Further, some users will need to select "All applications" to open the full list, for others such a list of programs will be deployed automatically. Scrolling down with the mouse wheel, the corresponding keyboard key with an arrow or holding down the slider, you should go down to the programs with the name in the Russian letter "K". This is where the Camera app is located.
If everything works correctly, the video device will turn on, and an image will appear on the screen. In this application, you can take photos with a set timer and record videos. It is possible to adjust the brightness. Additional settings can be made by clicking on the "Settings" button - the gear in the upper right corner.
How to change privacy settings
If the video camera in the considered program does not work, one of the options may be that the appropriate privacy settings are simply not enabled. Because of this, applications do not receive permission to use the video device.
You can make the necessary settings both from the Camera program and through the Start menu. In the first case, you need to click on the gear (as shown in the figure above), then scroll to the “Related settings” section and select “Change privacy settings” from the list.
Next, in the "Parameters" window that appears, open "Camera". Here you need to move the slider to the "On" position and allow programs to access the video device. Below in the list, you can independently configure permissions for using the camcorder for various applications.
The second way to open the Settings window is through the Start menu. After clicking on the button with the Windows logo in the lower left corner, a list of applications will open. On the left is a column of 4 icons, in which you should activate the already familiar gear.
Camera buttons on various laptops
In many Asus, Acer, MSI, Samsung, Lenovo laptops, especially in older models, the design provides special buttons for turning on or switching video cameras. Usually they are located near the laptop start buttons. In Lenovo laptops, such camera controls may be located in the area of \u200b\u200bUSB ports. If the recorders on your laptop don't work, be sure to check these buttons.
Another way to control the camcorder is to use the function keys on the keyboard. You should carefully look through all the keys to find the one with the icon of the video device. On many laptops, you can enable or disable the camcorder using the Fn + V combination. In Lenovo laptops, the Fn + F5 or Fn + Esc combination is often responsible for this function. But in general, each laptop owner needs to individually look at his computer to find the required function keys.
Checking the operation in the device manager
A common reason for a non-working camera is that the video device, although it is in the design of the computer, is disabled from working in the system. To check this assumption, you need to go to the "Device Manager". This can be done in several ways.
The first option is through the Start menu and the Settings window, as already done above. In the search bar, the query "device manager" is entered. Next, from the drop-down prompts, the desired one is selected, and a new window opens.
The second option is through "This computer". If there is a corresponding shortcut on the screen, move the cursor and press the right key. In another case, in the open explorer, right-click on "This PC". In the list that appears, select "Properties".
In the window that appears, the item "Cameras" is of interest. The name "Image Processing Device" may also be used. All camcorders used on the laptop are shown here. By double-clicking the left mouse button on the selected video camera, a window with properties will open.
In the "Driver" tab, the recording device can be either disabled or enabled.
The camcorder may not work properly if the driver is not installed correctly. If this is the reason, then an unknown device may be indicated in the lists of devices for video recording. Also, the problem may be indicated by the fact that there will be an exclamation mark next to the device. In the properties, you can update the desired utility or roll back the results to the previous version if the driver does not work correctly after the update.
There are times when the driver fails to update automatically. Then you need to find and download it on the official website of the laptop manufacturer. You can also use Google or Yandex search engines to search for utilities on third-party resources.
Video
For the most curious, we have a video in which what is written is duplicated.
All owners of computers and laptops have a camera. Some have it built in, some have it connected via USB. For modern life, this is a very convenient thing that allows you to conduct negotiations, webinars, make online calls and more. But it happens that the webcam may not work after Windows 10 has downloaded new updates, or after it has been completely reinstalled.
With such a "breakdown", users often look for new drivers for their PC in search engines, but usually they must be installed on the computer, and the reason for the camera's inoperability is completely different. We will try to help you solve the problem in this article by describing several ways to configure.
Check if the camera is enabled on the PC
Usually Windows 10 automatically installs all the drivers for the device, so your webcam may not work for a very banal reason, maybe it is disabled.
You can check its activation thanks to the Device Manager, which is called by right-clicking on the Start menu.
You will see a whole list of different kinds of devices connected to your PC, but you are looking for the Imaging Devices tab (usually it is located at the very bottom). By clicking on it, you will see your camera.
By right-clicking on the line with the name of the camera and clicking on "Properties", you can find out if the function called "Enable" / "Enable" is active.
If you see that the camera is in disable mode, you need to enable it, after which the system will prompt you to restart your computer. This should be the end of your troubles with the camera. If everything is in order and the web device is turned on, then the problem may be different.
Removing and updating webcam drivers through the "Device Manager"
In order to do the manipulations to remove the camera, you need to go to the already familiar "Task Manager", find your camera and go to its properties. In the same window as the Enable/Enable button, there is a Delete button. It needs to be pressed.
After the removal operation was successful, you need to install it again. To do this, we select in the provided menu "Device Manager" a function called "Action".
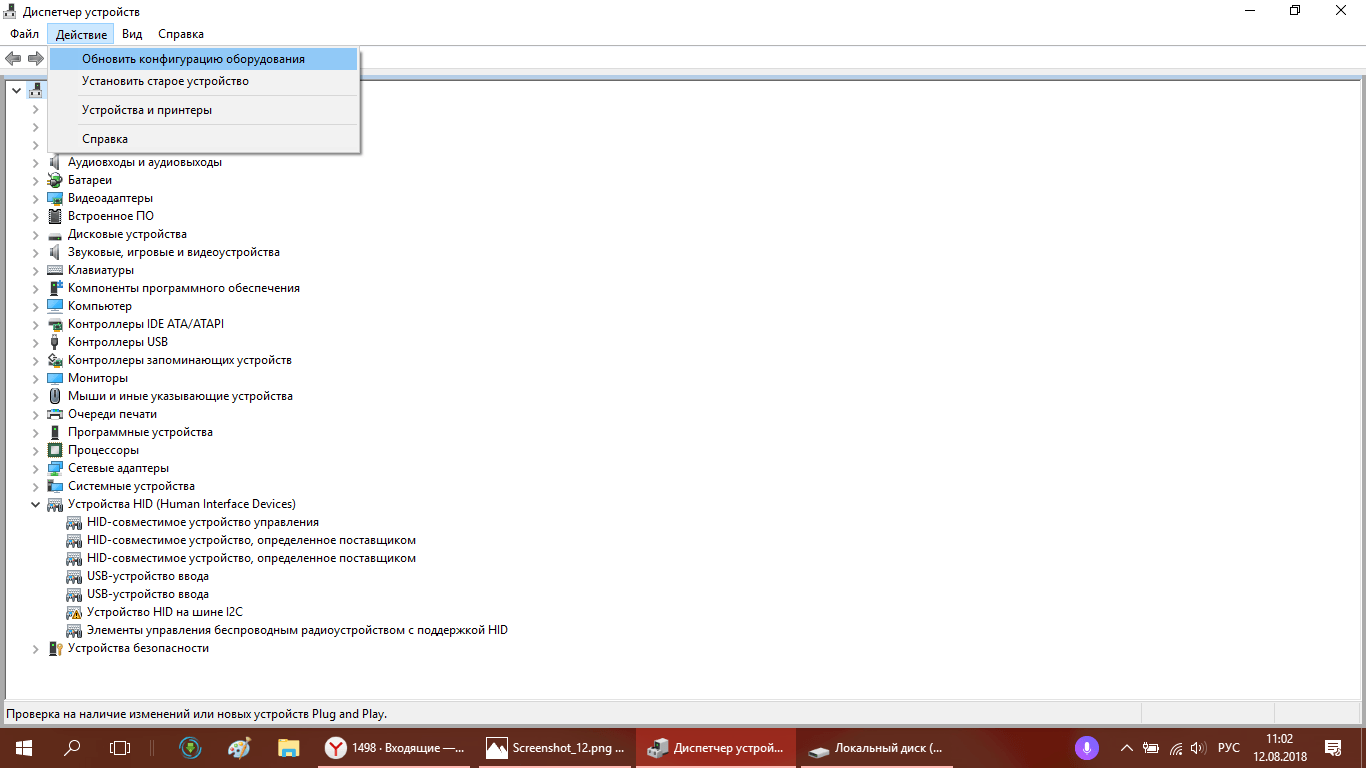
Then click on "Update Configuration".
All drivers related to the camera should again be rendered on the PC. Check if the camera is working now. If yes, then you do not need to follow any further instructions.
Installing new drivers for the camera
Another option is to install drivers that are slightly different in what Windows installed on your PC. If your web device is displayed in the Device Manager, then you can follow the next option.
Right-click on the line with the web device and select "Update Drivers", and then select "Search for Drivers".
In the new window, click on "Select a driver from the list of already installed drivers."
Among the options presented, you need to find a joint driver for your video device. Click on it and install.
If you did not find the cameras among the list in Imaging devices, then you should look in Other devices.
If there is an Unknown device, then you should try to install it. If nothing is displayed in this paragraph, then you have a direct path to the official website of the developer of your PC. There you need to find information about the drivers for the webcam. Perhaps they are available, but they are not suitable for Windows 10, then you need to try installing them through compatibility mode.
You should also be aware that everything may be fine with the drivers and the camera works correctly, but something may not function in programs such as Skype or similar. Then the cause may not be a problem in the settings of the camera program, but in the application itself. Then you need to change the settings in the program itself.
Good afternoon, dear readers of the blog site. Today I want to help those people who do not have a camera in windows 10 mnkredstone Anniversary Update 1607. Yes, it is after this global update for people who have Logitech webcams and those who work using the H.264 and MJPEG video compression format , got problems in skype and other video programs using the camera. Let's see how to solve.
Well, we continue to collect jokes from MS, it wasn’t enough for us to constantly reboot windows 10 or a black screen when you turn on your windows 10 computer, so Microsoft doesn’t let you get bored, welcome to the boredom club.

And so we all remember that Windows 10 Anniversary Update 1607 has been released, I even told you in two video tutorials about how to upgrade to it. Everything went well for me and I did not notice a glitch when the camera does not work after the update. since I have a Microsoft webcam, and for themselves they have done everything ok.
After the August update, Microsoft support became inundated with user complaints that the camera in windows 10 did not work for them. As a result of the proceedings, it turned out that it was Anniversary Update 1607 that stopped supporting H.264 and MJPEG video compression formats. Allegedly, all this was supposed to increase productivity, and so that Windows applications would have direct access to the webcam, but it seems to me that they just checked how much stink there would be in order to once again shove something of their own and for themselves.
Already more than a million people who have updated have encountered this infection, the most common is that they cannot organize video calls via Microsoft Skype. The problem on the hardware side affects many popular webcams from manufacturers like Logitech, and on the software side, many applications and services that used these codecs.
official representatives from Microsoft, commented on it like this. Well, all the same, Windows 10 is loved more than other operating systems, and they say there are not so many appeals with this problem.
“We have had a small number of reports of unexpected system behavior after the update. The technical department and customer support specialists investigate each individual case and offer troubleshooting advice if necessary.”
How to fix camera performance after Anniversary Update
Let's look at what can help you at the moment in eliminating this jamb.
- MS officially said that a fix for the MJPEG format will be released in September and can be installed via Windows Update.
- The second thing you can do is roll back to the previous version.
- But I prefer the third option, for this open the registry editor, and go to the section
HKLM\SOFTWARE\WOW6432Node\Microsoft\Windows Media Foundation\Platform


add the DWORD value "EnableFrameServerMode" with value 0.

Checking permission to use the camera
No matter how trite it may sound, you may be prohibited from using a webcam for certain programs, it is because of this that the camera stopped working in windows 10, to check this, we do the following. Open start and go to settings.

As a result, the Windows Redstone Settings window will open, it can also be opened using the Win + I hot keys. Next, go to the Privacy section.


Roll back camera drivers
If the method with the registry did not help you, then the camera in windows 10 redstone still does not work for you, then we will try to roll back the drivers to the camera. Right-click on the start button and select Device Manager.


Go to the Driver tab and click the Roll Back button.

After that, the operating system will ask you to reboot, if everything is OK, then the camera will start working again.
Camera removal and reinitialization
If the camera still does not work for you after updating windows 10, then we will try to completely remove the camera as a device so that Windows 10 tries to install the latest drivers. All in the same device manager, right-click on your camera and say delete.

If you are prompted to remove the drivers, then we do it.

After that, as everything is removed, we right-click on the top of the device root and select update configuration, the search for devices will begin, the system will detect the camera and install the drivers necessary for it to work.

You can try to immediately check the operation of the camera in Skype or in the built-in camera application. You can find it in the launch.

Installing additional software
Several times in my practice, I have seen that for the webcam to work correctly, it was necessary to install some vendor software in Windows 10 redstone.
The main thing is that it is compatible with the ten
To get started, go to the Control Panel (By right-clicking on "Start" and selecting "Control Panel". In the "View" field at the top right, put "Icons") and open "Programs and Features". If there is something in the list of installed programs that is related to your webcam, uninstall this program (select it and click "Uninstall/Change".
Press WIN + I again and open Settings, then Devices> Connected devices. We are looking for a camera and if the button to get the application is active, then we press it. We are waiting for its installation and enjoy life.

The second method of reinstalling drivers on the camera
If you have tried all of the above, and the camera in windows 10 does not work for you, then we will try to update the drivers with the second method. Again we go to the device manager and from the context menu select update drivers there.

Select Browse my computer for driver software.


See if there is another compatible driver for your webcam that can be installed instead of the one you are currently using. Try to install it

What to do if the camera is not in the device manager
Yes, it also happens that you may not find the camera among the available devices, there are two options: either it is turned off and is not displayed, or it is indicated by an unknown device and requires additional drivers.
To show hidden devices in Windows 10 rdstone, go to the view tab and check the box Show hidden devices. Then, if there is a camera in the list, turn it on.

Well, the second option with an unknown device, I suggest you solve it in two ways.
- The first is a full Windows driver update.
- The second method is to download the official drivers for your webcam

Hot keys for laptops
If you have a laptop, then you can try a special keystroke to try to turn on the camera.
- Asus, Acer, HP Fn + V key combination (or Fn + camera key)
- Lenovo models use Fn+Esc combination.
It may also be trite that the camera be turned off in the BIOS.

Another nuance: if the webcam is displayed in the device manager, but does not work, go to its properties, on the "Driver" tab and click the "Details" button. You will see a list of driver files used for the camera. If among them there are stream.sys, this indicates that your camera driver was released a long time ago and it simply cannot work in many new applications.
I hope you don’t have a question now why the windows 10 camera does not work.
Need to know how to fix Windows 10 camera issues on your laptop, desktop or tablet? It sounds like a minor issue, but sudden camera issues can be very frustrating when you're just trying to use it to learn how to fix common problems.
Almost every Windows 10 PC has a network camera. Laptops and desktops have front cameras so you can video chat with friends and family. Tablets and hydrides often have a second camera so you can take pictures of the world around you. When all is well, both cameras work flawlessly with the Windows 10 Camera app and any other app that needs access to the device's camera.
Camera issues in Windows 10 can make you less productive or make you miss an important moment. Windows 10 laptop owners may try to join a conference call, only to find that their device's camera is not working. The same thing can happen with Surface Pro 4 as well as other tablets that run on Win 10 when someone tries to use the main camera. Some users get an error message with every open Camera app.
Here's how to properly work with the camera and fix Windows 10 camera issues.
Setting Camera Permissions Windows 10
You must grant access permission to any camera or sensors on your PC. In most cases, this process is useless because applications that require access to cameras will ask you for permissions when you open them. However, it's easy to miss the request popup. And without proper permission, the app will only show a black screen.
Press the Windows key on your keyboard or the Start button in the lower left corner of the screen.
Tap the cog on the left edge of the screen or on the Start screen to open the Settings app. You can also access the settings app from the Action Centre. Just swipe left from the right side of your device's touchscreen. Then click on the "All Settings" shortcut at the bottom of the Action Center.

Tap on the "Privacy" icon in the "Settings" app. It is in the third row and has a lock icon.

Select the "Camera" section from the menu on the left side of the screen.

There is a toggle at the top of the Camera section area. If it's off, click on it to turn it on.

Every app you try to use with your device's camera must also have permission. Use the app list at the bottom of this area to make sure your most used apps like Instagram and Facebook have the camera access they need.

Switching and closing apps to fix camera issues in Windows 10
Often, Windows 10 camera problems occur because users who have more than one app access the camera at the same time. For example, if you open an app that requires Windows Hello access, the Camera app cannot access that app so you can take a picture.
When this happens to you, close any open applications that may require access to the camera. Then return to the application you are trying to use. Close this application and open it again. If that doesn't help and the camera still doesn't work, restart your Windows 10 PC from the Start menu.
Changing Camera Settings to Fix Camera Issues in Windows 10
Sometimes an app can access your device's cameras but not reset your camera settings to get a bright and clear photo. If this happens to you, go to the start menu and open the Camera app from the alphabetical list on the left side of the screen.

Use the controls at the top of the Camera app. Now use the controls to change the brightness and contrast. Close the Camera app and open the app you were trying to use the camera with.

These fixes should help you fix any Windows 10 camera issues you have. We will continue to add new solutions as new issues are identified.
All laptops are equipped with a built-in webcam. Users can use it as a video chat tool in various instant messengers such as Skype. In Windows 10, there is a special standard Camera application that allows you to quickly launch it on a laptop as on a phone to take an instant photo or shoot a video. Today we will look at how to enable and configure the camera in the application of the same name, as well as how to give certain programs access to it. In addition, we list effective ways to troubleshoot problems with the webcam.
How to turn on the camera on a laptop with Windows 10
You can activate the laptop webcam to take pictures at the current time, for this the classic Camera application is launched. If you want to use it in other utilities, give them access to it in the Windows settings. Let's see how to do both.
Launching an Application Through the Start Menu
Calling the Camera application is quite simple: it is in the list of utilities in the system Start menu. Follow the little instructions:
- Click on the button in the form of a window in the lower left corner of the screen. It is the leftmost icon on the taskbar. This menu is also called by a special key, on which the same icon is drawn. Finding it is easy: it is located next to the gap. Click on the "Start" button with a window-like icon to launch the menu of the same name
- In the menu, you can simply scroll through the list of services and applications to the letter "K". If you don't want to scroll through the list, click on the letter "A".
 Click on the letter "A" to open a table with the rest of the available letters
 - In the table that appears with letters from two alphabets, select the Russian "K" with the left mouse button.
 Select the Russian letter "K" in the table
 - A small list will open with applications whose names begin with this letter. Find the “Camera” in it and click on it with the left button.
 Click on the item "Camera" in the list of applications with the letter "K"
 - On the PC display, you should immediately see yourself.
Video: launch the Camera utility on Windows 10
Switching on with special keys
Many portable computers have special keys that allow you to activate the webcam (open a window where you can see yourself). For models of each manufacturer, they are different. The inclusion is due to a combination of two buttons, the first of which is always Fn. The aforementioned key is added to it: it usually has an icon in the form of a camera, so the keyboard should be carefully examined. There are two combinations for Lenovo laptops: Fn + F5 and Fn + Esc.
For many laptops, Fn + V also works.
 Press the key combination Fn + V to launch the camera on your device and take a photo
 Older laptops have a separate button, which is usually located next to the Power (power button). In this case, you only need to press it, Fn is not needed in this case.
 Click on the Web button next to the power button to open your built-in webcam window
 Setting permission to use the webcam by other programs
If when you launch the Camera app, a white window appears on the screen with a message that you need to grant access to the camera and microphone, this means that you have disabled access to them in your privacy settings. In this case, no programs will be able to use the webcam. How to enable access, we will tell in detail:
- At the same time, we press two buttons: Win and I. So you can open the "Windows Settings" window, in which all configuration manipulations will be performed. If this combination does not work, go to this window through the Start menu: launch it on the taskbar and click on the gear icon.
- In the window with the parameters, we are interested in the "Privacy" tile. It is usually located at the very bottom of the page. We press on it.
 Click on the "Privacy" tile in the options window
Immediately click on the first switch to allow all utilities to use the camera.
We switch to the third block called "Camera". You can also run it from the application of the same name, if it works for you. To do this, click on the gear in the upper right corner, scroll down the panel in the right part of the window to the “Related parameters” block. In it already click on the link “Change privacy settings”. The system will immediately redirect you to the desired tab in the Windows Settings window.
 In the "Camera" tab, set the first switch to the "On" position to allow applications to use the webcam
Windows tools allow you to set the camera to turn on only for certain applications. If this is your case, scroll down the page a little and in the list of utilities find those that you want to give access to the "webcam". For them, set the switch to the "On" position.
 In the list, select the applications that you want to give access to the camera, and then enable them using the switches on the right
How to turn off the webcam on a Windows 10 laptop
Sometimes users may need to turn off the webcam for one reason or another. You can do this in the Windows system window "Device Manager". Follow the step by step instructions:
- Call the "Device Manager" window. The easiest way is to enter the appropriate query in the panel for universal search on the Windows system: it is launched through the magnifying glass icon on the Taskbar. This icon is usually located next to the Start button. In the search results, then click on the desired section.
 In the Search bar, type "Device Manager"
 - If you do not have this icon, use the "Windows Settings" window: press the key combination Win + I and start typing "Device Manager" in the search bar. As you type, the system will automatically determine what exactly you want to open. Select the required service from the list by clicking the left mouse button.
 In the search bar in the "Settings" window, enter the query "Device Manager"
 - In the manager window, find the line "Cameras" and open the list of connected devices by double-clicking.
- Right-click on the name of your built-in camera. In the context menu, select the "Disable device" option.
 In the context menu, click on the line "Disable device"
 - In the dialog box that appears, confirm your intention to temporarily deactivate the video device.
 Click "Yes" to turn off the camcorder
You can turn on the webcam again through the same context menu that opens by right-clicking on the corresponding item.
How to set up a webcam on a laptop
You can change your webcam settings in the desktop Camera window. We will tell you about which settings are available in this utility point by point:
- Launch the Camera app using the instructions in the first section of this article. In the application window, there is a photo timer (an alarm clock icon) at the top. The arrow next to it allows you to switch from automatic to professional shooting mode. On the right, there are two round buttons for switching between taking a photo and taking a video.
 In the "Camera" application, you can select the mode (photo or video), as well as enable the ability to manually set all settings
 - To get to the settings, click on the gear-shaped icon, which is located in the upper right corner of the application window under the icon to close.
- In the first drop-down menu, you can select the action that will be performed after pressing and holding the camera button. Three options are available: one shot, a whole series of photos or video recording.
 Set the action to be performed after pressing and holding the camera button
 - In the next menu, you can flip the image that you see in the application window.
 If necessary, set the angle by which you want to rotate the image
 - In the "Photos" section, options for aspect ratio of the image are available, as well as a framing grid. Depending on what type of survey you want to use, select the grid type. With it, it will be easier to apply one or another method.
 Set the framing grid according to the shooting method you want to apply
 - With the Continuous shooting option turned on, you can take many photos until you press the camera button again.
- In the "Video" block, you can select the recording quality (depending on the maximum setting the camera itself offers), as well as set the flicker reduction option.
 In the Video Recording menu, set the quality of your future media content
 - In the Related Options section, you can change the path to folders where photos and videos will be saved.
 In the related options section, you can choose the location of the files with the taken photos and videos
 - In addition, you can enable the use of your computer's location. The characteristics of the photo or video will indicate in which place they were taken.
 Allow the Camera app to show your current location
What to do if the camera is not working
Users of the Windows operating system sometimes fail to launch the classic Camera utility. In this case, as a rule, a message appears in the window stating that the camera cannot be found or turned on. Each error has its own code. Most issues are resolved by updating or rolling back your video device drivers.
Checking antivirus settings
Most antiviruses have a feature that protects the user from being tracked through a webcam. It allows or blocks access to the video device for certain scripts and programs. However, there may be problems with this feature. For example, an antivirus may suddenly disable the camera for the standard Camera application or the third-party Skype utility, considering them a threat. In the Skype messenger, in this case, a message usually appears stating that it cannot connect to the webcam and that you need to close the utility that is currently using it.
 Skype can't start a video broadcast because the camera is open in another program
 To make sure that it's not the antivirus at all, disable the camera protection functions in it for a while. The name of the option, as well as the location of the section, differ depending on the type of antivirus. Consider the instruction on the example of the Avast program:
- Antiviruses usually work in the background to be always on the alert and block the threat if necessary. This means that you can open it through the Windows tray (the rightmost part of the taskbar with the date, time and other icons). We click on the arrow pointing up, and on the small panel, click on the Avast icon.
 Find the Avast icon in the Windows tray and then click on it
 - Click on the "Privacy" tab with the fingerprint icon. In the blue menu, select the "Webcam protection" block.
 In the "Privacy" tab, open the "Webcam Protection" section
 - We click on the green switch to deactivate the option, and try to open the "webcam" in a third-party utility or in the standard Camera program.
 Click once on the switch to disable the protection option for a while
Updating or Installing a Driver
The most common cause of problems with the camera is the untimely updating of its drivers. How to make an update, we will describe in the instructions:
- We launch the "Device Manager" by any of the methods described in the "How to disable the webcam on a laptop with Windows 10" section.
- Find the "Cameras" object in the list and open it by double clicking. Right-click on the line with the required hardware and select the "Update driver" option from the list. You can also start the update by clicking on the "Properties" item - a new small window will appear, in the second tab of which you need to click on the "Update driver" button.
 Click on the "Update Driver" button in the "Properties" window
 - In the next window, click on the link for automatic search.
 Click on the link "Automatically search for updated drivers"
 - We wait until the process is completed. It will take a little time.
 We are waiting for the search for available drivers on the network to complete
 - As a result, the system will either find, download and install an available update, or notify you that your device already has all the latest drivers.
 The system may display a message stating that the latest drivers are already installed
 - You can also manually search for updates on your computer to make sure the driver doesn't need to be updated. To do this, instead of automatically searching in the initial window, select "Search for drivers on this computer". Click on "Select a driver from the list available on the PC" again.
 Click on the link below "Select a driver from the list available on the computer"
 - If you have a disk or other media containing your camera drivers, click on the "Install from disk" link.
 Click on the "Next" button to start searching for drivers or on the "Have Disk" button if you have a disc with camera drivers
 - Wait for the procedure to complete. As a result, a message appears stating that the system successfully installed the drivers. Now you can close all windows, restart your computer and try launching the camera again.
 Click on the "Close" button after the system completes the driver update successfully
Rollback to a previous driver version
If you notice that the "webcam" began to refuse to work after a recent driver update, roll back to the previous version. The following procedure may help you regain access to your camera:

Remove and rediscover the webcam
If the usual update did not help you, do something a little different: remove the camcorder, and then immediately return it to its place. Upon returning, the system will immediately install the device with all the latest updates. How to do this, we describe below:
- We launch the "Task Manager" using the "Windows Settings" window or the "Search" panel. Detailed launch instructions are in the section on disabling the webcam.
- We click on your video device with the right mouse button, select "Remove device" in the additional menu.
 Click on the "Remove device" item so that the "Cameras" section disappears from the "Task Manager" list
 - In the next window, we confirm that we want to get rid of the camera for a while. You will see that the "Cameras" section has disappeared from the list.
 Select the menu item "Update hardware configuration"
 - We are waiting for the system to find the device again and update the list. After that, you can try to start the webcam again.
Troubleshoot code 0xA00F4246
After launching the Camera utility, a black window may open with a notification that the webcam cannot be launched. In this case, the system will ask you to check if new versions of drivers are available and update the latest ones if available. The error code in this case is 0xA00F4246. It occurs both with built-in devices and with removable (external) devices that are connected separately.
 Error 0xA00F4246 may occur when launching the Camera app
 If you encounter this problem, most likely your camera will not work in other utilities that require it, such as Skype. Unfortunately, a simple driver update will not fix the problem. The way out of the situation is a small procedure for editing the registry in the Windows system application:
- Launch Registry Editor. To do this is quite simple: press the Win and R keys and in a small window, spell the word regedit. After that, immediately click on OK or Enter, so that the system executes the given command.
 Enter the regedit command in the window that appears
 - In a small Windows system window, confirm permission for the registry editor to make changes to the computer.
- A list of several branches will appear in the left pane of the window. Select the third - HKEY_LOCAL_MACHINE. Run it by double clicking and open the SOFTWARE folder.
 Open the HKEY_LOCAL_MACHINE branch on the left, and the SOFTWARE folder in it
 - Navigate to the Microsoft folder and then to Windows Media Foundation.
 Open the Windows Media Foundation section in the Microsoft folder
 - In the last folder, right-click on the Platform block and in the small menu, hover over the “Create” item. In the following list, select "DWORD Value".
 Click on the "New" button and select "DWORD Value"
 - Use EnableFrameServerMode as the name of the created parameter.
 Name the created entry EnableFrameServerMode
 - Open it by double-clicking the left mouse button. In the window that appears, set the value of the created parameter to 0. To save the changes, click OK.
 Put the value 0 in the corresponding field of the window
 - Close the editor window, disable all open applications and restart your PC.
- When the device starts, check if the problem with the Camera utility is resolved.
Video: what to do if an error with the number 0xA00F4246 appears when starting the "Camera"
Windows 10 has a built-in camera utility that allows you to launch a webcam. In this program, PC users shoot videos and take photos. To turn on the webcam in other standard and third-party programs, you need to allow them to use it in the privacy settings that are available in the Windows Settings window. If your camera does not want to start in either standard or third-party utilities, try updating its drivers in the Device Manager, and also check if the antivirus is blocking its operation.