How to change icons on Android - customize the smartphone workspace to your liking. How to replace icons on Android: necessary applications Change the android application icon
Read how to change desktop icons on your Android phone. Which launchers support this, where to download interesting icon packs. The Android system has flexible settings, so users really like it. With the help of several applications, you can manage, change and customize the icons as you wish. If you do not have special applications that can change icons on the Android desktop, then you can download them from the Play Market.
What applications will help you change the icons on your smartphone’s desktop?
In standard Android, unless it is modified by the smartphone manufacturer, there is no way to change the icons at will. You can only move them into folders and distribute them across desktops. But there are several types of applications that can change the appearance of standard icons and give them a new style.
- Icon packs. This is the most affordable way to change the design of your smartphone. In most cases, the user does not need root rights to use such applications. But the changes will affect only the icons, and not the entire visual design as a whole.
- - programs that change the graphic design of the entire Android system. They can style it for IOS or another shell of your choice. Moreover, such applications can also work with ready-made icon packs. With their help you can completely personalize your smartphone. Often such programs require.
You will have to download any launcher first and then add an icon pack to it. Many launchers are equipped with their own packages or a means for downloading them.
The best among launchers with the ability to replace desktop icons:
- Launchers;
- ADW Launcher;
- Apex Launcher;
- Nova Launcher;
- Holo Launcher.
The easiest to manage is Nova Launcher, which is distributed free of charge through the official Play Market.
All types of applications for changing the appearance of a smartphone have a simple interface. You just need to go in, select the appropriate visualization option and install it with one click. In some cases, confirmation of actions is also required, but this manipulation will also not take you much time.
Best Icon Replacement Apps
The Play Market offers several dozen applications that will help you solve the problem of how to install icons on Android. Each of them has its own characteristics - some require a launcher to work, while others launch without its help. We have selected 6 of the best options.
Beautiful Icon Styler
After launching the application, you will be asked to choose one of several dozen shortcuts presented in free packages. If this is not enough for you, you will have to pay extra. Each package has its own price. To use the application you do not need superuser rights, which is another undoubted advantage.
The advantage of this application is that it works with launchers. Icons are transferred without loss. If you use packages with a standard shell, the design will only change on the desktop. In the main menu, the icons will be standard. You can independently choose which of the launchers you have on your phone to add icon packs to.
Awesome Icons
Another free application that does not require root rights from the user. In it, you can set an icon for each application, using the provided templates or creating one yourself. Icons for Android can be made from any picture or photo.
This application is most often used to change the appearance of icons for e-wallets and banking applications. All programs that you want to hide can be changed using this application. The only exceptions are standard applications from Google - their icons do not change when using this program.
Rondo

This application allows you to change the icon design of 85% of the applications installed on your smartphone. This program is distributed free of charge. It includes not only several icon options, but also 20 desktop wallpaper options. All labels are made in high resolution 192 by 192 pixels, they have a rounded shape and a shadow. Interestingly, wallpaper pictures go well with icons.
Some content is offered for a fee. You will also have to be distracted by advertising banners, but they are not too intrusive. Updates are released regularly for this app, giving you the ability to change the icons of more apps and choose from a wider range of thumbnails.
Siru
![]()
This package is chosen by those who love contemporary art and appreciate feedback. It contains about 300 icons for various applications, but the library is regularly updated with new types. In addition, everyone who has downloaded the program has the opportunity to contact the developers and ask them to create images specifically for one of their favorite programs.
This option has many advantages: free distribution of the application, no advertising, a set of wallpapers that match the style, and a unique appearance of the icons. The appearance of the icons will remind you of OnePlus smartphones, since Hampusa Ollson was involved in their creation, as well as the design of the gadget.
GEL
This application can give your smartphone a finished look. It is intended for those who love minimalism. The essence of the visualization is that the wallpaper becomes the same color as the icons, which stand out in more intense shades. The shortcuts are round in shape and have a white icon to help identify the app. They look quite original, but if you have application shortcuts on your desktop that are not supported by the package, you will have to remove them. Only in this case will you give a finished look to your desktop.
The big advantage of this application is that it can be launched on smartphones with their own shell (LG, Sony, Asus) and not equipped with third-party launchers. The GEL application can completely solve the problem of how to change icons on Android. At the same time, application shortcuts will remain informative; icons will appear on them indicating the number of changes that have occurred during your absence. Also in the package you will find a stylized clock widget that will complete your desktop composition.
VIT
Another pack of icons in the minimalist style. Its icons are white, with smoothed edges, and the pictograms are drawn as if with a pencil stroke. Manufacturers did not forget to equip this application with wallpapers and suitable widgets. You can choose the clock or calendar option for visualization. All elements fit together perfectly. In addition, you will have the choice of one of several design options.
The developers have thought through everything so that they can recommend this application to the widest range of users. It is distributed free of charge, and exists due to advertising present on its pages. In total, you will find more than 2000 icons in the package that are suitable for most applications on your desktop. There are no special icons just for less common programs, but few people keep them on their main phone screens.
Now you know how to change icons on Android and where to get original packages. We will not talk in detail about the operation of packages and launchers, since they all work according to the same principle. The interface will intuitively tell you where to click. You can ask questions about using the programs in the comments. Share the list of original packages and applications with your friends, invite them to discuss.
For all the splendor of their graphic design, the Windows and Android operating systems do not satisfy the users' need to own an exclusive software product. However, it is enough to change the icons in Windows 7 or Android, and the shell will begin to emphasize the individuality of the computer owner. This will also make it more convenient to use. It’s much better when, for example, the shortcut to a folder with music is depicted as a note, and the shortcut to a text file with passwords is shown as a key.
Changing icons in Windows 7
In order to change the icon of a folder or file (program) shortcut you need to:
- Place the cursor over it and press the right mouse button;
- Select the “Properties” item in the menu that appears;
- Go to the “Shortcut” tab in the window that opens;
- Click the “Change icon” button;
- Choose any other from the collection;
- Click “OK” and “Apply” successively.
The gallery contains standard pictures, but their use is not at all necessary. Packs of additional icons can be downloaded from the Internet or created with your own hands in a graphics editor.
To make things even easier, you can download and install a new theme that already comes with a different set of icons.
Changing icons in Android OS
It is impossible to change icons on Android using the operating system itself. There are two different ways you can go here:
- replace the standard launcher with a more advanced one;
- use applications to gain root access and change system applications.
The first case is ideal for most users, since using it eliminates the possibility of the device malfunctioning. By installing LauncherPro, GO Launcher, ADW.Launcher, Apex or the like, you can easily change not only the icons of folders and applications, but also the entire appearance of the system. Their installation from the Android Market and configuration does not cause difficulties even for inexperienced users.
Replacing icons using Go Launcher
Changing icons in the Android OS using various third-party launchers is almost identical. In Go Launcher this is done like this:
- the launcher itself;
- Install it on the device;
- The first time you try to go to the desktop, the system will ask you to choose a standard launcher or a new one - you should check the box next to “Default for this action” and check Go Launcher;
- Go to the list of installed offers and select “GO themes”;
- We install the one we like best from those offered.
The procedure for installing a specific theme is as follows:
- Long touch on an empty space on the desktop to enter the launcher settings;
- Select the Theme tab;
- Click the "Subject" button;
- Select one of the installed themes.
The icons will automatically change to those present in the theme package. In this case, it becomes possible to change them to any image. To do this you need:
- Extract the image icon to the desktop;
- Long touch on it to bring up a submenu;
- Click on the "Icon" item;
- Select another image from those offered or click on the schematic image of the picture (mountains and sun) in the upper right corner;
- Select "Gallery";
- Mark any image (too large will have to be cropped).
The downside of decorating using third-party launchers is an increase in power consumption and a decrease in the battery life of the device.
Replacing icons by changing system applications
The second method requires installing root access to system files on a tablet or smartphone running Android OS. To implement it you need:
- Install the Unicon application;
- Install the Xposed application;
- Go to the Xposed menu, where in the “Modules” item select Unicon.
After these manipulations, Unicon will be able to install third-party icon packs into the system.
The downside here is that obtaining root rights and using applications that modify system files can lead to malfunction of the device. This also serves as a reason for refusal of warranty service in most service centers.
Android in its standard form looks poor. Yes, all the necessary functions seem to be there, but you still can’t turn on displaying battery percentage. There is a beautiful loading animation, but it is of no use. There was still no support for the topics. So what now - install another custom, the tomorrow night build of which will definitely fail? No, we will do everything with only root. Read on and learn how to change the Android interface.
PREPARATORY STEPS
To perform many of the tricks described in the article, you need root and a root that depends on it. In the standard version, it will work 100% correctly only in AOSP firmware, but even in them there may be glitches. Problems with Xposed modules can often arise in stock firmware with modifications from the manufacturer, but there is a special version of Xposed for them: for TouchWiz, for MIUI, for firmware based on Android 5.0+. HTC owners can install the official build, but S-OFF is almost always required.
Got root, installed Xposed? Then let's go.
1. CHANGE THE LOADING ANIMATION
 The boot animation is stored in the /system/media/bootanimation.zip file. Inside there is a text document desc.txt, it indicates the frame rate, horizontal and vertical resolution, etc. There are also the images themselves (frames), which change with the frequency specified in desc.txt. The order and rules for playing animation from folders are also written in this file.
All you need to do is get the archive from the device using a file manager with root support, unpack and replace the images, not forgetting to first compress them to the desired resolution. Next, just pack the archive without compression and return it to its place. But, of course, it’s easier to take a ready-made archive. On the site hboot.co.uk there are plenty of them.
On the other hand, although the animation is interesting to look at, it makes no sense. But it can be useful to see which services are running. The simplest option is to install LiveBoot, which outputs logcat and dmesg, i.e. Android and Linux kernel messages.
2. ADD YOUR SOUNDS TO THE STANDARD SET
Sounds can be dropped into one of the folders in /system/media/audio. alarms - alarm ringtones;
notifications - sounds for notifications;
ringtones - ringtones;
ui - system sounds, such as low battery, camera focusing, selection of interface elements. Some applications may access them by default, so you can replace them with your own.
Why put ringtones in the system partition? Firstly, the files there are able to withstand a general reset to factory settings; secondly, sounds from special folders can be set to a signal (alarm sound, call, SMS receipt) in almost any application.
3. CHANGE FONTS
I very, very doubt the usefulness of these actions, because the standard Android font is almost perfect. But the taste and color...
You can use a special application to install fonts. For example, HiFont allows you to change fonts in the firmware of Samsung, HTC, Motorola, Lenovo, Huawei, Nokia X without root. And if you have root, then in all other devices. You can either use fonts already available in the application catalog or add your own.
But where to get them? There are three options:
- fonts taken from different firmware of Android devices can be found in the post on w3bsit3-dns.com;
- on w3bsit3-dns.com there is a good collection of user-created fonts in the next post;
- collection on XDA.
You can install fonts without using a special application. We take the .ttf files from the archive, replace them with them in /system/fonts/ (root is needed) and reboot the device.
4. CHANGE ICONS
 Icons can be changed using special applications, for example Unicon - Icon Themer. After installation, you need to activate the application in the Xposed settings (it will notify you). Next, restart your smartphone and open the application. All that remains is to click on Download themes from Google Play and select an icon pack, install it and reboot your smartphone. But it is worth considering that the icons do not change in some launchers, for example Google Start.
5. ADDING THEMES SUPPORT
 Before installing the theme, HKThemeManager will show the entire list of applications to which the theme will be applied. Uncheck the boxes that are not needed, click on “Apply Theme” and reboot the device.
There is also an alternative option for installing themes - the Layers Manager application. It works in any firmware on Android 5.0+ thanks to the introduction of the RRO resource reassignment mechanism. The application's database of themes is huge and is located on the Play Market. To view it, just type Layers Theme in the search.
Keep in mind that the application does not work on firmware based on CyanogenMod: the local engine and RRO conflict.
6. CONVERT ANDROID 5.X+ INTO ANDROID N
The Android N-ify module will help us with this. After installation, the following features from Android N will appear:
- The design of the notification panel will noticeably change. The quick settings panel will appear;
- Interesting inscriptions will appear in the settings under some items.
- For example, under Wi-Fi the name of the current access point will be written, under the “Battery” item - the remaining operating time and battery charge in percentage;
- the Easter egg will change in the “About phone” menu;
- You will quickly switch between the two most recently launched applications by double-clicking the “Recent” button.
Android N-ify also has useful settings through which you can not only disable it, but also configure individual changes made.

7. IMPROVING THE STATUS BAR
For me, the status bar in stock Android is the most unfinished thing. Luckily, Xposed can be used to change a lot of things and make it more convenient.
8. Changing the battery indicator
Battery Home Icon installs a battery indicator instead of the Home button. Moreover, this indicator is highly customizable: you can change colors, enable/disable the display of percentages, charging animation, and so on.
XbatteryThemer - customize the battery icon. There are many different themes, both ordinary and very extraordinary.
9. Display the speed of the Internet connection
Network Speed Indicator - network speed indicator. Can show the speed of mobile networks, Wi-Fi, Bluetooth, Ethernet. Everything is customizable - from units of measurement and speed threshold to color and font size. You can also add the amount of internet traffic used to the status bar using DataUsage. The data shown is the same as in the “Data transfer” settings section.
10. Display the actual signal level
Sometimes you need to know how well the Internet is received in different parts of the room, how the position of the smartphone affects the signal reception level, or you simply need to compare the signal reception level of your smartphone and other models. NetStrength will help with this. The module can display the cellular network signal level in decibels per milliwatt (dBm or dBm). This unit of measurement has a negative value, and the closer it is to zero, the better the reception. You can also enable the display of ASU (Arbitrary Strength Unit - signal-to-noise ratio in the pilot channel). Calculated using the formula ASU = (dBm + 113)/2.
By the way, the module can show the Wi-Fi reception level in dBm, Mbps (Mbit/s - megabits per second) and percentage.
11. Monitor the download process
Statusbar Download Progress is one of the most useful Xposed modules. It displays the download process from the Play Market or a file from the Internet in the form of a thin white bar above the status bar. I immediately recommend activating “God Mode”, thanks to which progress will be displayed for any applications that have a progress bar. In the settings you can set the display above the status bar or below the line.
Today we will look at one of the options for graphic design of the theme on Android devices, or rather changing the standard icons. Let’s say right away that the procedure is not easy, and only technically literate users can do it; in turn, we will try to describe everything in as much detail as possible, illustrating everything with detailed screenshots.
Replacing standard Android icons
Before starting the procedure, you need to make four “golden” rules:
Important! The Android system version must be 4.0.3 or higher.
1. Make sure that the device is rooted, i.e. has superadministrator rights, if there is no root access, then read this article;
2. Download the latest version of Xposed Installer, to do this follow this link and download the apk file (see screenshot below), more details about it;
4. Install two previously downloaded apk on your gadget, read more about the installation procedure.
If all the above points are done, then go directly to the procedure itself:
1. Launch Xposed and give it root access, select the framework item;
Be careful! In some cases, the device may not boot after connecting the framework. If you are not familiar with the terms “looping”, “turning into a brick” and have not encountered or solved such cases, do not install it.
2. Click the “Install/Update” button, the application will install all the necessary files;


3. Reboot the gadget;
4. Open the Unicon application;
5. Select “Open Xposed Installer”;
6. It will automatically appear in the “Modules” section; you need to check the box;


7. Now we find any icon pack, for example, ;
8. Open Unicon, select the pack and click “Apply”;

9. For new packs, click “Download themes from Google Play”;
10. Reboot the device and enjoy the new Android icons.
Bottom line
This procedure is not easy, and there are certain risks, so Android beginners are not recommended to change the standard icons of their device.
how to change shortcut size in android. How to check the motherboard for functionality.
Renaming files and changing its icon for a child's game on Windows and other similar operating systems designed for a personal computer. However, have you ever thought about renaming and changing the app icon installed on Android? Could be fun, right?
Well, I thought about it one day and then started researching how it could be done. It is currently not observed that there is an app on the Play Store that can rename an installed app, not even a rooted device.
Using APK Editor it's easy to rename your Android app and change the default icon even for non-rooted Android phones. So let's see how it's done. Renaming and changing Android Apps icon
which swing from the top curtain, which is found in any Android smartphone. For some, this very curtain disappears without a trace, for others, labels fall out of it and
Step 1: First of all, we must APK package the application you want to rename and change the icon. If you don't have the APK with you, but the application is installed on your phone, you can easily compile its APK using Astro file manager. We have already talked about how you can make APK files of installed applications, talking about transferring installed applications from one device to another via Bluetooth.
Step 2: Download and extract Edit v0.4 APK to a folder on your computer. APK Edit v0.4 requires Java to work, please install it if you don't already have it.
How to change the icons of a file or folder shortcut... On the screen of your monitor there are a large number of different folders and icons that have a standard appearance.
Step 3: Now that you have both the APK file and the APK editor - let's start with editing.
Run APK Edit.exe extracted in the previous step and download the APK file you want to edit.
Step 4: The tool will now read the file and display the application icon and name in the General tab. You can change the field name directly by text and click on the icon to find a new icon. Please make sure the file icon is in PNG format and the size of the square is correct.
Step 5: Once you are done with editing, click on the Apply button to save the changes.
Although the app gives you the option to directly push apps to your device using a data cable, I would suggest you to transfer the modified APK file to your internal hard drive using Wi-Fi or data cable and then install it on your device.
Even when you install a file, you will see changes in the file name and application icon. Once the app is installed, you will see the app with a user-defined icon and name. Conclusion
You can use this trick to disguise your protected apps on Android. But remember that the trick is for personal use only. Don't try to change the app's name and icon and publish it as your own work.
But there is still a plus - the required shortcut will no longer disappear from the home screen after rebooting the device!
app in the list, then tap: tap to change label Now you know how easy it is to rename a shortcut in Android, even if your launcher
Working with applications, contacts, bookmarks, shortcuts - Changing icons The photo assigned to him is used as a contact icon, change it
 It allows you to install third-party icon packs on Android and does not require superuser rights. Moreover, it’s easier to change icons using it
Applications can be grouped by topic and shortcuts can be displayed on the desktop. You can change the folder name and icon.
Interface replacement for Android. It should be noted that some are especially rich, with their help you can change almost everything, resizing labels is now easy.
What should I do if the icon (shortcuts) looks like a green android?
Is it possible to change the set of applications on the lock screen?
 You can then change the folder name to your own by opening the folder and tapping on the name. How to send a shortcut to your favorite webpage to your desktop in Android.

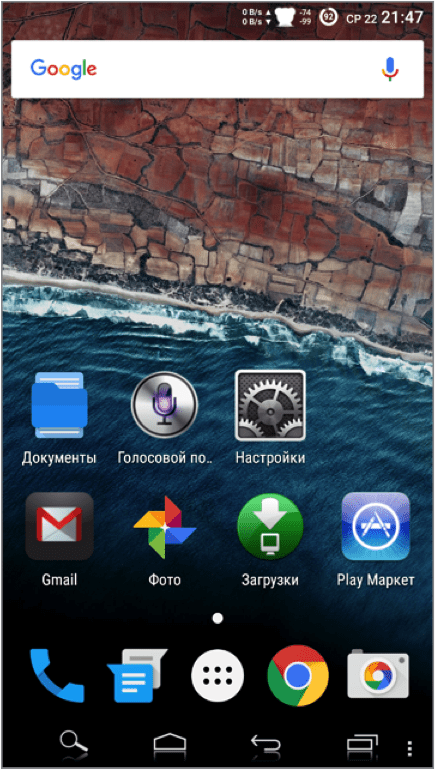
We most often see a grid of application icons on our screens of smartphones or tablets Android 6.0, 5.1, 4.4 2 and so on.
Unfortunately, the "factory" icons (by default) are not the most beautiful, but this can be easily changed.
The main advantage of the Android system is its flexibility and, in our case, personalization.
You can change icons in three ways: with a launcher and without a launcher - with the appropriate package and programs.
Moreover, the packages are compatible with such launchers as launcherami, ADW Launcher, Apex Launcher, Nova Launcher or Holo Launcher.
A lot also depends on the individual set - I tested it on Nova Launcher and it works great.
NOTE: you can also change the icon size, text color and even change the name on the Android desktop.
Now let's take a closer look at some procedures for changing the appearance of Android to make it more beautiful.
How to change application icon on Android
The easiest way to change icons on Android is to download the launcher application, like in the Windows theme.
Nova Launcher is popular today. You can download it for free on Google Play Market, so I don’t give links (just enter the name in the search bar).
Once installed, go to settings and install the appropriate “icon” pack.
Of course, there are many other free apps and perhaps better ones.
They will quickly change all application icons.
How to change application icons on Android without launcher
If you don’t want to install a launcher, then you can change the icons without the launcher. It goes without saying that for this you need to have others prepared.
Where can I get them? They can be downloaded for free on the play market. Here are the most popular packs, although there are many others: MIUI v5 Icon Pack, Holographic Icons, Simplex, DCikon, Square Icon Pack, Round Icon Pack, Min Icon Set and so on.

The good news is that you don't need root access or other changes to the operating system.
Basically, without the hassle of root or other tools, you can do this using a launcher, although a lot depends on the application containing those icons.
If you search on Google Play, you can find icons that simulate the presence of an operating system from LG, Samsung, etc.
How to swap Android icons
When changing icons in Android, you need to drag one over the other, but not completely (so that there is a small indentation), otherwise the system will create a folder and place both icons in it.
If you use a launcher, then when you long press the selected icon, in most cases they change places on their own.
Programs for changing icons on Android
If you are disappointed with the modification described above and the icons of your favorite applications look the same, there is a solution in the form of special programs - Icon Theme, which will make your desktop unique.
Some of them run on Android version 4.0 and require access to the root and the Xposed library.
After launch, you may be greeted by an ascetic interface. In the list you will find all the icon packs that are installed in the memory of your device.
You can select any of them and then accept the changes. After this, you need to restart your smartphone and voila.
NOTE: When changing icons, two problems may pop up. The first is interference with system files.
Even simply changing icons carries the risk of damaging the system and requiring you to restore all factory settings again.
Secondly, there is no way to change the icons of individual applications, although some launchers may have such a function. Good luck.
Today we will look at one of the options for graphic design of the theme on Android devices, or rather changing the standard icons. Let’s say right away that the procedure is not easy, and only technically literate users can do it; in turn, we will try to describe everything in as much detail as possible, illustrating everything with detailed screenshots.
Replacing standard Android icons
Before starting the procedure, you need to make four “golden” rules:
Important! The Android system version must be 4.0.3 or higher.
1. Make sure that the device is rooted, i.e. has superadministrator rights, if there is no root access, then read this article;
Download the latest version of Xposed Installer, to do this follow this link and download the apk file (see screenshot below), more details about the installer itself here;

4. Install two previously downloaded apk on your gadget, read more about the installation procedure here.
If all the above points are done, then go directly to the procedure itself:
1. Launch Xposed and give it root access, select the framework item;
Be careful! In some cases, the device may not boot after connecting the framework. If you are not familiar with the terms “looping”, “turning into a brick” and have not encountered or solved such cases, do not install it.
2. Click the “Install/Update” button, the application will install all the necessary files;


3. Reboot the gadget;
4. Open the Unicon application;
5. Select “Open Xposed Installer”;
6. It will automatically appear in the “Modules” section; you need to check the box;


7. Now we find any icon pack, for example, here;
8. Open Unicon, select the pack and click “Apply”;

9. For new packs, click “Download themes from Google Play”;
10. Reboot the device and enjoy the new Android icons.
Bottom line
This procedure is not easy, and there are certain risks, so Android beginners are not recommended to change the standard icons of their device.
In this lesson I will tell you
Right-click on an empty space on the desktop and select “Screen Resolution” from the drop-down menu.

Make sure that in the window that opens, the “Resolution” setting is set to the correct values for your monitor, marked “Recommended”.

Now that everything is installed correctly, we will change the size of the icons. I'll show you 3 different ways. The first is when we go to the screen resolution settings, you need to click on the link “Change the sizes of text and other elements.”

A new window will open in which you can select 3 icon sizes as in the screenshot below.
After changing the settings, do not forget to click the “Apply” button.

The second way to answer the question how to change the size of desktop icons, - you need to click on an empty space on the desktop, then go to “View” and select one of three sizes: large, regular or small icons.

Well, the easiest way is to click on an empty space on the desktop with the left mouse button, then hold down the “Ctrl” key on the keyboard and, while holding it, simply roll the mouse wheel forward or backward. The icons will begin to grow or shrink. We settle on the size that suits you.
In this lesson I will tell you how to make desktop icons smaller or larger. Changing the size of desktop icons is a fairly simple procedure. This can be done in several ways, but before that you need to understand what caused their increase or decrease. I would recommend first checking the set screen resolution, since failure to follow this recommendation leads to distortion of the display of elements and, accordingly, changes to the desktop icons.
If you need to set a Windows 7 password for one reason or another, then in this lesson I will show how this can be done easily and quickly.
In this video tutorial we will talk about how you can install a new font in Windows 7 and Windows XP.
In this lesson I’ll tell you about another way how to make an invisible folder. In one of the previous lessons, I already talked about hidden files and folders. Today we will create an invisible folder by assigning a special attribute to it from the command line.