How to configure adsl modem d link 2640u
This article is devoted to connecting and setting up the D LINK 2640U modem. Here you will find complete step-by-step instructions, learn how to connect a router via a router, how to organize a Wi-Fi network that is secure and encrypted from other PC users, as well as Network settings for different providers.
Connecting a modem
In this section we will look at how to connect a modem to a computer.
First of all, the router should be connected to power - insert the end of the wire from the power supply into the corresponding socket on the back of the modem, and the power supply itself into the outlet.
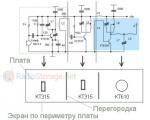
On the back side of your modem (router) there are 4 LAN inputs at once. It is there that insert one of the ends of the blue wire that comes with the D-LINK 2640U, and insert the other end into the LAN port on your PCM.
Photo: Wireless router D-link DSL-2640U
At the same time, be careful: the LAN light on your router should light up with the number of the modem port into which you inserted the local wire. In this case, both ends of the wire must be in place (port on the PC and port on the router).
After this, go to the next tab of the instructions, where you will be asked to connect your modem and splitter.
There is one more cable included with the modem - insert it into your splitter (separator), and place the other end of this cable into the corresponding port of your router - “LINE”.
Factory settings
Each device has its own “factory settings”. We will talk further about how to reset the D-LINK 2640U to factory settings. You have to reset the settings to factory settings if you simply cannot go to the modem settings menu, or the modem was configured incorrectly.
- The “RESET” function is available on every router and using it is much easier than you think:
- find a needle or awl at home, look at the back panel of your router, where you will see a small hole labeled with the word “RESET”;
- After this time, all the lights on the router will go out one by one. It may restart, which means that the modem settings have been reset to factory settings. Now you know how to reset D-LINK 2640U.
Video: Setting up the D-LINK 2640U router
Login via web management
Each modem has its own web management system. In the case of the D-LINK 2640U router, you can access it through any browser on your computer.
- check whether the modem is connected to the computer and the splitter (the Line and LAN lights should be on);
- after that, open your browser (Opera, Chrome) and enter the IP address 192.168.1.1. You will find yourself in a web management window where you can either update your modem or configure it automatically or manually.
Firmware update
In this section we will tell you how to properly update the firmware of your router. After purchasing each device, we advise you to check for the latest firmware (updates), which will ensure trouble-free operation for a longer period of time.

ADSL connection parameters
ADSL connection parameters are very important, because both the speed of your Internet connection and its uninterrupted operation will depend on them.
As described earlier, go to the web control panel of your modem:

How to configure the D-LINK 2640U router for providers
To connect the D-LINK 2640U router, you must first connect the router itself to the computer.
If you do not have signal separation, when you need simultaneous operation of both the telephone and the Internet, then do the following:

Rostelecom
- open your browser, enter 192.168.1.1 in the address bar and press Enter/;
- enter your username and password (default – admin/admin) and click on the login button;
- go to the “Network” tab, and from there to the “WAN” section. Clear all Internet connections using the “Delete” button.
Click on the "Add" button and enter the following parameters:

Domolink

Specify the following options:

Simply skip the remaining pages with the NEXT button and confirm the settings with APPLY. Click the FINISH button to complete the router setup. In a couple of minutes the connection will be established.
MGTS

Ukrtelecom
Go to the configuration menu of your router via web management. And to do this, enter 192.168.1.1 in the browser and press Enter. Enter your username and password, click on the login command.
Uncheck DSL Auto-connect, then proceed to setting up the modem:

Save and wait about a minute for the router to reboot.
Setting up a modem in router mode
The modem can be configured both in router mode and in bridge mode. To configure the modem in router mode, open the web control panel. To do this, open your browser and enter 192.168.1.1 in the address bar. Next, enter your username and password (by default – admin/admin), log into the panel and go to WAN settings. Now you will need to fill out the network parameters, which can be obtained from your provider, or read in the sections above.
Wi-Fi network
Go to the web control panel of your router:

Continue setting up wifi, now you can enter the security parameters of your network:

In the article, we looked at all the options for setting up the D-Link DSL-2640U router, from connecting it to power and your PC, to setting Internet parameters for different providers. We hope that our article was able to fully reveal the answers to your questions.
Transmitting the Internet over the air within a home is a fairly simple task, given modern technologies and their rapid development. The only thing that is necessary now is to draw up an agreement with the provider for network supply services and buy the necessary equipment for distributing Wi-Fi. The most commonly used are routers, or, as they are also called, routers.
Many providers in cities and large towns provide Internet based on special leased lines. Others still have to use a telephone cable to connect. One of the devices using ADSL technology will be discussed in this article.
Manufacturer of household network equipment, D-Link, has released its device - DSL-2640U. Its purpose is to provide a network of computers via Wi-Fi and Ethernet. Relevant for both home use and small offices.
Appearance
Among the developers of such devices, there is a tendency to create an unpretentious design. This device did not escape it either. The form is a regular black box. On the front panel there is a standard set of elements for indicating the status of the router - LEDs with icons for the network, ports and Wi-Fi operation.
The rear panel contains 4 Ethernet ports, 1 DSL, buttons to turn on Wi-Fi and the device itself, and change WPS. There is also a connector for connecting a power adapter and an antenna.
There are grilles at the bottom and top of the device to create natural ventilation and cooling. There are also a pair of mounts for mounting the router on a wall. The peculiarity of this model is that the reset button is located on the bottom of the device.

DSL-2640U: setup and connection
Typically, connecting routers occurs as standard - through the web interface. But to do this, you must first physically connect the device and the computer. This is done using the patch cord included in the kit. One end is installed in any LAN connector of the router, and the other end is installed in a computer port.
After establishing a connection between the device and the PC, you need to open any browser, enter the IP address in the address bar and go to it. As a result, a web page should open asking you to enter your username and password. By default, both parameters are set to admin. After going to the administrative part, you can change your login and password to your own.
Administrative panel
In the administrative panel of the D-Link DSL-2640U, it is possible to fine-tune all the necessary parameters for any task. For convenience, all main functions are divided into categories and sorted.

Status tab
This tab has several categories, on the pages of which you can find out about the current state of the router. Network statistics will tell you about existing connections and their activity. The DSL Status category shows the status of the DSL network. WAN contains information about WAN connections. DHCP is a technology for automatically obtaining IP addresses connected to a router. This category provides a list of equipment with issued IPs, their times and MAC addresses. The routing table contains information about which interfaces packets are exchanged through. The "LAN clients" category shows the number and information about currently connected devices.
Network Tab
This tab allows you to configure network connections or create new ones the first time you use them. It contains only one category - “Connections”. It already has one LAN connection built into the settings of the D-Link DSL-2640U router, and it is impossible to remove it.
Wi-Fi tab
The Wi-Fi tab contains several categories related to creating a local network with Internet access via Wi-Fi. In general settings, you can programmatically disable the use of a wireless network.

The “Basic Settings” category contains many settings for precise configuration of the router. Among other things, it is possible to hide the access point, the connection to which will be realized only after the client enters its exact name. SSID is the name of the network, which can be set right there. Selecting a channel is used to switch to a less interference-laden range. You can select the auto option, which will do this automatically. The “Client isolation” checkbox serves to cut off the ability of connected devices to interact with each other. The remaining items are used less frequently, and in most cases there is no need to change their values.

The “Security Settings” section is responsible for creating a password for connecting to Wi-Fi. It is worth taking these settings seriously, as they will help to avoid unauthorized use of the network. By default, the DSL-2640U WiFi router is configured for an open connection, that is, any device equipped with a Wi-Fi module can enter the local network.
To avoid this, you need to change the Open item to one of the other options, for example WPA-PSK or WPA2-PSK. When you change the type, more detailed settings will appear, where you can specify the encryption key and additional authentication parameters.
The MAC filter will allow you to block the connection of unwanted computers by MAC address. Adding occurs on the MAC address tab, as does deleting.
WPS service allows you to quickly connect devices to the network using the router PIN code. Using this function is convenient, but still unsafe.
“Advanced settings” are used to define parameters that are not necessary for everyday use of the DSL-2640U router.
Other settings
The “Advanced” and “Firewall” tabs contain advanced settings that are used for fine-tuning the router and are used by experienced administrators. The average user, as a rule, does not need them.
Control
The “Control” tab contains Internet management for users. You can limit his visit to certain days and times. This will be relevant, for example, in the office or for children. To activate a usage rule, you need to enable it and specify the MAC address of which device should be denied access to the Internet, on what days and hours.
To prevent employees or children from visiting prohibited and inappropriate sites, you can limit their accessibility from the router by specifying a specific URL. By analogy with MAC addresses, you can create a list of URLs.
System Tab
This tab is responsible for system settings. Here you can and should change your login and password to enter the administrative panel. It is also in this category that all changed data must be saved. The “Factory settings” item repeats the action of the Reset button on the bottom of the device, that is, it returns the DSL-2640U router to its initial state. Before doing this, it resets all settings.
DSL-2640U: setting up the first connection
While in the admin panel, you need to go to the “Network” tab. There you should specify the connection name and its type. Depending on the type of connection, other settings will be displayed. The most common type is PPPoE. This is where an agreement with a provider will come in handy, which specifies all the necessary parameters for connection. After entering the data, you need to save it.

In order for the DSL-2640U router to distribute the Internet via Wi-Fi, it must first be configured. To do this, go to the Wi-Fi tab. By default, the wireless connection in the router is enabled. Therefore, you can immediately go to the “Basic Settings” category. Here, the standard generated network name can be changed if desired. Next, in the “Security Settings” category, set the encryption type and set a strong password. In order for the router to allow devices to access the Internet, these settings should be sufficient. Now you need to save everything. If the DSL-2640U asks you to reboot, you must do so.
Conclusions and features
It is worth saying that during the existence of the DSL-2640U, the firmware radically changed its design. Therefore, sometimes users get confused when switching or updating to a new one. On the DSL-2640U, the latest firmware version is indicated as 1.0.32.

The main Internet provider in Russia through ADSL technology is Rostelecom. Therefore, the DSL-2640U is especially relevant for connecting devices via ADSL. Rostelecom provides full support for this type of network for a reliable connection.
To update the software yourself, you need to download the corresponding file from the official D-Link website. And at this point you need to be very careful, since the DSL-2640U has several revisions, and the firmware will only fit those specified. You can find out the revision of the current router in the administrative panel or on the sticker on the bottom of the device marked H/W Ver.
After downloading the required file, go to the router’s web interface in the “System” tab. There, select the “Software Update” category. Then you need to specify the downloaded file in the configuration, click “Update” and “Reboot the device.”
In general, the operation and setup of the D-Link DSL-2640U is not that complicated. A simple and intuitive interface that many similar gadgets have. Judging by user reviews, the router can boast of good reliability and stability.
When connecting to the Internet, Internet companies such as Rostelecom usually provide routers. One of the main routers issued by this company is the D-Link 2640U.
The new version of this D-Link modem is very similar to the DIR-615, but they differ in characteristics. In the old version, the following indicators can be distinguished on the front panel:
1. Availability of electricity. Signed "POWER".
3. WLAN – status of the Wi-Fi wireless network.
4. WPS – a function for quickly connecting to a router.
5. The last two are DSL and Internet.
Installation and activation
We choose a suitable place for us. Such that it is not very far from the desktop computer, preferably closer to the center of the house or apartment, so that the signal is good everywhere. There should be an outlet nearby.
We connect to electricity using a power supply. We turn on the D-Link DSL 2640U router. We connect the Internet cable to the WAN port. Through one of the 4 local ports using a network cable, we connect our PC or laptop to our device. In some cases, the Internet may already appear at this moment. Then all that remains is to configure Wi-Fi. Let's continue the instructions for the 2640U, now we'll look at how to enter the settings.
Full Internet and Wi-Fi setup
Before you start debugging everything, you need to go into the settings of our router.
Entrance
The settings site is usually written somewhere near the serial code, maybe on the bottom side. There may also be a login and password to enter debugging.
If you can’t find the address, then simply write in the address bar of your browser - 192.168.0.1 or 192.168.1.1. Here we enter the login and password, in factory settings it is usually “admin” (both login and password are the same)

On this page you can find various characteristics of the device. It is worth noting that these instructions are suitable for any routers in the D-Link 2640U line that do not have DSL.
Debugging the Internet
In the tab that has now opened, you need to select the advanced settings of the D-Link router. In the left menu, select “Network”, then “Connections”. Click the “add” button.

We have opened a page for installing a new connection to the D-Link 2640U DSL modem. Everything is extremely simple here:
- The connection type for Rostelecom must be PPPoE.
- DSL port.
- We put the name INTERNET, although this is not particularly important.
- The username and password must be specified in the contract. Or you can check them with the support service.

Debugging a wireless Wi-Fi network
We go again to the router settings page. In the left menu to configure Wi-Fi we need the “Wi-Fi” item.

There we select the basic settings. Here is also a simple instruction on the fields:
- SSID is the name of your Wi-Fi, here we write any name in English.
- Country – your place of residence (in our case, Russia – Russian Federation).
- Click “Change”.

Now you need to set a password on the router. Selecting security settings. We are only interested in a couple of fields: “Authentication Type” and “Key”. The type you need to select is “WPA-PSK”, and the key is our Wi-Fi password, here we write at least 8 characters at our discretion. And it’s better to write down the password somewhere before setting a password on Wi-Fi D-Link so that you don’t have to reset the software to factory settings after that.
One of the most popular devices today used for correct operation of the Internet connected by the Rostelecom provider via a telephone line is the DSL 2640u router. And today we want to figure out how to connect DSL 2640u and how to configure it.
D-Link DSL 2640u modem kit
When purchasing or receiving a router, the first thing you need to do is check its contents. It is not extensive, and remembering all its elements is not so difficult:
- Power unit;
- Patch cord;
- Telephone cable crimped with connectors;
- Directly the router.
When you are convinced that the package is complete, you can proceed to the next step, which is to correctly connect and turn on the device.
How to connect D-Link DSL 2640u to Rostelecom
- Connect the power supply to the modem.
- Connect the telephone cable to the corresponding port of the modem and the other end to the corresponding port of the splitter.
- Connect the patch cord to the router's Lan port and to the computer's network card.
- Plug the modem into a power outlet.
- Switch the device to the on state by pressing the corresponding button on it.
Equipment setup
Now that all the equipment is connected, you can start setting it up:
- Launch the router’s web interface by logging in to page 192.168.1.1 in the browser using the username and password “admin”.
- Click the “Advanced setup” button on the main page.
- Navigate to the “WAN” subdirectory located in the “Network” section.
- If there are any parameters in the connection list, remove them. After that, click on the “Add” button, which will allow you to create a new connection.
- Specify the “PPPoE” parameter in the connection type field.
- Port select DSL.
- Specify the connection name “Internet” to navigate available connections in the future.
- Leave the VPI parameter at 0.
- For the VCI field, enter 33.
- The username and password are entered in accordance with the agreement with the provider.
- The authentication algorithm remains in automatic mode.
- The MTU item is set to 1492.
- The LCP interval is set to parameter 30.
- LCP failures – 3.
- Enable NAT, IGMP and Firewall by checking the appropriate checkboxes.
- Save your changes.
Setting up IPTV on DSL 2640u from Rostelecom
Of course, the setup cannot be considered complete until all available services provided by the provider are working. Therefore, to make the IPTV service operational, users need to add another connection in the Network=>WAN item. Its parameters are specified as follows:
- Connection type – Bridge;
- Port – DSL;
- Name – TV. You can specify any name, but this parameter will allow you to navigate existing connections.
- VPI is set to 0;
- Enter VCI parameter 50;
- The encapsulation method is specified by the LLC;
- QoS parameter – UBR.
After entering all the parameters, click on the “Save” button again.
Setting up wireless access
And finally, of course, you also need to take care of the correct configuration of the wireless network, because today it is simply impossible to imagine Internet access in a home or office that cannot be connected to via Wi-Fi protocols. To this end, we perform the following actions:
- In the main menu of the device’s web interface, go to the “Wi-Fi” section.
- Select "Basic Settings".
- Enter the access point name in the field
- Check the checkbox to enable a wireless access point.
- Save your changes.
- In the “Security Settings” section, select the network authentication type WPA2-PSK, and also specify the access password to the Wi-Fi point.