Virtual machine for windows 7. VirtualBox virtual machine for beginners. What virtualization and a virtual machine are not
Network and server administrators are often faced with the need to test hardware, software, and certain parameters and settings on real servers. But testing something on a running server is extremely dangerous, as it can lead to data loss and operational failures.
Specialized software comes to the rescue in this situation. Capable of emulating a real computer and performing all the necessary actions with it. The most popular program in this case is VirtualBox from Oracle.
How to use virtualbox?
virtualbox 32/64 bit for windows 7 and 8 must be installed on a work computer running the Windows operating system. In the future, VirtualBox allows you to create any number of virtual machines with selected parameters, and install any operating systems on them for testing. In this case, the real physical computer will be the host computer, and the operating system on it will be the host computer.
When installing an operating system on a virtual machine, you should pay attention to the fact that it must be configured properly and meet the minimum requirements. In this case, the operating system installed on the virtual computer is called a guest operating system.

Thanks to the use of virtual machines, testing of hardware, software and necessary settings is greatly simplified. With all this, the virtual and physical machines communicate with each other through a network connection. In addition, a virtual machine can seize control of any equipment installed on a physical computer.
The program is also available for operating systems such as MacOS and Linux (popular for Ubuntu and Mint).
A virtual machine or VM is software that allows you to create one or more virtual computers on a real computer that emulate the operation of real devices (disk, monitor, network adapter). You can install an operating system on a VM that is different from the one running on a real computer. Today we will talk about how to install Windows 7 on a virtual machine. But first, let's look at its capabilities.
What can you do with a VM?
- There are a large number of old necessary programs that do not want to work with the new advanced operating system. After installing the “old” operating system on a virtual computer, you will be able to use them perfectly.
- Those who want to get acquainted with the capabilities of the new operating system can install it on a virtual computer and test it, without the risk of ruining anything on the work computer.
- Software whose operation you doubt can be first tested on a virtual computer, and only then installed on a real one.
- System administrators can emulate the operation of a computer network using virtual servers.
Most popular VMs
Among the large number of programs for working with virtual computers, we would like to draw your attention to the three most popular ones, which you can easily download and install yourself.
- VirtualBox is free software from Oracle. The VM works with most operating systems: Windows and Linux, FreeBSD and Mac OS, and supports 32- and 64-bit versions.
- VMware is a popular VM supplied in two versions: Player (free) and Workstation (paid). Player is a stripped down version of Workstation. VMware also works with various operating systems (32- and 64-bit versions); the paid version of this program is used by many large corporations.
- Microsoft Virtual PC is free, functional software with a great interface. Unfortunately, Virtual PC only works with Microsoft operating systems.
We believe that the VirtualBox program is best suited for use on a home computer, which we will install.
VM installation
- Download the latest version of VirtualBox from the official website and start the installation.
- After the “Welcome to Oracle VM” welcome window, we go to the window for selecting installation components. In this window, you can disable unnecessary components and change the VirtualBox installation folder.
- We decide on the placement of program shortcuts and continue working (Next button).
- Please note the warning that during the installation of VirtualBox our computer will be temporarily disconnected from the network. If at this moment you are downloading information from the Internet, wait until the download is complete and only then press the Yes button.

- Once the installation process is complete, VirtualBox will automatically launch.
Creating a VM
Let's start creating a VirtualBox virtual machine.

- We allocate RAM to our machine. For Windows 7, it is advisable to allocate at least 1 GB (this is a system requirement), but not more than half of the computer's RAM.
- Press the button Create a new virtual hard disk and we get a disk for our VM.
- When choosing a hard disk type, you can accept the default value if you do not have specific requirements for the virtual device format.
- Now we must decide on the format for storing data on our disk (fixed or dynamic). A fixed format immediately “eats” all the disk space allocated to it, and the disk space in a dynamic format (initially very small) will increase only as data is added. We recommend choosing a dynamic format.
- And we complete the process of creating a VirtualBox machine by specifying the name and size of the virtual hard disk.
Setting up a VM and preparing for Windows installation
We have completed the creation of the Windows 7 VM virtual machine and can proceed to the settings window ( Configure button), in which all the necessary settings for our machine are performed - setting the video card parameters and enabling 2D/3D acceleration, configuring network and remote display parameters, etc.

We will focus on the settings that need to be made to install Windows 7.
Windows can be installed from a CD/DVD distribution or from an ISO image. It is important to note that installing Windows 7 from an ISO image is much faster. Let's move on to the section Media, which so far only contains the virtual hard disk we created, and let's start with the settings (we'll consider all the options).

We exit the settings window and click the Run button to install Windows 7. Installing the OS on real and virtual computers occurs in exactly the same way.
Today, more than ever, they are in demand among completely different groups of computer system users. Actually, the Windows operating system is not losing popularity, which many users want to use on their terminals in parallel with the main OS. Let's see how to install Windows 7 on a virtual machine in the simplest way. Let's take the WM VirtualBox software package as a basis, which is not only one of the most powerful, but also one of the easiest to understand general operating principles.
What is a virtual machine?
If anyone doesn’t know, software in the form of a virtual machine is nothing more than an emulator of a computer system with hardware, an operating system and user programs installed in it.
In fact, a virtual machine with Windows 7 installed is like a copy of a really (physically) existing computer with G7 on board, but only at the software level, and is no different in its capabilities from a real terminal. In such a virtual system, you can install programs and applications, test equipment, emulate the operation of web servers, etc.
As a rule, all processes associated with installing the software itself, and then the operating system, do not cause difficulties, however, taking into account the requirements of the “seven”, it is still worth giving some recommendations on how to complete all steps of this process.
Virtual machine for Windows 7: WM VirtualBox
So let's get started. As is already clear, first we will need an existing operating system. We proceed from using the WM VirtualBox package.
Please note that in this case the question will be considered not of how to install a virtual machine on Windows 7, but of how to install “seven” on the machine. Indeed, why should we emulate its operation if it is already installed as the main system?
First, we need to download the latest version of the program. You can do this either on the official website or find it on the Internet. In any case, the application is free, so there will be no problems with any “cracked” versions.

Run the installation file and follow the instructions. Here everything is as usual: we agree with licensed use and constantly click the “Next” button until we reach the installation confirmation. There is one nuance here. The fact is that after clicking the Install button, the connection will be disconnected for a while and Internet access will be lost. There is no need to panic, this is normal.
Next, windows will appear with offers for some devices. We agree everywhere. The last window will display a box with a checkbox next to the line to create a virtual machine immediately. If you need to proceed with these actions, leave everything unchanged. If the virtual machine will be created later, uncheck the box and click the button to complete the installation process (Finish).
How to install Windows 7 on a virtual machine: pre-selecting parameters
All. The main program is installed. The next stage will be the creation of a new car, on which the “seven” will subsequently be installed.

To do this, in the running program, use the appropriate button, after which in the starting “Wizards” window, click the continue button. Now you need to select a few basic parameters. We indicate the type of Microsoft Windows operating system and select the version of Windows 7.

Now one of the most crucial moments is choosing the amount of RAM. Please note that it will be allocated from the total volume installed on the computer, so that when the child OS is running, it will be reduced in the main one. It is not recommended to set the size to less than 512 MB (preferably 1 GB and above) and more than half of the total available size, otherwise the main system will not only slow down, but may even refuse to work.

The next step is creation. In a similar “Wizard”, it is recommended to select a dynamically expanded disk (Dynamically Allocated) and give it a name. The save location and size will be indicated by default, but these parameters can be changed, say, to use not the system partition with the OS installed, but another logical partition. The program suggests using a size of 20 GB. This parameter can be left unchanged, but if you decide to change it, it is not recommended to use a size less than 15 GB (this is due to the requirements of the “seven” itself).
Creating a boot disk (or system image)
If you consider the question of how to install Windows 7 on a virtual machine, you should remember that it must be installed from a disk. There are two options: either the original installation disk (or a copy thereof) will be used, or the installation will be made from an image.

In principle, if you create a dynamically expanding disk at an early stage, it is better to choose a bootable system image. You can create it from the original DVD quite simply in programs like UltraISO, Daemon Tools, Nero, etc. and save it directly on your hard drive. There is no point in dwelling on this in detail.
Pre-configuring the virtual machine
Now, before proceeding directly to the installation of the child OS (in our case, Windows 7), the virtual machine needs to be configured.

To do this, use the properties button. In the menu, first set the video memory size for the display (at least 26 MB) and enable 2D and 3D acceleration.

Then, in the media section, depending on how the installed operating system is written, select the DVD icon for the optical media with the original (then insert the disc into the drive) or the folder icon to indicate the location of the .iso image (after which the line will appear with reference to the image). Settings for audio, network, COM ports and shared folders can be set without changes.
Now the main application window appears again, where you should click the “Start” button. If an information message appears, agree, and then click on the virtual machine screen and select the “capture” command in the pop-up window.
Installation of the "seven"
Only now we install Windows 7 on the VirtualBox virtual machine. In principle, the process of installing the “seven” is absolutely no different from how if this procedure was carried out on a real computer. You just need to follow the installer's instructions. Depending on the configuration created, the process may take up to 20-30 minutes. At the end of the process, we get a “seven”, no different from a regular terminal.
Working with add-ons
Separately, it should be noted that the question of how to install Windows 7 on a virtual machine cannot be done without understanding some of the nuances that many users often do not pay attention to. The problem is that the enabled virtual machine blocks the use of the keyboard and mouse on the main system. In addition, it will not be possible to use it for the hosting and child OS at the same time. That is, it will be impossible to copy data in the main application running on the main system and paste it into a program on a virtual machine.

To prevent this from happening, you just need to go to the add-on installation section, after which in the autorun window you need to click on the line VBoxWIndowsAdditions.exe and install the program.
Conclusion
So we figured out how to install and work with the WM VirtualBox virtual machine. As you can see, there is nothing particularly complicated here. In addition, in most cases, the average user will not have to select parameters manually, since the “Wizard” initially monitors the configuration of the main system and offers optimal settings.
Well, how expedient and justified the use of a child OS in the form of a “seven” depends only on what specific tasks the user assigns to it. By the way, if you noticed, in this case you don’t even have to enable virtual technology support in the BIOS settings. They are used mainly only when using the “native” Hyper-V hypervisor (for its operation or for selecting the boot OS). But in our case this is not required.
Computer users are sometimes faced with a situation where they need to work with old programs that worked successfully on previous versions of Windows. Managing two computers at once is not always convenient. But it is possible to install another edition of the operating system on a work laptop. Parallel operation of two systems can be ensured by a virtual machine for Windows 7 (VM). From this article you can learn:
- what is VM;
- what programs exist for this purpose;
- How to install and configure Windows 7 in a VM.
A second computer is real
Virtual machine- software. With its help, a copy of a real computer is created with:
- hard virtual disks;
- optical software drive;
- analogue of network adapters;
- BIOS, etc.
A virtual laptop with its own operating system runs in a separate window and occupies a certain amount of space on the physical hard drive. It looks like this:
The example shows how in a real operating system with Windows 7 Professional installed, the program runs with the virtual Windows XP operating system. And it performs the same actions as on a real device.
VM tasks
Almost everyone is faced with a situation where a program downloaded from the network and installed brings with it a trail of unnecessary applications. That is why more advanced users prefer to install the downloaded application in a virtual system and test it both for functionality and for unexpected surprises.
In addition to this, other problems are solved:
- Possibility to test the program.
- Avoid harmful effects from suspicious programs.
- Emulate a second computer network.
- Check the consequences of changing settings in the system.
- Safely perform autosurfing over the network.
- Reduce the likelihood of a real laptop becoming infected with computer viruses.
- Running programs that are incompatible with the real operating system.
Most popular emulators
You can find many programs with which you can create a virtual Windows. But it’s best to familiarize yourself with the most popular ones.
This is the most common free program with which you can emulate the most popular operating systems:
- Windows(with support for different versions).
- MacOS.
- Any operating system from the family Linux.
- Interaction with VMs from the paid version of the emulator is supported VMware Workstation.
Windows 7 and the created virtual machine can be easily configured by the average user. The program differs in both performance and stability. In addition, despite its free nature, it has extensive capabilities and a clear interface. It is better adapted for home use than others.
VMware
Also a well-known and popular program. It found its main application in large corporations.
There are two versions of this product:
- Workstation;
- Player.
Version Workstation will be able to fully satisfy the user's needs, but this is a paid program. Regular users can use a free analogue Workstation - VMware Player.
The paid version supports work with 32- and 64-x systems, sees USB 3.0, and various operating systems work quite successfully. VMware Workstation- an advanced version of a computer emulator, but due to its cost, it has found its use mainly among large companies, and not among ordinary users.
Microsoft Virtual PC
A similar virtual machine for working in Windows 7. It has wide functionality and a clear, convenient and practical interface. But there is also a significant drawback - it can only work with operating systems of the Windows family. Other operating systems, such as Linux or Mac OS, cannot be run on it.
This brief overview describes three of the most popular virtual machines. Now you can see that for home needs it is best to use the program. Next, the procedure for installing and configuring it will be discussed.
Installing Windows 7 in a VirtualBox virtual machine
The installation process of a virtual operating system can be divided into several stages:
- Install the program .
- Download the file with the Windows 7 image for the VM.
- Installation of virtual Windows 7.
Let's consider all these processes separately.
Install VirtualBox
First of all, you need the virtual machine itself. As already mentioned, there are several of them. We are interested in . You can download it from the official website https://www.virtualbox.org. From the proposed list, select VirtualBox 5.1.14 for Windows hosts.

The process of how to install a virtual machine is described in other articles, but there are a few points:

After the Internet connection is restored, you can begin downloading and installing the finished VM file in Windows 7.

Finding a ready VM
Microsoft, in order to test different versions of Internet Explorer (8, 9, 10, 11), has specially prepared several options for downloading VMs with pre-installed Windows versions (7; 8.1; 10) from its website https://developer.microsoft.com/ru- ru/microsoft-edge/tools/vms/ . If this link is not available, the browser will automatically redirect to the English version of the site https://developer.microsoft.com/en-us/microsoft-edge/tools/vms/

So, first you need to select a Windows 7 image with any version of IE (8, 9, 10, 11).

From the drop-down list, select the item which virtual machine will undoubtedly be used. In our case it is .

And click on the Download .zip button. The zip file download process will begin.

All that remains is to install and run the virtual machine on Windows 7.
Adjusting virtual Windows 7
The virtual Windows file itself is extracted from the archive “IE10.Win7.For.Windows.VirtualBox.zip”. 
After the file is extracted, right-click on it  and from the drop-down list we select “ To open with».

In principle, nothing needs to be changed in the import parameters. You can leave it as is and click the Import button.

The configuration process will start. The "" window looks like this:

After the process is completed, the new seven and VM will appear in the program list. To launch it, just double-click on the VM itself, or click on the arrow button “ Launch" The operating system startup process will begin immediately. If you install it for the first time, it will take a little longer, however, the same thing happens when installing a real OS. Once the installer has completed all the necessary steps, a desktop with a working Windows 7 system will appear.

Windows 7 in English and the created virtual machine are ready to launch.
Set up a virtual system
All VM controls are intuitive. But if you have any questions, you should carefully read the pop-up tips in Russian. You can turn to help for help, where you can find answers to all your questions.
Typically, both the mouse and keyboard only work in the VM and are blocked in real Windows. But it is possible to switch between the two systems using the Right Control host key.
Now that the virtual machine is installed and running, you can configure Windows. The first step is to install software components (drivers) for all virtual devices. This process is quite simple. You need to go to the main menu and in the line “ Devices" click on " Install guest OS additions».
After installation is completed, the VM is rebooted. Now the picture has become clearer, the VM window can be dynamically changed, support for mouse integration will be enabled, and access to the Internet will open.
It is also possible to expand the display functions. In this mode, windows that open in the VM will be displayed on the real desktop, and not in a separate program window. This makes it possible to facilitate access to all controls and installed VM programs.
Shutdown virtual Windows 7
Just like in a real laptop, Windows installed in a VM requires a certain order to be completed. You can complete the job by pressing the button to stop the job. A menu will open offering three options for closing the VM.

« Save machine state"- before shutting down, the machine will save all running applications at the time of shutdown. When the VM is turned on again, work in it can continue from the moment it was turned off.
« Send a shutdown signal"- all applications can be closed, and the machine will turn off automatically.
« Turn off the car" - the same as if a real computer were de-energized.
Conclusion
From this short overview it is clear that working with virtual machines, such as, makes it possible to connect several different operating systems on one device at once. Naturally, the more powerful the real device (RAM and CPU), the faster the virtual computers will work. Disabling the antivirus on your home machine or adding a virtual directory to the antivirus program’s exclusion list will also help speed up the work.
Video on the topic
Good afternoon.
Why might you need a virtual machine (a program for running virtual operating systems)? Well, for example, if you want to try out some program so that if something happens, you don’t harm your main operating system; or planning to install some other OS that you don't have on your actual hard drive.
In this article I would like to dwell on the key points when installing Windows 7 on a VM Virtual Box virtual machine.
1. What will be needed for installation?
1) A program that will allow you to create a virtual machine on your computer. In my example, I will show work in VM Virtual Box (more about it). In short, the program: free, Russian, can work in both 32 and 64 bit OS, many settings, etc.
2) An image with the Windows 7 operating system. Here you choose for yourself: download, find the required disk in your bins (when you buy a new computer, the OS is often included on a disk).
3) 20-30 minutes of free time...
2. Setting up a virtual machine (VM Virtual Box)
After launching the Virtual Box program, you can immediately click the “create” button; the settings of the program itself are of little interest.
If you already had a virtual hard disk, you can select it; if not, create a new one.
A dynamic hard drive is preferable. Because its occupied space on a real hard drive will increase in direct proportion to its fullness (i.e. if you copy a 100 MB file onto it, it will take up 100 MB; copy another 100 MB file, it will take up 200 MB).
In this step, the program asks you to specify the final size of the hard drive. Here you indicate how much you need. It is not recommended to specify less than 15 GB for Windows 7 OS.
This completes the setup of the virtual machine. Now you can launch it and begin the installation process...
3. Installing Windows 7. What to do if an error occurs?
Everything is as usual, if not one thing...
Installing an OS on a virtual machine is, in principle, not much different from installing it on a real computer. First, select the desired machine for installation, in our case it is called “Win7”. You launch it.
If we have not yet specified the boot device in the program, then it will ask us to indicate what to boot from. I recommend that you immediately specify the bootable ISO image that we prepared in the first section of this article. Installation from an image will be much faster than from a real disk or flash drive.
Usually, after starting the virtual machine, a few seconds pass and the OS installation window appears in front of you. Next, proceed as if installing the OS on a regular real computer, for more details about this, for example,.
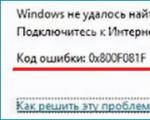
If during installation An error with a blue (blue) screen came out, there are two important points that could cause it.
1) Go to the virtual machine RAM settings and move the slider from 512 MB to 1-2 GB. It is possible that the OS does not have enough RAM during installation.
2) When installing the OS on a virtual machine, for some reason various assemblies behave unstable. Try to take the original OS image, it usually installs without any questions or problems...
4. How to open a VHD disk of a virtual machine?
A little higher in the article, I promised to show how to do this... By the way, the ability to open virtual hard disks appeared in Windows 7 (Windows 8 also has this option).
To get started, go to the OS control panel and go to the section administration(you can use the search).
In the right column there is the option to connect a virtual hard disk. We only need to indicate it location. By default, VHD disks in Virtual Box are located at the following address: C:\Users\alex\VirtualBox VMs\(where alex is your account name).
More similar about all this - .

That's all, successful installations! 😛